As mainstream VR/AR input continues to evolve – from the early days of gaze-only input to wand-style controllers and fully articulated hand tracking – so too are the virtual user interfaces we interact with. Slowly but surely we’re moving beyond flat UIs ported over from 2D screens and toward a future filled with spatial interface paradigms that take advantage of depth and volume.
Last week, Barrett Fox described his process in pushing the new Graphic Renderer and the Interaction Engine’s Hover callbacks to their limits by creating a kinetic sculpture with tons of tweakable input parameters. Today I’ll detail my exploration of several ways spatial UIs could be used to control aspects of that sculpture – or any piece of complex content – by creating a playful set of physical-like user interfaces.
From Flat Screens to VR Interfaces
We’re moving beyond flat UIs from 2D screens toward a future with new spatial interface paradigms.
Click To Tweet
When someone first puts on a Leap Motion-enabled VR headset, it often seems like they’re rediscovering how to use their own hands. In a sense, they are. When we bring our hands into a virtual space, we also bring a lifetime’s worth of physical biases with us. Compelling spatial interfaces complement and build upon these expectations.
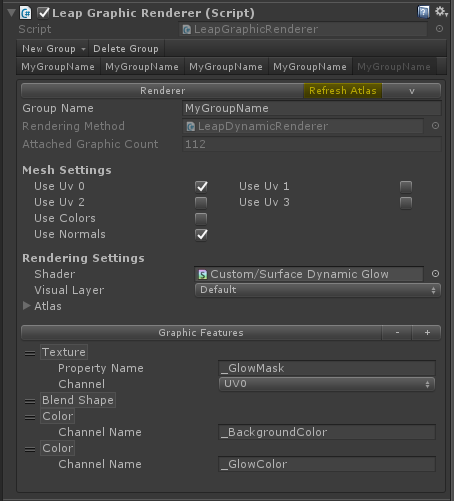
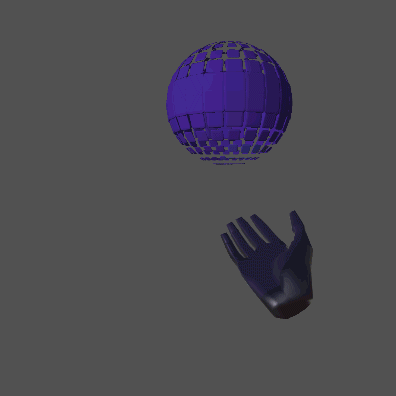
With our Interaction Engine Unity package, prototyping these kinds of physically inspired interfaces is easier than ever. The module features prefabs for a range of common 2D UI components, made 3D and physical-like. Buttons that depress in Z space then spring back to their resting position. Sliders that can be activated by a fingertip tap on the side. Even examples of hand-based, wearable UIs and dynamic deployable UIs.
Concept: A Playset, Not A Control Board
When designing an interface, one of the highest priorities is usually efficiency. In this exploration, however, speed of task completion was further down the list. The core things I wanted to focus on when creating these UIs were:
- Creating a sense of physicality
- Conveying hand-to-UI-element proximity in 3D through reactivity/feedback
- Making interface interactions which feel playful
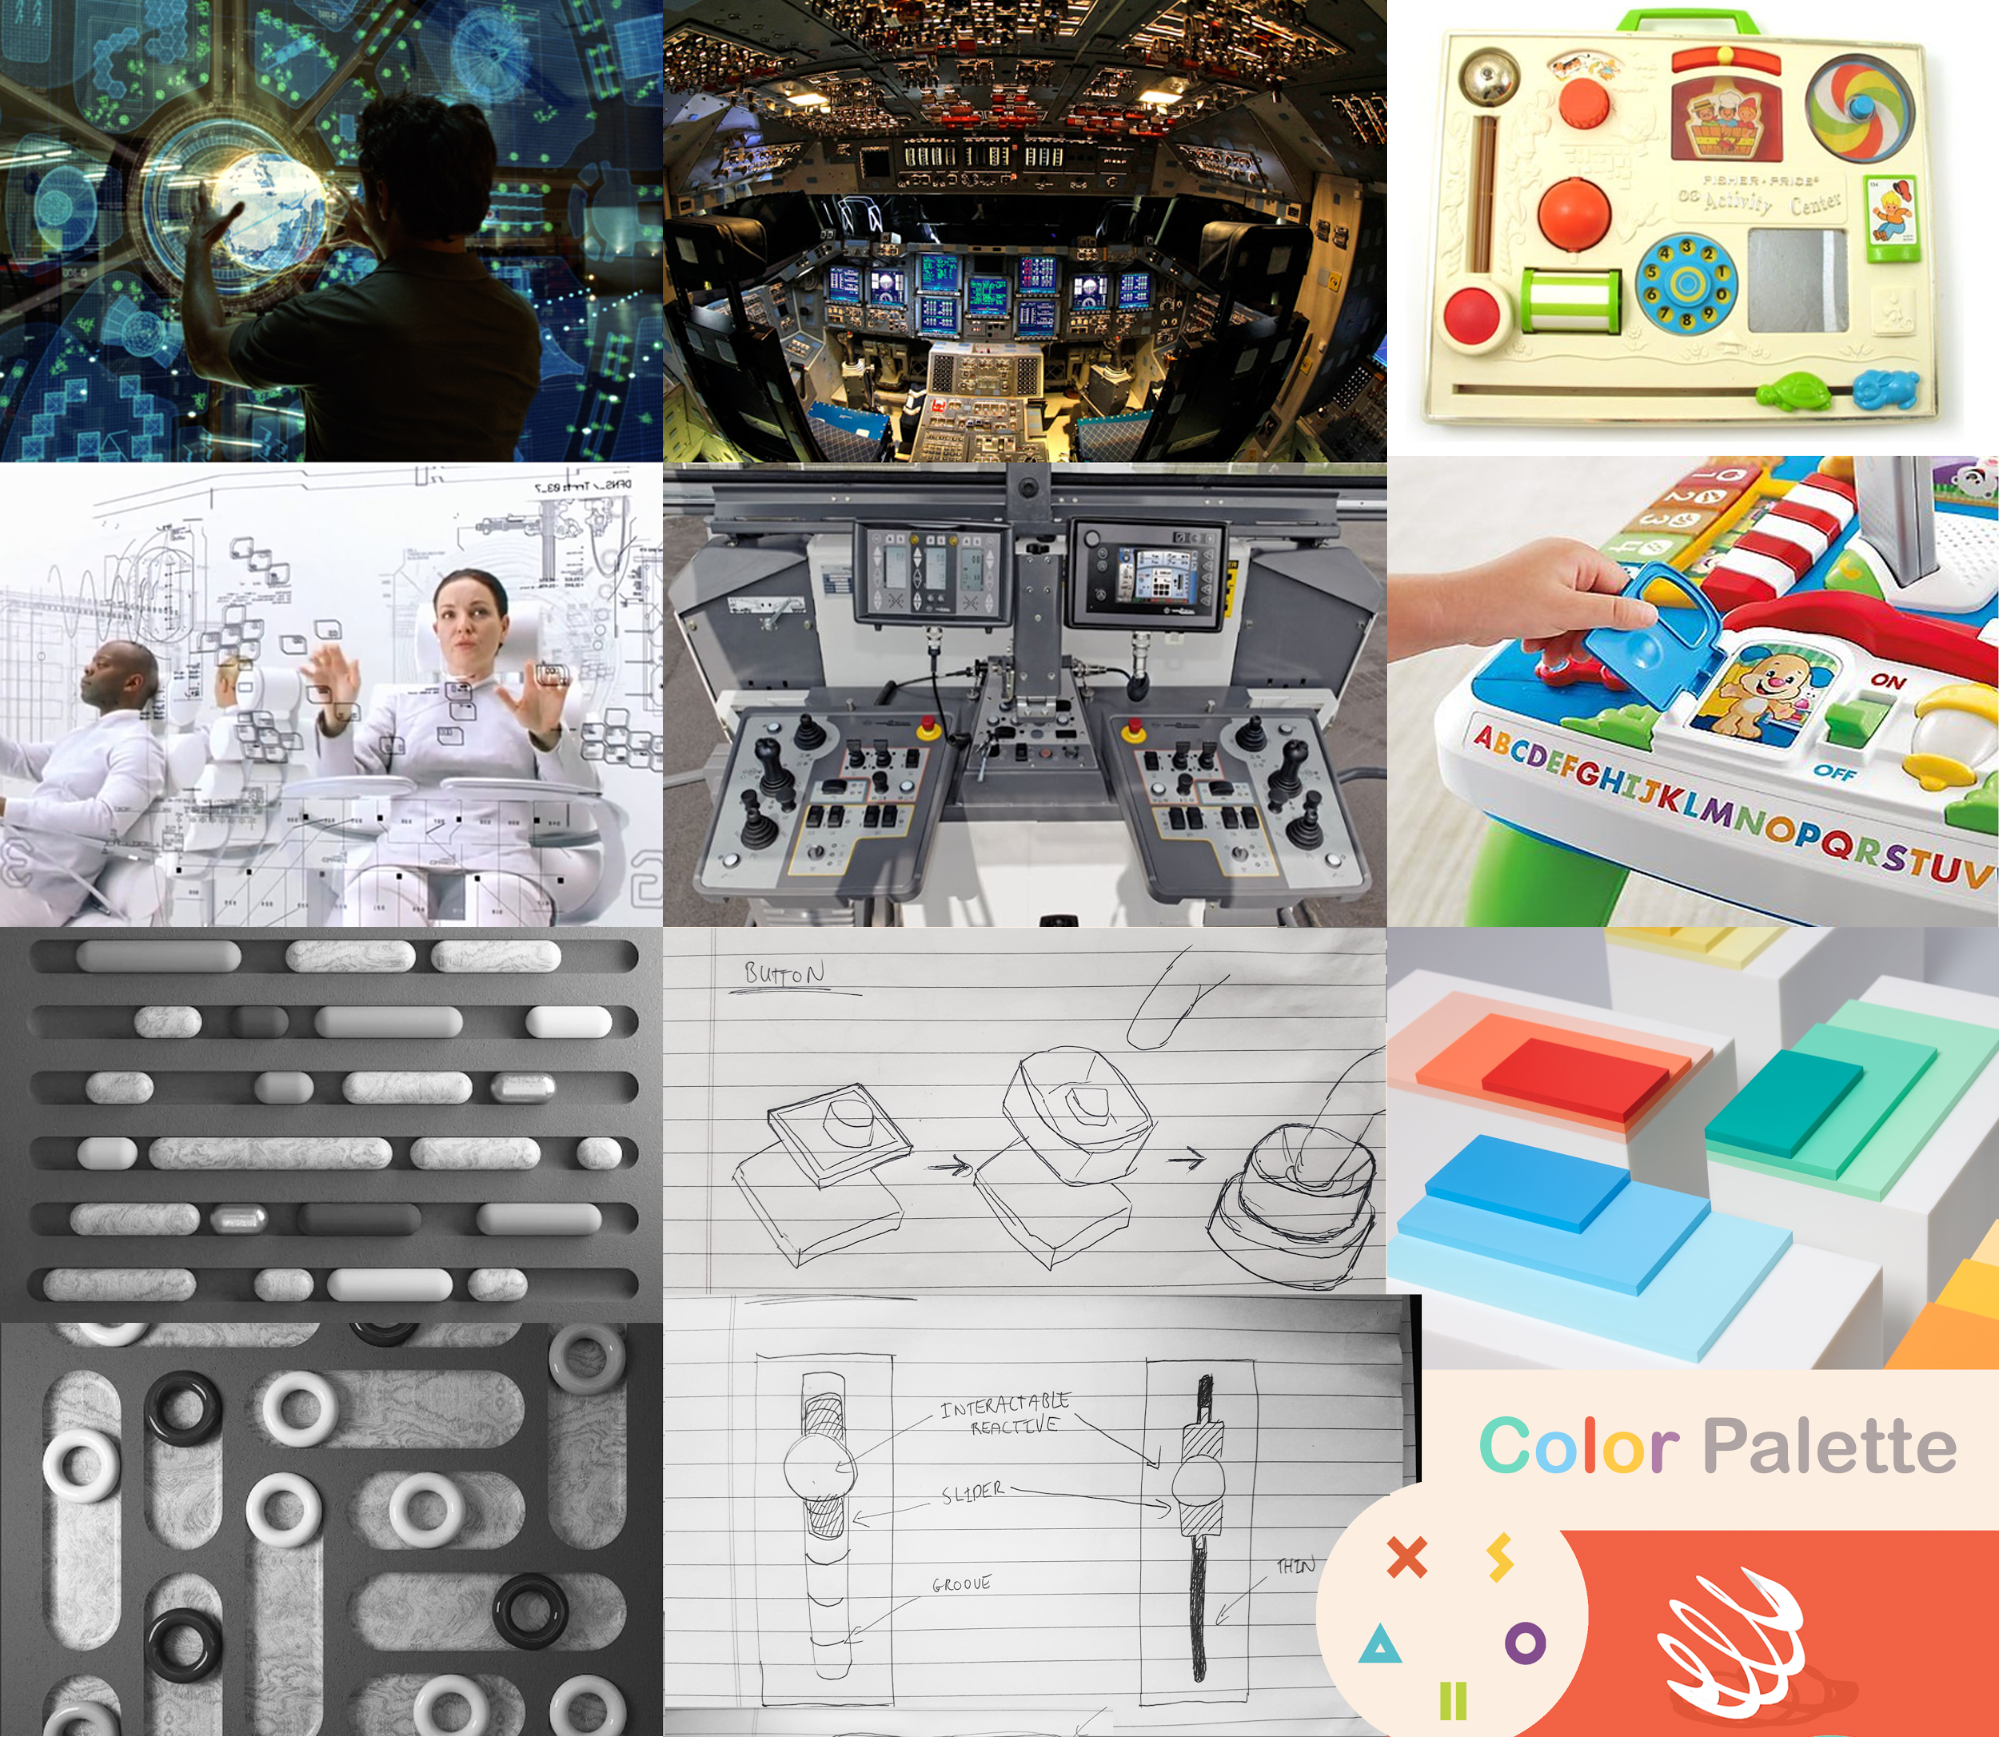
![A conceptual mood board featuring interfaces both simple and complex, with a focus on physicality and play. We also explored ideas around form, affordances, and use of color accents.]()
A conceptual mood board featuring interfaces both simple and complex, with a focus on physicality and play. We also explored ideas around form, affordances, and use of color accents.
#VR design pro-tip: human beings move in curves. Your interfaces should be curved as well!
Click To Tweet
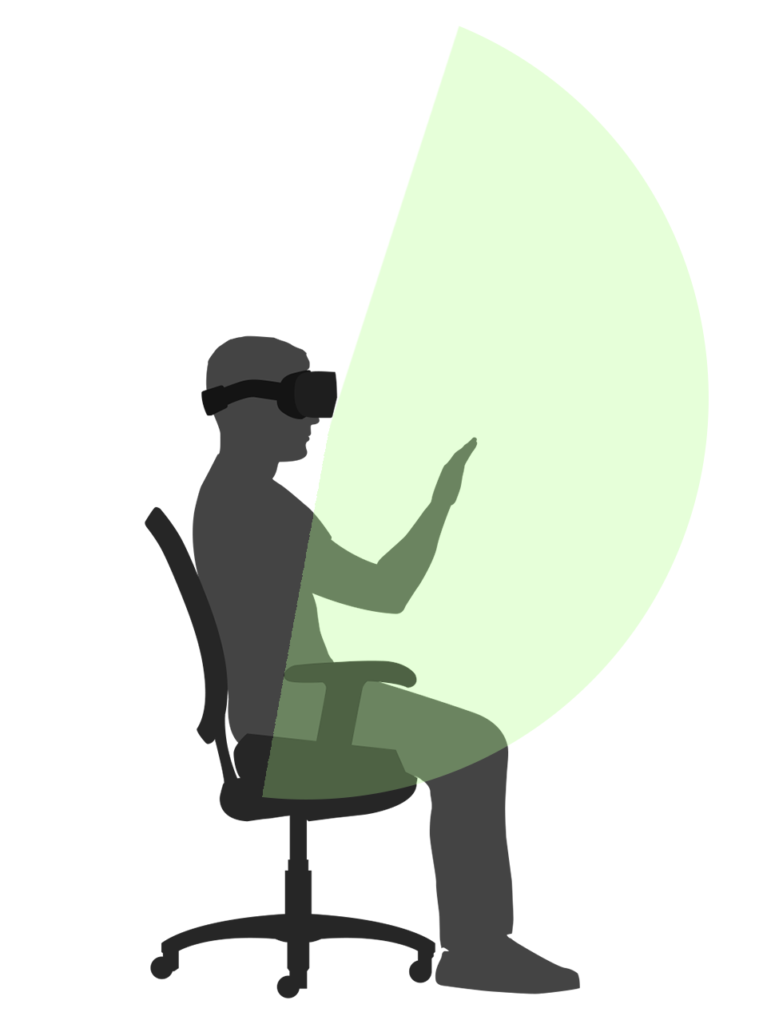
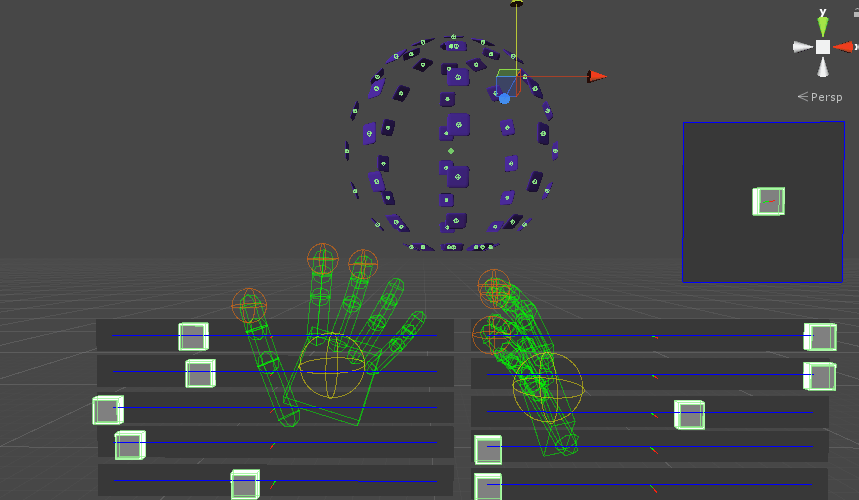
Since this project was designed to run on mobile VR headsets, we designed knowing that it might be experienced with only 3 degree-of-freedom (3DoF) head tracking. This meant that the user would be seated and all UIs needed to be within arm’s reach.
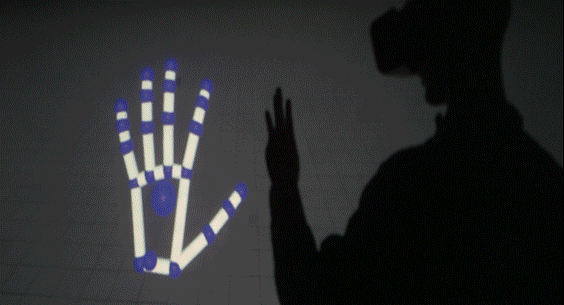
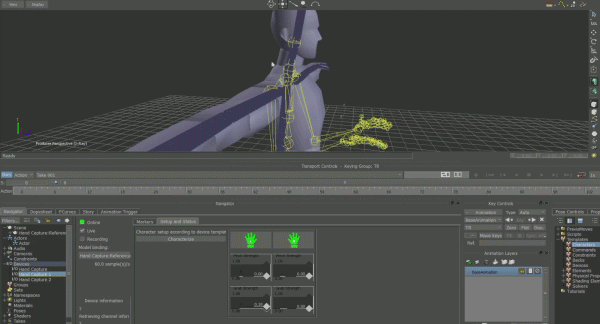
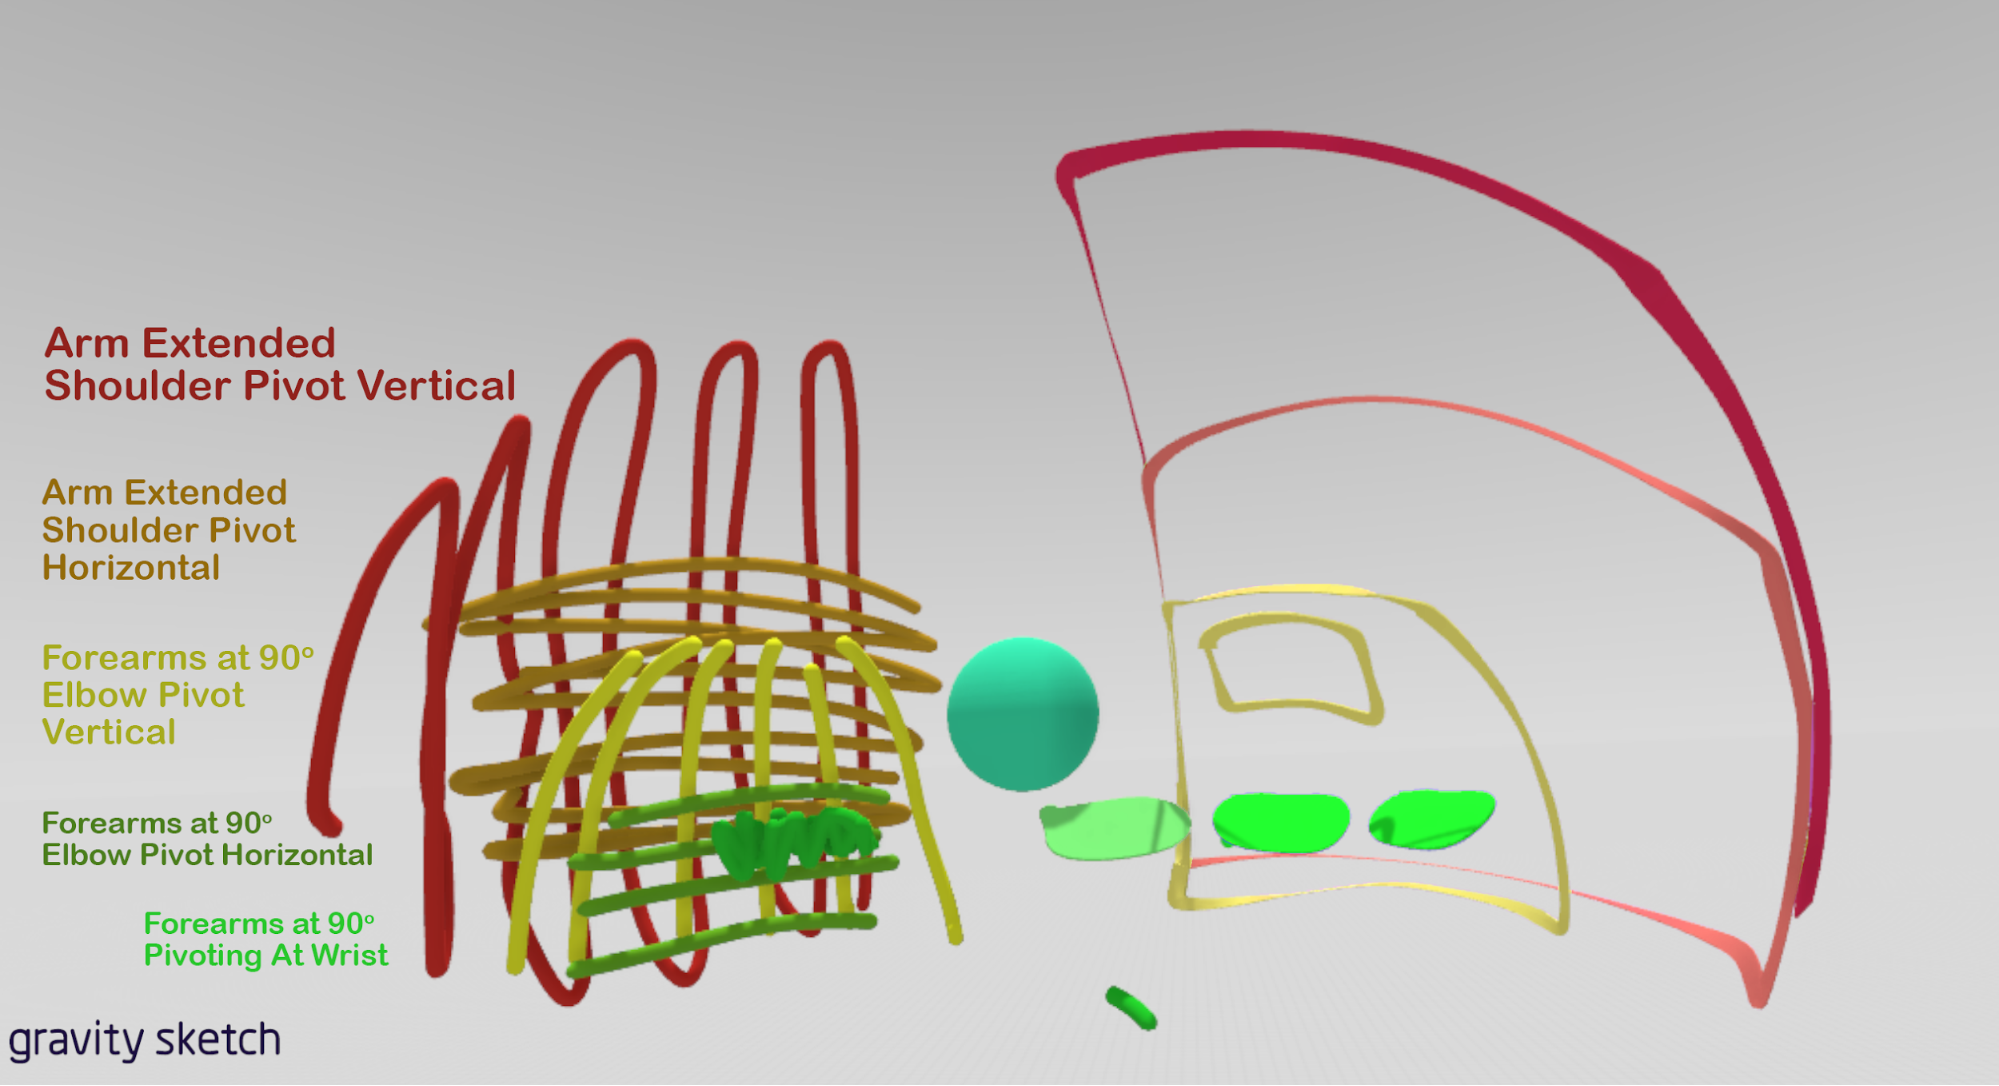
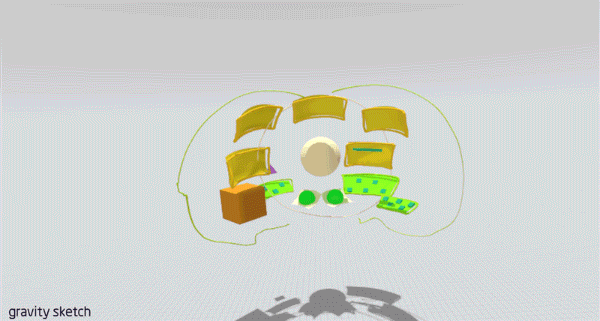
Designing virtual interactions for human arms, hands, and fingers means digging into the range of motion of shoulders, elbows, and wrists. To begin blocking out the layout of the UI elements, I dove into Gravity Sketch. Using different colors for each joint, I marked out comfortable ranges of motion for moving my arms, pivoting at my shoulder, elbows, and wrists with both my arms extended, and then with my elbows at my sides.
![Using Gravity Sketch to mark out ranges of comfortable motion, pivoting at my shoulders, elbows, and wrists.]()
Using Gravity Sketch to mark out ranges of comfortable motion, pivoting at my shoulders, elbows, and wrists.
![Blocking out UI areas based on the above ranges.]()
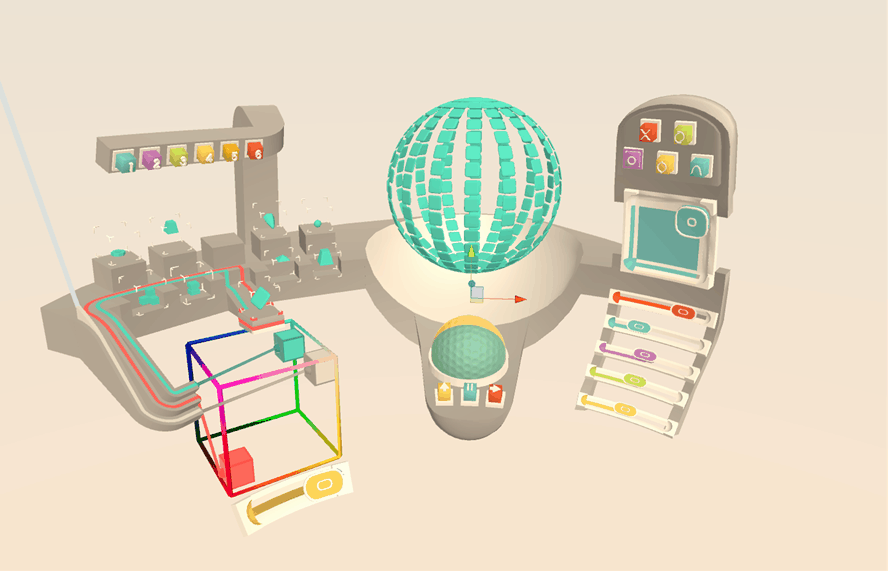
This constraint – surrounding a seated user with UIs – also meant that I was able to test out another new utility, curved spaces. A feature that can be unlocked by combining the Graphic Renderer and the Interaction Engine, curved spaces allow entire user interfaces to be trivially warped into ergonomic curves around the user while everything still works as you intend.
![Almost all of the UI components in this demo are rendered with the Graphic Renderer, making it easy to wrap them around the user by using a Leap Curved Space component.]()
Once we defined the overall design goals and layout schemes, it was time to design the user interfaces themselves.
Building a Button with the Interaction Engine
Since the iPhone introduced multi-touch input in 2007, we’ve seen 2D touchscreen interaction design evolve into a responsive, motion-filled language. Modern apps respond to any input with visual, audio, and sometimes even subtle haptic feedback. Taps and swipes are met with animated ripples and dynamic element resizing.
Without dynamic feedback, #VR interactions can feel unsatisfying and weird.
Click To Tweet
In VR, every interactive object should respond to any casual movement. Users don’t always know what to expect, and dynamic feedback helps to build a mental model of how the virtual world works, and what each action achieves. Without dynamic feedback, an interaction can feel unsatisfying and weird.
Beginning with the most fundamental of UI elements – a button – we asked what this sort of reactiveness might look like in VR with hands. While touchscreen button interactions are binary (contact vs. non-contact), pushing a button in 3D involves six distinct stages:
- Approach. Your finger is near the button, which may start to glow or otherwise reflect proximity.
- Contact. Your finger touches the button, which responds to the touch.
- Depression. Your finger starts to push the button.
- Engagement. Success! The button may change its visual state and/or make a sound.
- Ending contact. Your finger leaves the button.
- Recession. Your finger moves away.
#VR buttons have 6 stages of interaction. Each stage is at your fingertips w/ #LeapMotion #Unity.
Click To Tweet
Conveniently,
feedback for all of these stages of interaction are provided by the Interaction Engine. You can simply attach an InteractionBehavior component to a RigidBody (in this case, the button) for easy and performant access to all kinds of information about the relationship between a GameObject and a user’s hands. Here are those interaction stages again, this time with their specific Interaction Engine callbacks:
- Approach [HoverBegin]
- Contact [ContactBegin]
- Depression [ContactStay]
- Engagement [OnPress]
- Ending contact [ContactEnd]
- Recession [HoverEnd]
When your hand approaches a button in this prototype, a white ring rises up from its base to meet the contact surface. As your finger gets closer, the ring gets closer, until contact is made and the ring reaches the top of the button.
Depressing the button until it engages changes the color of the button frame. Along with an audio click, this confirms the successful completion of the interaction. When contact between finger and button ends, a second slightly higher-pitched click marks the end of the interaction. The white ring recedes as the user moves their hand away.
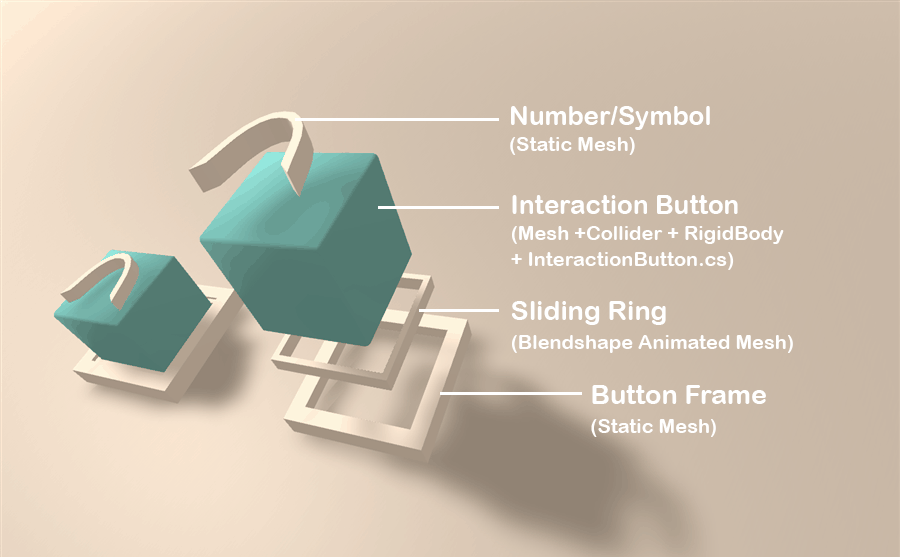
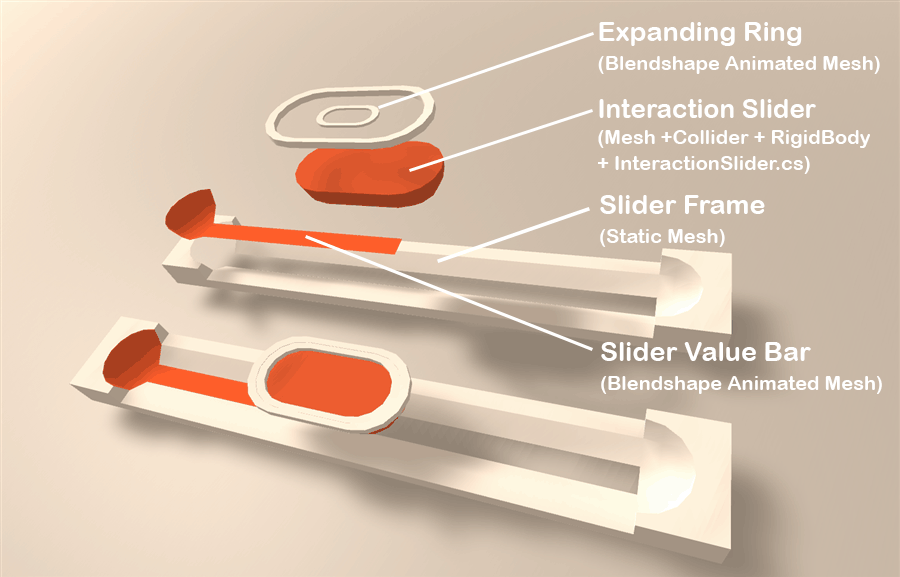
![The symbol is a static mesh. Behind that, an interaction button, sliding ring, and button frame.]()
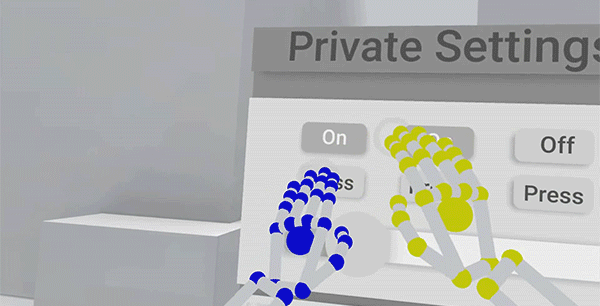
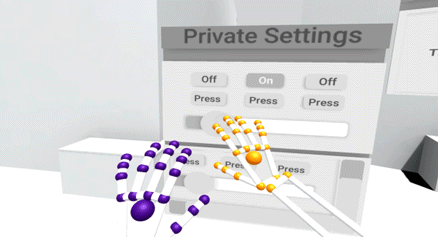
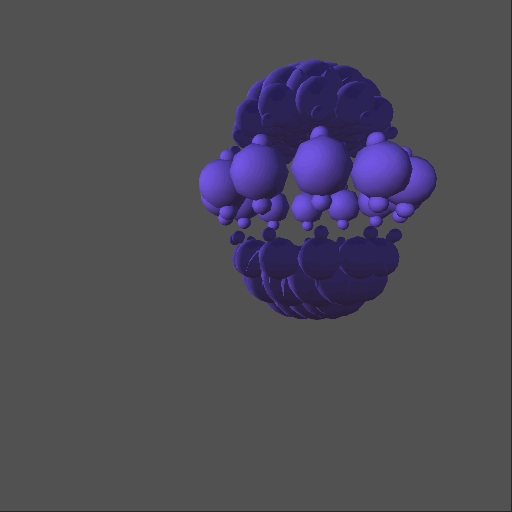
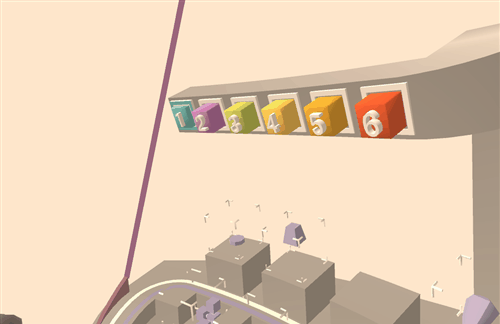
![These are actually toggles (the stubborn cousin of the button) which activate preset configurations of all of the Sculpture’s parameters at once.]()
A similar approach with an expanding white inner ring was used on the sliders.
![Animation showing the different components of the sliders.]()
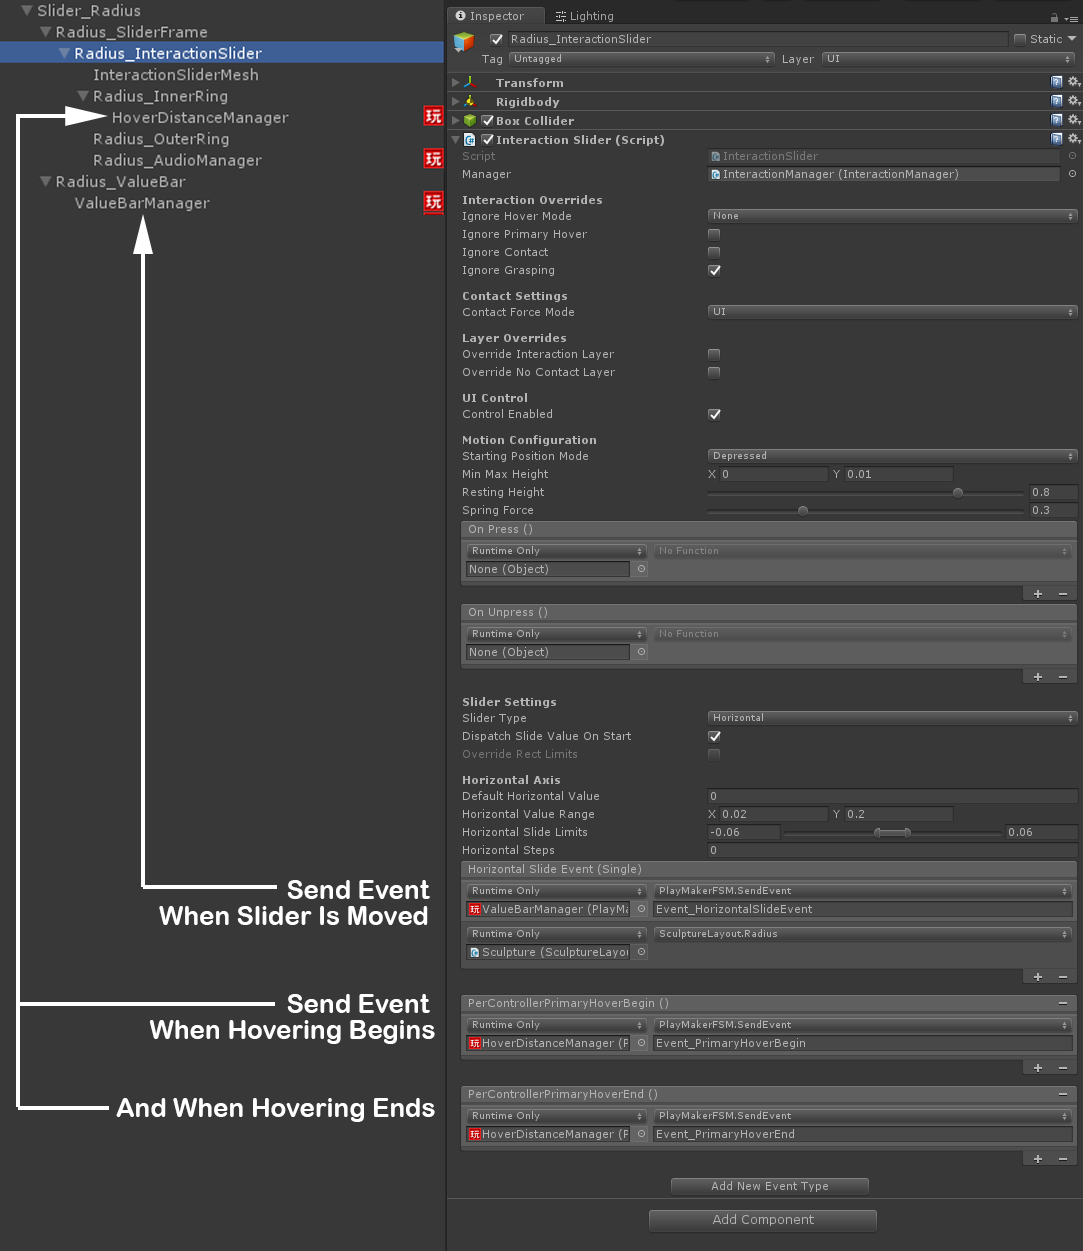
![The Hierarchy setup in the Unity Editor for the Radius Slider, showing an InteractionSlider.cs sending events on HorizontalSlide, HoverBegin, and HoverEnd events.]()
The Hierarchy setup in the Unity Editor for the Radius Slider, showing an InteractionSlider.cs sending events on HorizontalSlide, HoverBegin, and HoverEnd events.
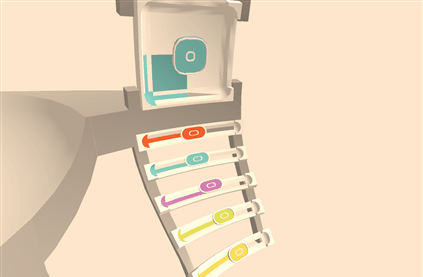
![Physical-feeling signage-style text callouts were added to the sliders. These expand when hovered and retract once the user moves their hand away.]()
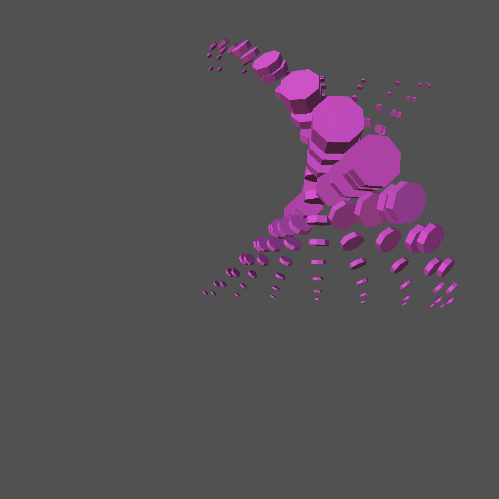
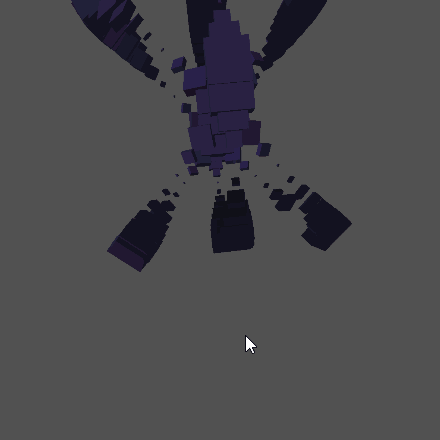
Before settling on this rising (or expanding) ring feedback, I also experimented with the base button mesh itself morphing as your finger approached. The idea here was to make the button convex at rest, affording the action of being pushed. As your finger approached, it would morph into a concave shape, as though acknowledging the shape of your finger and providing a matching socket. A kind of lock to key metaphor.
![Inspired in part by the finger-key from The Fifth Element.]()
![]()
![]()
This style took full advantage of the 3D nature of the UI components and felt very interesting. However, having HoverDistance drive this button shape morphing didn’t communicate how close the finger was as effectively as the rising ring approach. I would love to delve deeper into this concept at some point perhaps by having your hand mesh also morph – turning your fingertip into a key shape.
Exploring 3D VR User Interfaces
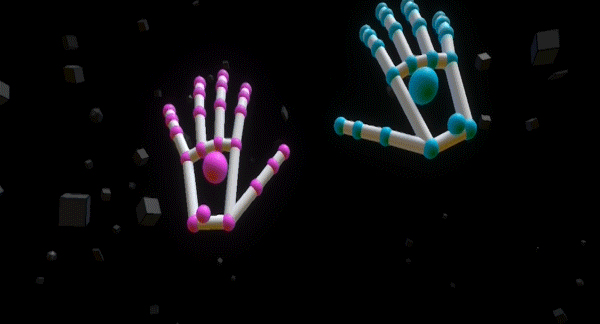
Beyond adding spatial UI feedback for buttons and sliders, we also began scratching the surface of new UI possibilities afforded by the freedom of three dimensions. How could the reliable grab/release interactions and the soft hand-to-object contact enabled by the Interaction Engine allow for novel 3D user interfaces?
Recreating Real World 3D Manipulation
How can we bring common mechanical 3D inputs from the physical world into #VR?
Click To Tweet
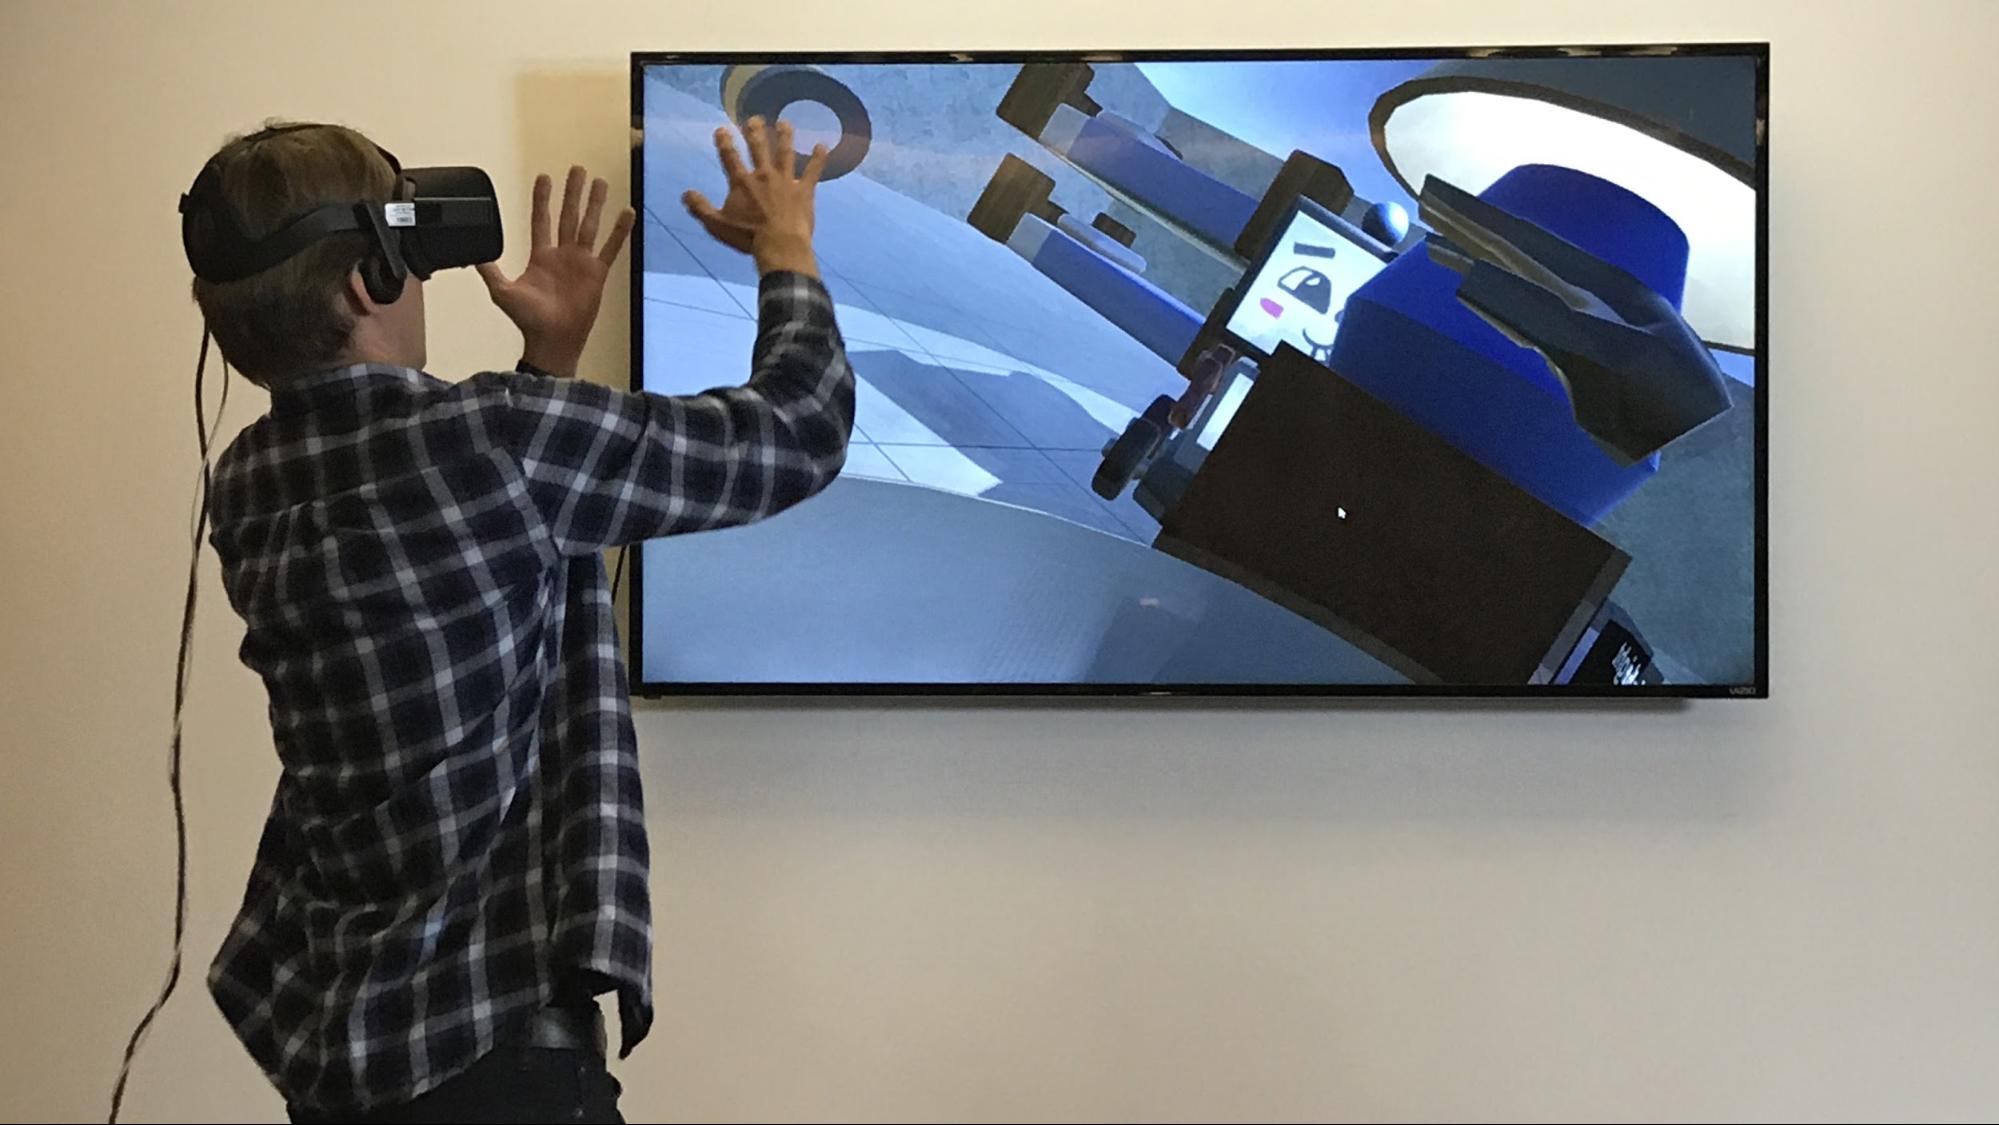
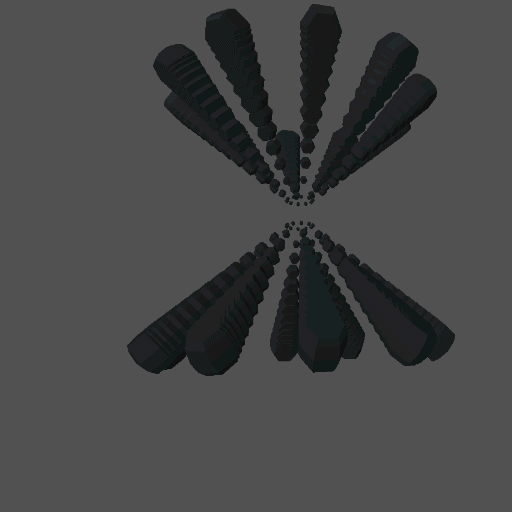
I was curious to explore whether a virtual recreation of a common mechanical 3D input from the physical world would be compelling to interact with in VR using your hands.
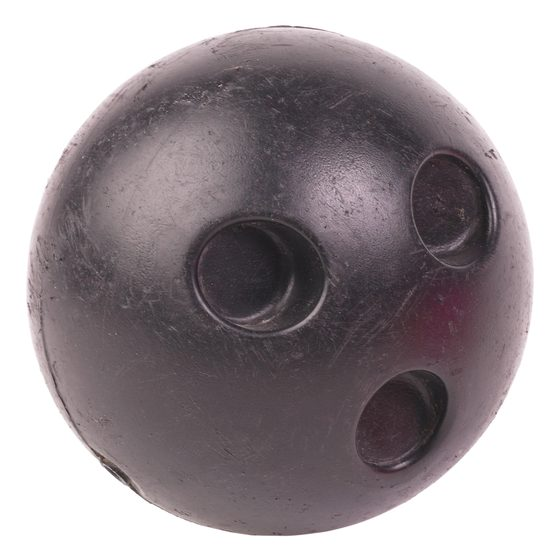
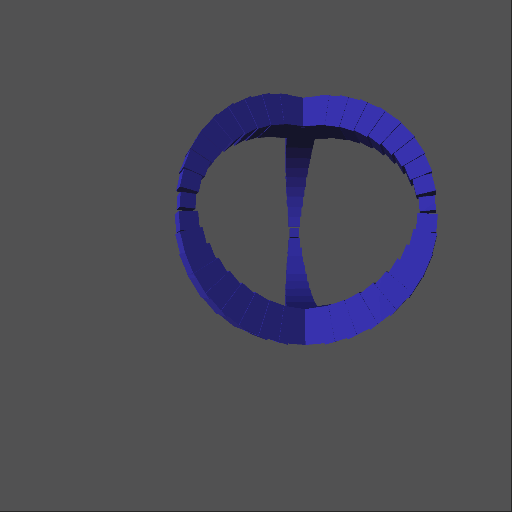
Physical trackballs are a highly tactile input with a wide spectrum of interaction levels. They can be manipulated with a fingertip and dialed in with slow precision or – especially with larger trackballs used in interactive installations – can be spun with force like a basketball balancing on a fingertip or a Kugel Fountain. A trackball seemed like a prime candidate for virtual recreation.
![]()
![]() Interacting with just the tip of a thumb on a small trackball, and a whole group spinning a Kugel Fountain.
Interacting with just the tip of a thumb on a small trackball, and a whole group spinning a Kugel Fountain.
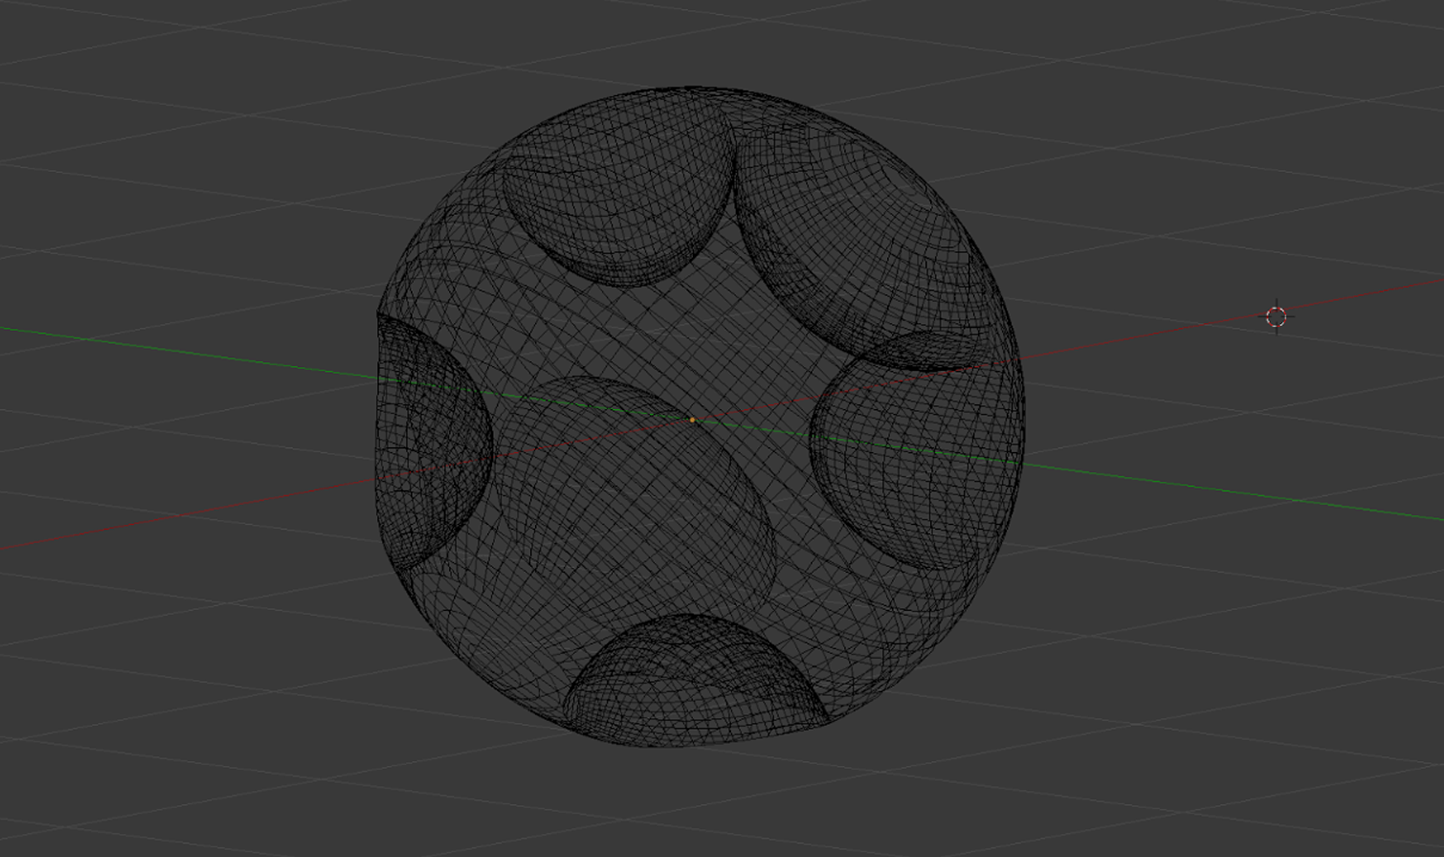
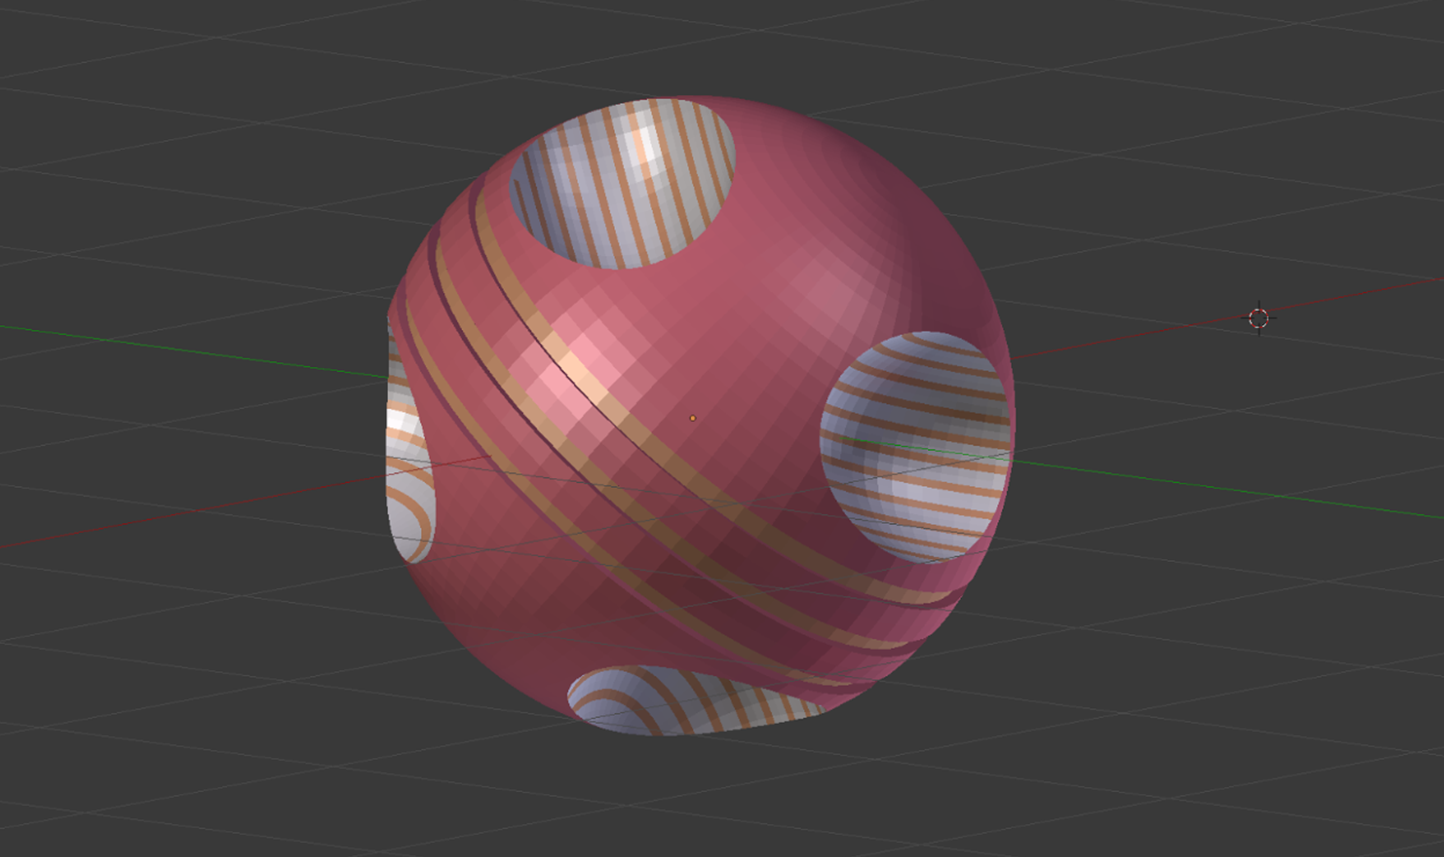
To start, I attached a RigidBody component and an InteractionBehavior to a sphere, locked its XYZ position while allowing XYZ rotation to move freely, and let the Interaction Engine take care of the rest. Mapping the rotation of the sculpture 1:1 to the freeform manipulation of the trackball, combined with audio and visual cues driven by angular velocity, created quite a compelling interaction.
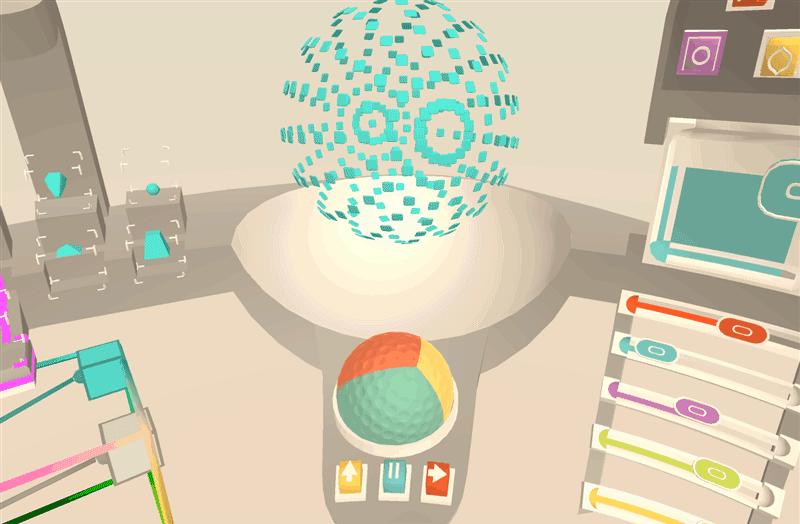
![A trackball-style interface with three-color diffuse texture and a golf-ball-like normal map.]()
A trackball-style interface with three-color diffuse texture and a golf-ball-like normal map.
VR Color Picker
Color pickers often try to expose multiple dimensions of color – such as hue, saturation, and lightness, or red, blue, and green levels. There are many ways to visualize these color spaces in 2D. By exploring them with a mouse and keyboard, we can pick exact values plotted on 2D planes very easily, though it’s usually quite a deliberate interaction. What might a 3D color picker add to the user’s experience of selecting colors?
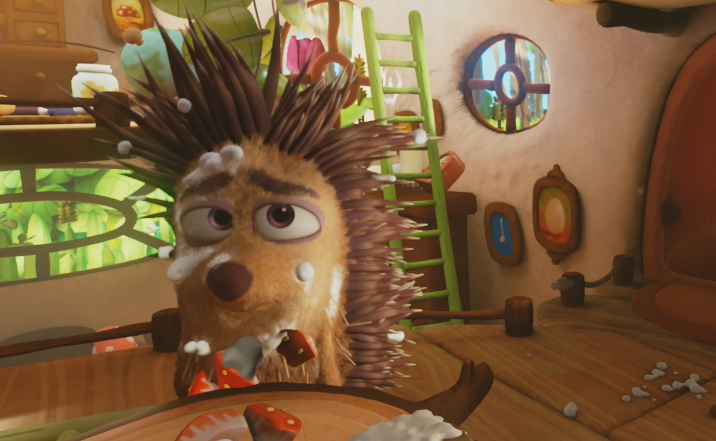
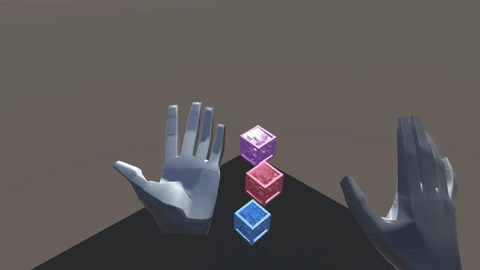
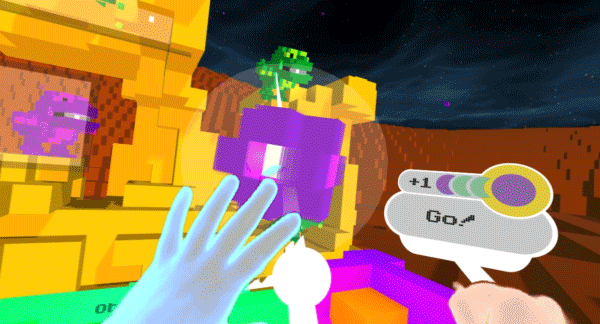
In our sculpture prototype, there are three colors the user can change: (1) the sculpture’s tint color, (2) the sculpture’s glow color, and (3) the skybox color. Rather than focusing on a UI that excels at fine-tuning color values, we explored a 3D color picker which allowed a user to change all three colors quickly with just the wave of a hand.
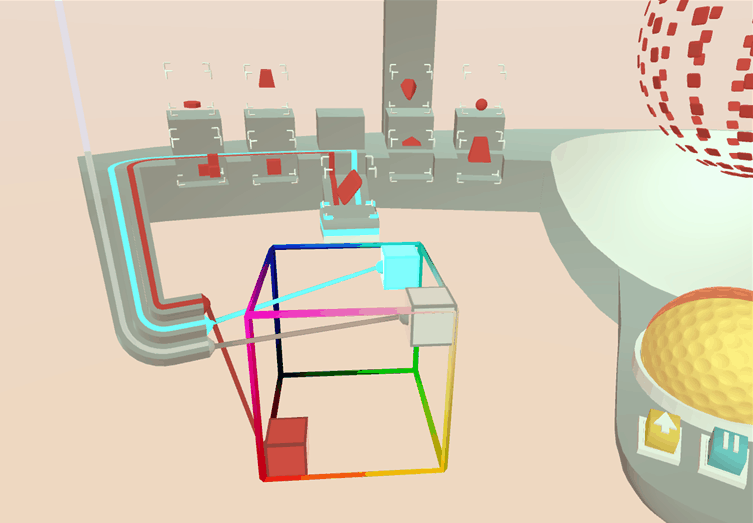
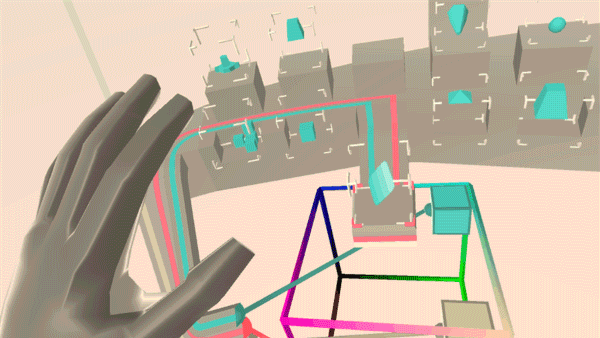
Each color is represented by a small cube in a larger frame, with red (X), green (Y), and blue (Z). Moving the cubes around (by pushing or grabbing) updates their RGB levels. This allows an exploration of additive RGB color space.
![To visually convey as much information about the state of UI elements as possible, each color cube is connected by a line renderer to the object whose color variable it controls.]()
To visually convey as much information about the state of UI elements as possible, each color cube is connected by a line renderer to the object whose color variable it controls.
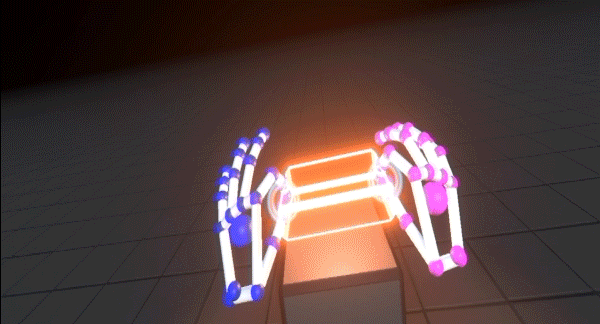
3D Drag and Drop
Drag and drop is one of the most metaphorically direct interactions a user can do on a 2D screen. Holding a mouse click or a fingertip tap to select an object, and then dragging it to a target location, feels natural and intuitive.
Fortunately, one of the core features of the Interaction Engine is the ability to realistically grab, drag, and drop a virtual object in 3D. As a result, the functional part of this piece of UI was again already mostly complete.
![]()
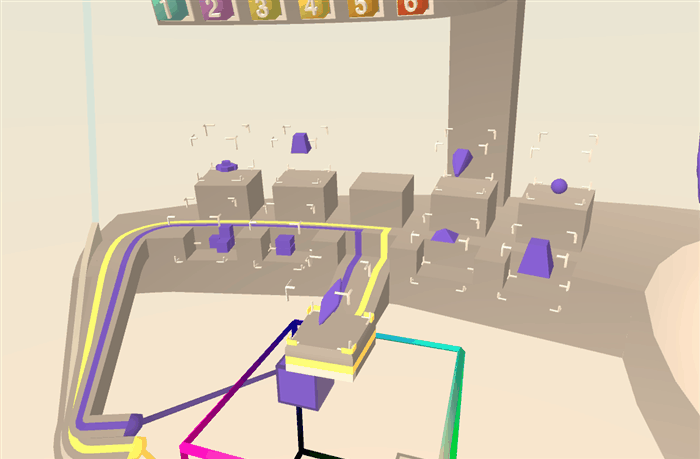
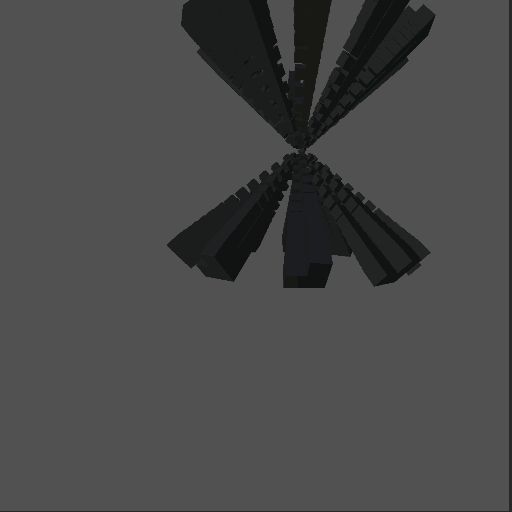
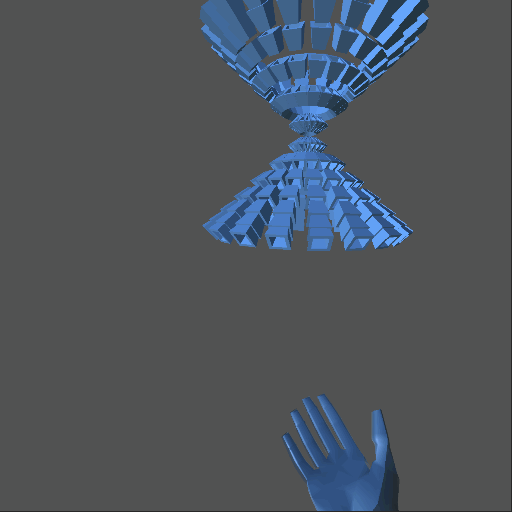
So that users could change the mesh shape that makes up the sculpture, we created a shelf which displays each mesh option in 3D, plus a protruding podium which shows the currently selected shape. To add more feedback, a cubic frame was added around each shape. As the user’s hand approaches, the frame extends until it forms a complete cage. This achieves two things: it tells the user how close they are to any given shape, and creates a uniform cubic volume that’s easy to grab.
![]()
Once you pick up a shape, the podium unlocks the current shape and moves it away to make room for the one in your hand. The grabbed shape and the podium also pulse with the current sculpture glow color, indicating a connection. Once the grabbed shape is moved near the podium, it automatically detaches from the hand, orients itself, and locks into the podium.
![]()
This playset of spatial user interfaces is just a glimpse of the possibilities afforded by the physics-based foundation of the Interaction Engine. What kinds of 3D UIs would you like to see, touch, and create with these tools? Let us know in the comments below.
An abridged version of this article was originally published on UploadVR. Mood board image credits: Iron Man 2, Endeavor Shuttle Cockpit, Fisher Price Vintage, Matrix Reloaded, Wirtgen Milling Machine, Fisher Price Laugh and Learn, Grooves by Szoraidez, Google Material Design Palette, sketches by Martin
The post Design Sprints at Leap Motion: A Playground of 3D User Interfaces appeared first on Leap Motion Blog.
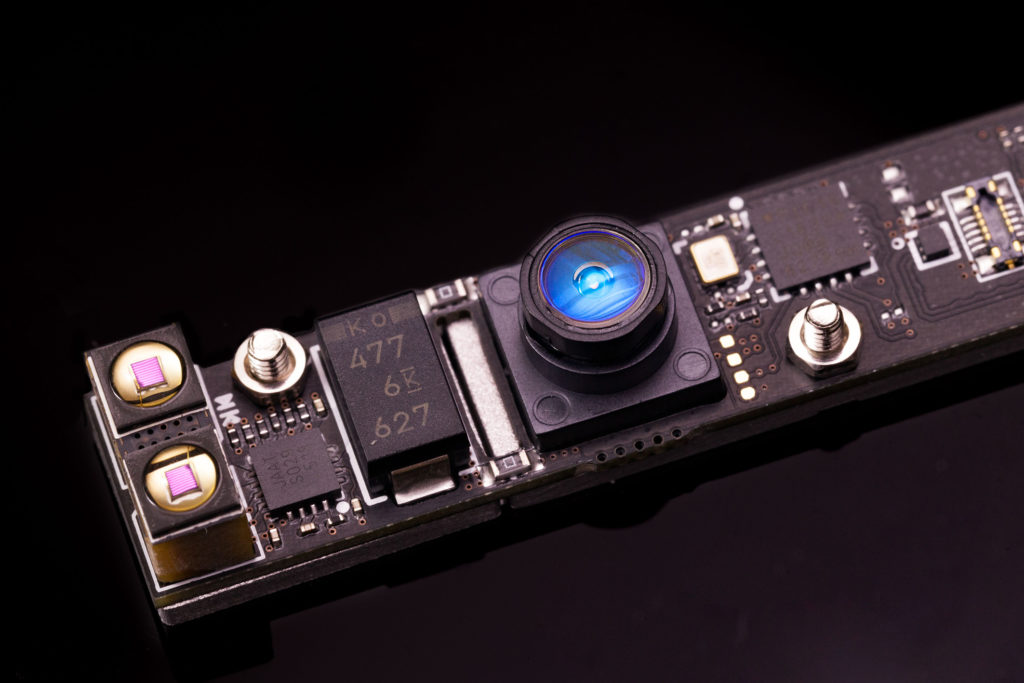
 At the same time, we wanted to address the biggest request from the VR community, which is field of view. While our PC peripheral remains unrivaled at 140×120 degrees, we’ve found in virtual reality there is reason to go even further. So we’ve built our next-generation system with the absolute maximum field of view that a single sensor can support on a VR headset, which is 180×180 degrees.
 Window Blinds


 Recognizing that helper NPCs


 Interacting with just the tip of a thumb on a small trackball, and a whole group spinning a Kugel Fountain.