Quantcast
Channel: Leap Motion Blog
Viewing all 481 articles
Browse latest View live

Hands Module 2.0: Bring Your Hand Designs to Life in Two Minutes or Less

$
0
0

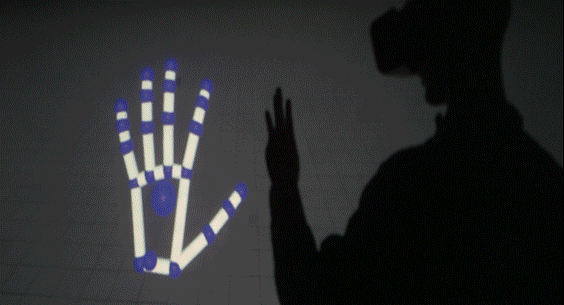
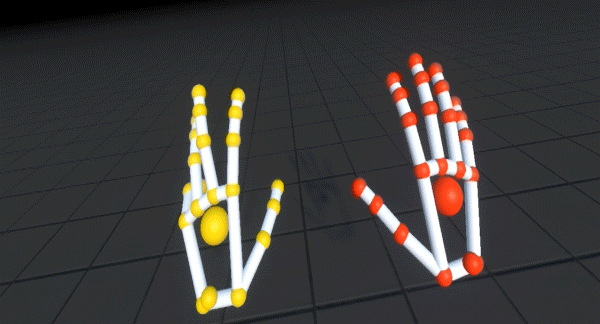
Creating new 3D hand assets for your Leap Motion projects can be a real challenge. That’s why, based on your feedback, we’ve massively automated and streamlined the pipeline for connecting 3D models to our Core Assets with Hands Module 2.0 – so what used to take hours only takes a minute or two. You can get the new module and updated assets on our developer portal.

You now have the ability to autorig a wide array of FBX hand assets with one or two button presses. This has the powerful benefit of being able to quickly iterate between a modeling package and seeing the models driven by live hand motion in Unity. Even if you’re a veteran modeler-rigger-animator, it’s a singular experience to bring hand models that you’ve been sculpting and rigging into VR and see them come to life with your own hand motions.

In this post, we’ll provide a detailed overview on how to use our new autorig pipeline, as well as some explanation of what happens under the hood. At the end, we’ll take a step back with some best practices for both building hand assets from scratch or choosing hand assets from a 3D asset store.

Autorigging with LeapHandsAutorig

The new LeapHandAutorig Monobehavior script acts as a quarterback for an array of scripts and methods which comprise the rigged hands setup process. Sitting at the top of a hands hierarchy, the script runs in the editor. The Autorig button in the Inspector sets off a chain of actions that works through the steps outlined in the chart below <chart coming>.

  • Diagram of automated steps
    • Assign RiggedHands
    • Assign Handedness
    • Asign Palms
    • Find finger base joints
    • Assign RiggedFinger scripts
    • Assign FingerType in each RiggedFinger script
    • Reference RiggedFingers in RiggedHand
    • Assign finger joints in each RiggedFinger script
    • Calculate Palm Facing for each hand
    • Calculate Finger Pointing for each RiggedHand
    • Populate those values to RiggedFingers
    • Save Start Pose
    • Add, name and populate a new ModleGroup in HandPool +

After autorigging, the LeapHands Autorig Inspector console acts as a central control panel to push values to the other Leap Motion rigging scripts. This allows you to test the model quickly and set certain values centrally, instead of digging through the hierarchy to set values in all the scripts manually.

Autorigging can act on a variety of FBX assets, and works in two different ways, depending on whether the asset has a Unity Mecanim Humanoid definition. If so, then LeapHandsAutorig finds and assign joints based on this mapping. If not, then LeapHandsAutorig searches the hierarchy below its Transform by a list of names typical of common character rigging practices.

Step 1: Setting the Scene

To try the autorigging for yourself, the Hand Module download includes an example file, Assets/LeapMotionModules/Hands/Examples/Rigged_Hands_AutoRig_Example.unity. This contains a Leap VR camera rig: LMHeadMountedRig. (For an explanation of how the camera rig works, see our posts on the new Unity Core Assets.)

There are two sets of FBX hands in this file for testing the autorigging. They’ve simply been dragged from the /Hands/Models/ folder and parented under the VR camera rig. One set of hands is made of two FBXs and illustrates how the autorigger can start its process by finding names.  The other is a single file with a simple human body joint hierarchy to illustrate autorigging with Unity Mecanim’s joint mapping as a starting point.

Step 2A: Separate FBXs

In this example, the first set of hands (under the GraphicsModels transform) is comprised of a separate FBX for each hand. Since these don’t have a Mecanim Humanoid mapping associated with them, LeapHandsAutorig will use their hierarchy’s naming to set them up.

+Drag the LeapHandsAutorig script found in the /Hands/Scripts/ folder to the GraphicsModels transform. These hand models happen to be built with metacarpal transforms at the base of each finger. So check the “Use Metacarpal’s” checkbox in the Inspector. This will take those extra joints into account when assigning RiggedFinger scripts. Then press the Autorig button at the bottom of the Inspector and the hands are ready to play!

There are several ways to verify whether various parts of the autorigging were successful. Start by seeing if the previously empty fields in the LeapHandsAutorig component now have references in them. Then, to verify that the hands are added to the HandPool and ready to be driven, select the LMHeadMountedRig/CenterEyeAnchor/LeapSpace/LeapHandController transform and check for the GraphicsHands ModelGroup in the HandPool component.

You can also verify that the hands have been setup correctly by checking the Set Editor Leap Pose checkbox in the LeapHandsAutorig’s Inspector. This will pose the hands in the Leap editor pose. When the autorigging is run, snapshots of the hands’ hierarchies are stored. Then, if you uncheck that checkbox, the model is returned to this stored pose.

Step 2B: Single FBX With Mecanim Humanoid Hierarchy

In this alternative example, the LoPoly_Rigged_Hands_Skeleton transform is an FBX with a simple but complete body joint hierarchy and a + Mecanim Humanoid definition in its Unity Avatar.

Drag the LeapHandsAutorig script to this transform and click the Autorig button. In this case, if you check the SetEditorLeapPose checkbox, you’ll see that the hands’ palms are flipped. So for this model, you can check the FlipPalms checkbox. This reverses the direction of the ModelPalmFacing vectors for each RiggedHand script and all of the RiggedFinger scripts as well.

Step 3: RiggedHand and RiggedFingers Are Set Up Automatically

One of the main tasks of the LeapHandAutorig component is to find hand transforms and assign RiggedHand components, then to find the base transform for each finger and assign RiggedFinger components. After autorigging, you can find them quickly by clicking on their references in the LeapHandAutorig’s Inspector. This expands the hierarchy and highlights their individual transforms for easy selection. These are the script components that receive and translate tracking data from Leap Motion’s Core Assets scripts and actually drive the rigged hand models at runtime.

The RiggedHand script contains references to the palm and forearm (if they exist) as well as reference to the five RiggedFinger components in its hierarchy. The ModelPalmFacing and ModelFingerPointing vectors represent the cardinal direction the the palm and fingers face. These, and the several remaining fields, are identical to those exposed in the LeapHandAutorig script. When those values are changed, those values are pushed here.

Each RiggedFinger script contains references for its three child bone transforms and one of five finger types. They also have fields for the cardinal-direction-facing vectors for the palm and the direction of its children bones.  Again, like those in the RiggedHand script, these vectors are calculated by methods within the RiggedFingers script, but can be changed via the central interface of the LeapHandsAutorig.

Each RiggedFinger component also has a significant checkbox called Deform Position. This causes the joint transforms to not only be rotated by Leap Motion tracking but to be positioned as well. To take advantage of this feature, the FBX model needs to have been built with joints close to human proportions and weighted well enough to allow joints to move without polygon tearing. + This field then allows for scaling and proportioning the rigged model to the user’s tracked hand.

Making New Hand Models or Choosing Hand Assets

Now that we’ve seen what Hands Module 2.0 can do, it’s time to find the right assets for your project! Before building and rigging new hand models in a 3D modeling package to use with the Hands Module, we recommend that you be fairly experienced with hand anatomy, 3D polygon modeling and edgeloop topology, joint orientations, and weighting.

That being said, the steps outlined below are equally relevant if you’re choosing (and possibly modifying) assets from a 3D asset store such as the Unity Asset Store or Turbosquid. In the end, all that’s need is a well-modeled, jointed, named and weighted mesh, nothing out of the ordinary for a typical game character rig. That said, for quality results, it’s important to address the following details thoroughly.

Sculpting and topology:  Sculpting something that can bend and deform well is more that simply creating a visually appealing shape. You’ll want to think about and plan how your model will look when it’s stretched to its limits, curled into a fist or other extreme poses. We strongly recommend topology that features edgeloops flowing along the creases of the hand, rather than a uniform distribution of polygons. This is critical for good deformations.

Performance: Since you’re probably creating these hands for a VR application, it’s good to remember that these hands get rendered twice. To keep your framerates high, polygon budgets and draw calls should be managed. (Underscore that several times if you’re creating a mobile application.)

Joint and File Naming: To allow the autorig script find-by-name approach, joints’ names should contain one of the possible strings for each joint type according to the chart below. These are pretty standard naming conventions for 3D rigs, and the common 3D packages have tools for renaming hierarchies quickly. If you plan to use Mecanim’s full Humanoid mapping, this naming is not critical.

Joint Orientation: Having proper joint orientations is critical for a couple of reasons – most importantly, for the RiggedHand and RiggedFinger scripts to be able to rotate joints at the correct angle. Joints need to be oriented with one axis pointed directly down the joint, towards its child, and another axis pointed along its main rotation axis. Notably, while this is common practice for character riggers, not all assets on the asset store are built this way. This is probably the first thing to examine when determining if an asset will work with our RiggedHand and RiggedFinger scripts.

Keep in mind that the end user’s hands will be curling anatomically. Understanding the finer details – like how fingers curl toward the center of the palm, rather just folding straight in – will streamline your development and help you get more convincing poses out of your rigged hands.

Vertex Weighting for Range of Motion and Good Deformation: Since your rigged hands may be driven by many different end users, hand models for Leap Motion tracking need to deform well through a rich range of motions. Joint placement and careful weighting for good deformations is important for quality posing.

Beware the Uncanny Valley: Hyper-realism isn’t always the best approach in VR. Users almost always respond better to stylized or cartoony hands.

When making 3D models for animation in the past, we’ve often used the workflow of throwing in joints and weights and a few rough poses early in the modeling process. That way, we can see how the model deforms while iterating the sculpture.

But now going all the way from your 3D package to seeing your hand models in VR – driven by your hands – can take just a few moments! Iterating models and quickly seeing how they perform during live tracking is a very new and interesting workflow.

This tool has been weeks in the making, and we’re really excited to see the new and interesting hand designs you create and sculpt with the Hand Module. Let us know what you think, and what\ resources you’d like to see next!

The post Hands Module 2.0: Bring Your Hand Designs to Life in Two Minutes or Less appeared first on Leap Motion Blog.


Unity Core Assets 101: How to Start Building Your VR Project

$
0
0

True hand presence in VR is incredibly powerful – and easier than ever. With the Leap Motion Unity Core Assets and Modules, you can start building right away with features like custom-designed hands, user interfaces, and event triggers. Each Module is designed to unlock new capabilities in your VR project, and work with others for more advanced combinations.

In this post, we’ll take a quick look at our Core Assets, followed by the Modules.  Each section includes links to more information, including high-level overviews, documentation, and examples. The Core Assets and Modules themselves all include demo scenes, which are often the best way to get started.

Leap Motion Core Assets

orion_unity_3

The Leap Motion Unity assets provide an easy way to bring hands into a Unity game. Since they’re built on the native VR integration included in Unity 5.4, they support both the Oculus Rift and HTC Vive. Setup is fast and easy, taking less than a minute.

Our new Orion Core Assets have been massively optimized for VR, with features like persistent hands in the Editor, greatly simplified workflows, and the ability to easily toggle through different sets of hands. For a more in-depth perspective on how the Core Assets are architected, see our posts Redesigning Our Unity Core Assets: Part 1 and Part 2.

Links: Quick Setup Guide / Documentation / Download

unity_modules

Modules are powerful extensions built on the Core Assets. With Modules, you can unlock a wide range of capabilities in your project.

Detectors

With the Leap Motion Orion software, we’ve away from touchscreen-like-gestures – such as swipe and circle – and towards more physical interactions designed for VR, like pinching and grabbing. Pinching is a powerful interaction that lies at the core of our Blocks demo, and has the ability to drive a wide variety of experiences.

Pinching and other hand poses are detected and managed through Detectors – which is not really a Module, but rather a set of scripts within the Core Assets themselves. With Detectors, you can:

  • use pinch gestures within your project
  • take advantage of hand poses like “thumbs-up”
  • create custom hand pose detectors with logic recipes like whether:
    • the fingers of a hand are curled or extended
    • a finger or palm is pointing in a particular direction
    • a hand or fingertip is close to one of a set of target objects

Links: Introducing Detectors / Pinch Draw / Pinch Move / Detection Example

Hands Module

HandsModule

In just a few minutes, the Hands Module gives you the power to select from different hand assets or bring your hand models to life in VR. With the Hands Module, you can:

  • access a range of example hands, including:
    • highly optimized rigged meshes
    • abstract geometric hands
    • dynamically generated hands (based on the real-world proportions of the user’s hand)
  • autorig a wide array of FBX hand assets

Links: Introducing the Hands Module (Part 1, Part 2) / Example Demo / Download

UI Input Module

close1_macro

Fully interactive menus – ones that you can touch with your bare hands – can be enormously compelling. The UI Input Module provides a simplified interface for physically interacting with World Space Canvases in Unity’s UI System. With the UI Input Module, you can:

  • build interfaces with buttons and sliders
  • design and customize your interface’s appearance and animation effects
  • easily setup and modify an event system for your interface

Links: Introducing the UI Input Module / Example Demo / Download

Attachments Module

AttachmentsModule

Last but not least, the Attachments Module is designed in part to augment and extend the capabilities of the other Modules. With the Attachments Module, you can:

  • attach Unity game objects to a hand
  • trigger events in the virtual world, using scripts for turning on and off attached game objects (designed to work with Detectors)
  • create a wearable menu attached to your arm (in combination with the UI Input Module)

Links: Example Demo / Download

What’s Next?

What’s the most powerful physical interaction in VR? The ability to grab a virtual object and simply hold it in your hand. This kind of interaction is immensely compelling and surprisingly complex, which is why we’re building an Interaction Engine that makes the experience feel smooth and intuitive. Stay tuned for more updates on that front. Beyond that, we have more Modules for Unity on the way.

What new Module would you like to see next? What kinds of experiences can you imagine from combining the existing Modules? Let us know in the comments!

The post Unity Core Assets 101: How to Start Building Your VR Project appeared first on Leap Motion Blog.

Tectonic Shift: Why Education is About to Change Forever

$
0
0

At its most powerful, education harnesses our natural curiosity as human beings to understand the universe and everything in it. This week on the blog, we’re exploring what it means to actually reach into knowledge – and why developers are at the forefront of how the next generation is learning about the world they live in.

Seeing a geological diagram in a textbook is one thing. But reaching out and creating massive volcanoes with your bare hands? Rearranging the continents by searching for hidden fossil patterns? Now you’ve got some magic in the classroom.

Educational gaming is on the verge of a major turning point, and one of the leading forces is Gamedesk – an LA-based research institute, commercial development studio, online community platform, and physical school.

Recently, Gamedesk released a lengthy white paper detailing how they built a set of “kinesthetic learning” games that teachers can use to teach complicated geoscience concepts to students aged 12 to 15. These include Leap Motion games GeoMoto and Pangean, which let you rearrange continents, shift tectonic plates, and form volcanoes. Pangean and Geomoto are both available for free download on Gamedesk’s website and on our Developer Gallery.

Pangean

Formerly known as Continental Drift, this puzzle game introduces the essentials of continental drift before moving on to plate tectonics. As a galactic member of the United Colonies, you travel the universe in your own scouting ship – using your hologram interface to piece together continents and demonstrate the shift that occurs over a hundred million years.

Use the fossil probe to reveal patterns in creature inhabitance and the sonar to scan for eroded portions of the continent. Your final mission? Returning present-day Earth to its Pangaea state! To help students absorb the lesson, teachers can ask: Why do you think the continents can be connected with each other? How did you use fossil remains to help you connect continents up? And why do you think similar fossils are found in different continents now?

GeoScience_Continental_Drift-1

GeoScience_Continental_Drift-2

GeoMoto

Building on their insights from the other three games in the series, GeoMoto (formerly Plate Tectonics) gives players a more direct relationship to geo-concepts. In other words, pulling, smashing, and grinding tectonic plates together!

Using the Leap Motion Controller, players navigate around a world with no geographic features, then shift and experience the motion of the plates with hand movements. You can see how plate tectonics create volcanoes, folded mountains, rift valleys, and seafloor spreading, then learn about different types of faults and the Richter scale.

GeoScience_Plate_tectonics-14

Photo_6

Kinesthetic Learning and the Future of Education

Geoscience is a complicated subject that involves thinking about the Earth as a fluid and complex system that’s constantly changing. These can be difficult concepts for kids, so Gamedesk used a kinesthetic learning approach to shed new light on the subject. This is a learning style that lets students engage physically with complex subjects through movement and action, rather than just watching a video.

Along with the creative and educational possibilities of virtual reality, we’re excited to see where motion-controlled gaming will take the next generation of students. You can download Pangean and Geomoto from Gamedesk’s website. Be sure to check out their white paper to learn about how the games were researched, built, and tested – including lesson plans and resources for teachers!

Plate_Tectonics_PlayMaker_HiRes-2399

The post Tectonic Shift: Why Education is About to Change Forever appeared first on Leap Motion Blog.

Welcome to the World’s First VR Dance Competition!

$
0
0

Get ready to raise the roof! The qualifying round for the first-ever VR dance contest starts this Thursday, with a brand-new Geforce GTX 1070 Graphics Card on the line. All you need to enter is a VR headset, Leap Motion Controller, and AltspaceVR user account.

On August 11 at 7pm PDT, find the dance competition room in AltspaceVR and show us your best moves. Our judges will select 16 lucky contestants to compete in the finals on August 18 – where the AltspaceVR dance champion will be crowned. For the final round, we’re excited to announce our judges:

  • David Holz, CTO of Leap Motion
  • Eva Hoerth, VR Evangelist and Design Researcher
  • The Wave, creators of a synesthetic cross­-platform VR experience
  • Timoni West, Principal Designer at Unity Labs
  • Zvi Greenstein, General Manager and Head of VR Business Development at NVIDIA

You can RSVP for the first round here. Everyone is welcome to attend both rounds, and there will be a YouTube livestream available for anyone who wants to tune in from the real world. Here’s a little more about how the competition works:

Who can compete?

The competition is open worldwide to participants who are eighteen (18) years of age or older at the time they enter, and who have created an AltspaceVR user account. (This is important – we won’t be able to judge unregistered guests!) All U.S. federal, state, and local laws and regulations apply.

The contest is not open to employees of Leap Motion, AltspaceVR, NVIDIA, or anyone else associated with the development, judging, or administration of the contest. Our immediate families, roommates, and pets are also not eligible for entry. (Sorry, Waffles!)

What’s the prize?

batmobile-gtx-1070

The prize is an insanely powerful Geforce GTX 1070 Graphics Card, worth approximately $449. As the world’s first VR dance competition champion, the winner will also be awarded eternal bragging rights. These may be exchanged for high-fives, thumbs up, and other forms of social acclaim.

thumbs-up

(Please note that the prize may not be redeemed for cash, and can’t be used in conjunction or combined with any other competition or offer. We reserve the right to substitute the prize for one of equal or greater value. The winner is responsible for reporting and paying any and all income, sales, or excise taxes that may apply. The prize may also be reported to the IRS as income to the winner.)

How are the contestants judged?

The judges will award points based on your head and hand dancing performance, awarding between 1 and 10 points. Hand tracking (via Leap Motion) and positional head tracking (via the Oculus Rift DK2/CV1 or HTC Vive) is required.

How does the competition work?

During the qualifying round on August 11, 2016, four judges will go through the room and watch everyone dancing. Each judge will select four finalists. The 16 finalists will have the opportunity to compete in the final round on August 18, 2016.

During the final round, each contestant will perform individually and one at a time. The contestant with the highest score will win. In the event of a tie, the top-scoring contestants will engage in a tie-breaker round where each judge selects the best performance from the round. The winner will be announced upon the conclusion of the competition. Bragging rights will be transferred instantaneously, while the NVIDIA graphics card will involve an email (and shipping) to the winner.

The qualifying round starts on August 11th at 7pm PT – don’t miss it! Register now at http://bit.ly/VRDanceParty and get ready to bring the house down.

The post Welcome to the World’s First VR Dance Competition! appeared first on Leap Motion Blog.

Reaching for New Social Realities with AltspaceVR’s Cymatic Bruce

$
0
0

Welcome to AltSpaceVR – a place that can exist anywhere, and where exciting things are constantly happening. On Thursday, the qualifying round for our #VRDanceParty will begin, where everyone can compete to be part of the August 18th finals and dance for a Geforce GTX 1070 Graphics Card.

These are still early days for social VR, and AltspaceVR is at the forefront of a whole new way for human beings to connect. Ahead of the competition, we caught up with Bruce Wooden, aka “Cymatic Bruce,” to talk about where the space is headed.

Bruce has been a VR evangelist since the earliest days of the new VR resurgence, and is currently Head of Developer and Community Relations at AltspaceVR. We talked about the uncanny valley, the power of hands in VR, and the challenges of building a global community. (For an extended version of the conversation, check out our post on Medium.)

What’s behind the abstract design of the AltspaceVR characters?

That was a decision that we reached after lots of iterations in the beginning. The avatars started very abstract with a robot that resembled a humanoid shape. Even our latest avatars, the rubenoids, are also pretty abstract.

evolution-altspace-design

Our focus is on emotional connection. We found that if we tried to represent things that weren’t tracking, in most cases it turned out to be pretty bad. We have this mantra – don’t show what you don’t know. We actually had an avatar and cheekbones and a mannequin face, and while it was a neutral expression, you got into VR and would feel uncomfortable because the person was talking but nothing was moving. There was nothing animating on the face. It was really weird.

old-models

So we end up abstracting out and really trying to reach a point where you can feel comfortable. Where within a few seconds to a minute, you feel like you’re interacting with a human being.

ruben

The other big thing is performance. We’re kind of unique in the VR space because we’re cross-platform – not only on the high-performance VR like the Vive, but also on the mobile Gear VR. So across all of those things we have to make sure that the avatars are simple enough so that when there are 70 avatars in the room that all these platforms can perform admirably. We have to make sure that it stays light and we don’t drop frames. With VR, you drop a few frames and you can ruin someone’s day. The performance bar is raised a little higher.

What do hands bring to social VR?

Nonverbal communication has been huge for us, where we can have people wave, give the Fonzi ‘eyyyy, air quotes, thumbs up… especially with Leap Motion Orion. That stuff just comes across so wonderfully. For folks to talk with their hands, it’s definitely a big add as far as making that connection and really seeing that person as another human behind behind the avatar.

anthony-moves-newsletter

What’s best about the hand tracking from Leap Motion is that it’s feeding from the actual hands from the person. It’s not an approximation but exactly what their hands are doing. People like to talk about the uncanny valley when it refers to faces, but for me, uncanny valley also refers to motion and other body parts as well.

Whenever any part of the body is not as human as you would expect to see from a human being, then all you’re doing is focusing on what’s wrong with that limb. It detracts from the entire experience, especially where communication is concerned.

After our Orion update, we were LeapspaceVR for a while. Everyone was grabbing their controllers and jumping in AltspaceVR and seeing how it worked. Lots of people playing pattycake and rock-paper-scissors.

What are some of the challenges involved in building a global community in VR?

Besides design and performance challenges, we’re always trying to find what people will like to do in VR. It’s a journey of discovery where we’re just going to try this and see if it works. Sometimes it goes well, and sometimes it goes horribly. It becomes a real challenge to find out how we’re doing events and how to maintain our community and see how those folks are being taken care of on the other side of the globe.

When you have the culture of the Internet transcribed over to VR, it gets really interesting. In the early days of our open beta, there wasn’t really a problem with trolling, disrespect of personal boundaries, that kind of thing – it was great. We thought, this is great, a lot of real-world cultural norms are being translated over. But when we released on Gear VR, it became clear that that wasn’t happening for everybody.

It’s a lot like real-world parties – you can have 20 people in the room, and everyone is doing great, and that 21st person can just ruin it for everybody. Dude, really? We were having such a good time. It’s really the same dynamic where we’re trying to figure out how we handle this in a way that doesn’t feel restrictive to users, while also making sure that people feel comfortable no matter what background, gender, whatever.

This is a continuing challenge, and the latest thing we’ve developed is the personal space bubble. You also have the ability to report, mute, or block people, and have 24/7 presence from our concierge team. We’re continually looking for more innovative ways to minimize that kind of behavior and discourage it. People have the potential to have such a wonderful time in AltspaceVR, and when it’s going well, it’s going really, really well.

What will social interaction in AltspaceVR be like in 2017?

The initial goal with AltspaceVR is to make it a really effective communication tool. Right now we’re using a phone or Skype or Google Hangouts, but down the line we’ll be using AltspaceVR because it’s the best option. It will be very interesting to see where we go from there, but that first milestone is nothing to sneeze at.

I think you’re going to see more accessible VR, and more people taking it on, and new social norms will develop. A lot of what’s happened so far is stuff that’s carried over from the real world – like when two French people meet in AltspaceVR and they have positional tracking, they kiss each other on the cheeks. That’s a real-world interaction that happens immediately and it’s super impressive.

What I expect to see is the development of some things like our emojis that pop up above your head, or the use of some types of gestures that will be native to VR. There hasn’t been a really core one that I’ve seen yet, but that’s what I would expect to see. There will be more people using VR to hang out, and there’s going to be something like what emojis are to cellphones and text messages. We haven’t gotten to that native communication format yet but I’m hoping to see that in 2017.

Join Bruce on August 11th at 7pm PT as he emcees the VR Dance Party! Register now at http://bit.ly/VRDanceParty and bring your A game.

The post Reaching for New Social Realities with AltspaceVR’s Cymatic Bruce appeared first on Leap Motion Blog.

Burning on the Virtual Dance Floor

Introducing the Interaction Engine: Early Access Beta

$
0
0

Game physics engines were never designed for human hands. In fact, when you bring your hands into VR, the results can be dramatic. Grabbing an object in your hand or squishing it against the floor, you send it flying as the physics engine desperately tries to keep your fingers out of it.

But by exploring the grey areas between real-world and digital physics, we can build a more human experience. One where you can reach out and grab something – a block, a teapot, a planet – and simply pick it up. Your fingers phase through the material, but the object still feels real. Like it has weight.

Beneath the surface, this is an enormously complex challenge. Over the last several months, we’ve been boiling that complexity down to a fundamental tool that Unity developers can rapidly build with. Today we’re excited to share an early access beta of our Interaction Engine, now available as a Module for our Unity Core Assets.

How It Works

The Interaction Engine is a layer that exists between the Unity game engine and real-world hand physics. To make object interactions work in a way that satisfies human expectations, it implements an alternate set of physics rules that take over when your hands are embedded inside a virtual object. The results would be impossible in reality, but they feel more satisfying and easy to use. Our Blocks demo is built with an early prototype of this engine, which has been designed for greater extensibility and customization.

Orion_3

The Interaction Engine is designed to handle object behaviors, as well as detect whether an object is being grasped. This makes it possible to pick things up and hold them in a way that feels truly solid. It also uses a secondary real-time physics representation of the hands, opening up more subtle interactions.

Our goal with the Interaction Engine is for integration to be quick and easy.  However, it also allows for a high degree of customization across a wide range of features. You can modify the properties of an object interaction, including desired position when grasped, moving the object to the desired position, determining what happens when tracking is momentarily lost, throwing velocity, and layer transitions to handle how collisions work. Learn more about building with the Interaction Engine in our Unity documentation.

Interaction Engine 101

Without the Interaction Engine, hands in VR can feel like one of those late-night infomercials where people can’t tie their own shoes. Now available on GitHub, Interaction Engine 101 is a quick introduction that lets you compare interactions with the Interaction Engine turned on or off:

off-pickup_greyon-pickup

Grasping and picking up an object is the most fundamental element of the Interaction Engine. With normal game physics, the object springs from your hand and flies around the room. The Interaction Engine makes it feel easy and natural.

off-stack_greyon-stack

The ability to pick up an object also extends to higher-level interactions, like stacking.

off-smush_greyon-smush

Standard rigidbodies will violently try to escape if you compress them into the floor. With the Interaction Engine, they take on new elastic properties, allowing your hands to dynamically phase through virtual matter.

off-throw_greyon-throw

The Interaction Engine also allows you to customize throwing physics. Without it, you could probably throw an object, but it would be extremely difficult.

This early beta of the Interaction Engine works well with the types of objects you see in these scenes – namely cubes and spheres around 1-2 inches in size. Game objects of differing shapes, sizes, and physics settings may have different results. We want to hear about your experience with the Interaction Engine so we can continue to make improvements.

Ready to experiment? Download the Module, check out the documentation, and share your feedback in the comments below or on our community forums!

The post Introducing the Interaction Engine: Early Access Beta appeared first on Leap Motion Blog.

The Design Process Behind Itadakimasu!

$
0
0

Itadakimasu (Japanese for ‘Bon Appetit’) is a therapeutic VR experience that allows users to interact with animals through different hand gestures. The focus of this piece stems from research findings that animal-assisted therapy can help decrease anxiety and reduce blood pressure in patients.

Although the experience is simple in content, my intent is that it could act as a short-term solution for people in places where owning a pet is logistically difficult.

Ideation and Planning

The goal is to create an emotional response through interactions between the user and animals.

1-QQJRD0N3pEAMViV-jMCW3Q

Sketching out various animal poses including a Quokka, which didn’t make it in the final version :(

With only one month to work on this, I planned a timetable and prioritized the following:

  • Code and perfect the interaction between the user’s hand gestures and the animals with the help of Leap Motion’s detection modules.
  • Model, rig, and animate the animals. It is important that every motion and animation elicits an emotional response from users.
  • Create an environment that uses motion to guide the users.
  • Develop music and voice assets that help bring life to the environment and characters.

To me, it was most important to get the interactions right. Once that was achieved, I could then start playing around with the different types of animals and animations.

Interacting with Leap Motion

I chose to work with optical hand tracking using the Leap Motion Controller in order to perform gestures that were natural to our culture. Although an analog controller would have been great for haptic feedbacks, the Leap Motion Controller provided an experience that was more personal and intimate.

Using Leap Motion’s detector scripts, I can easily detect what the user’s hands are doing. This can be anything from figuring out the palm direction to seeing if the fingers are curled or extended.

1-axsUK1YM67ozBO0inG80_g

The gizmos on the fingers can tell me if the correct gesture is activated or not (green color).

Combined with a Logic Gate, I can now use a certain hand gesture to trigger a specific animation in the animals. This has been extremely useful in my process, as it made it easier to debug and test what was working or what wasn’t.

Once this was achieved, I could begin to shift my focus to the animals themselves.

Cute Animals

One of my biggest inspirations is taken from PARO, the therapeutic seal robot. PARO is an advanced interactive robot used in hospitals and extended care facilities in Japan and Europe. You can read more about it here.

1-rMzp6NY_GO31aXdhKiBsNA

I wanted to emulate that same sensation of joy through animation.

In addition to reusing the sloth from my previous work, I added a red panda, an otter, and a hedgehog. Rather than going for more realistic animal behaviors, I wanted to place these characters in funny or unusual situations. For example, the red panda spends his time eating ramen or the otter is getting ready to jam with his clam guitar.

In order to ensure good feedback, the animals are highlighted whenever the user gazes at them. This lets the user know that they can start to perform an action.

Environment as Onboarding

Rather than have the environment act as a simple wallpaper, I wanted it to be central in guiding the user, so that a first-time user would be able to see hints of what to do embedded in the background.

1-LB9X-TDkbhedFDwyww4jkg

Various sketches of background objects.

In order to do that, I made sure that instructions would ‘frame’ certain animals. For example, the three hand gestures are integrated as flyers that rest above the red panda and otter. This ensured that the discoverability of these actions were high.

1-R0rXB27b1peJCgOGCmmM6Q

This is what you would see immediately above the red panda.

Taking cues from the interior design concept of ‘vignettes,’ I grouped my environmental objects around each animal as a picture frame. So not only was it pleasing to look at, but it conveyed the necessary information, as well.

For the sloth, I chose a slightly different approach. The sushi conveyor belt sits in the foreground of the sloth. Every so often, the user will see the same three hand gestures as signs that pass through along with the sushi.

The conveyor belt is also meant to guide the user’s eyes so they could follow the sushi to see the rest of the scene.

VRLA Reactions

Overall, there were strong positive reactions to my piece (see featured video above). The Leap Motion Controller worked well and everyone reacted naturally with the gestures. I feel this would have been a different experience if I had gone with a clunky controller.

I did notice that some of the participants assumed they could do any gesture, other than the three, to get a reaction. Some of them waved and even used voice commands like saying “hiiiiiii.”

Another observation is that several people were not immediately aware they could turn around to see more animals to interact with. This has to do with the user only being able to see one animal at a time, with the others being out of their peripheral vision. I feel if I had four animals, they would be evenly spaced for the user to notice and want to turn around. This also presents an opportunity next time to experiment with light, shadows, and sound to gives cues for users to turn around.

In the end, it was truly heartwarming to see most of the participants leave this experience with a laugh or smile on their face.

Looking Forward

I would like to develop my skills in sound design. Right now, sound is more of an afterthought rather than being fully integrated as part of the design. I would like to explore more to see how sound can be used as cues in directing the user’s attention.

Another area of improvement is making the environment more responsive. Several participants wanted to pick up the sushi and I feel adding that interactivity would have made the experience more immersive.

Acknowledgements

This would not have been possible without Sergio Trevino, who graciously donated his time to help me code and understand the detector scripts.
Thank you to the wonderful Robert Ramirez for providing the music, Patty Metoki and Emily Okada for lending their incredible voice talents, Jerry Villagracia for audio support, James Chen for Unity support, Keiko Komada and Mai-Chi Vu for design support, Kerin Higa and Nikki Chan for editing, and Chris Iseri for coming up with the wonderful title.

This post was originally published on Medium as a sequel to Jeff’s earlier piece on Notice Me Senpai. Download Itadakimasu and Notice Me Senpai from the Leap Motion Developer Gallery!

The post The Design Process Behind Itadakimasu! appeared first on Leap Motion Blog.


#ScreenshotSaturday Challenge: Alien Spiders and Data Pools

Weightless Remastered: Building with the Interaction Engine

$
0
0

Following up on last week’s release of the Leap Motion Interaction Engine, I’m excited to share Weightless: Remastered, a major update to my project that won second place in the first-ever 3D Jam. A lot has changed since then! In this post, we’ll take a deeper look at the incredible power and versatility of the Interaction Engine, including some of the fundamental problems it’s built to address. Plus, some tips around visual feedback for weightless locomotion, and designing virtual objects that look “grabbable.”

When I made the original Weightless, there wasn’t a stellar system for grasping virtual objects with your bare hands yet. Binary pinching or closing your hand into a fist to grab didn’t seem as satisfying as gently fingertip-tapping objects around. It wasn’t really possible to do both, only one or the other.

The Interaction Engine bridges that gap – letting you boop objects around with any part of your hand, while also allowing you to grab and hold onto floating artifacts without sacrificing fidelity in either. You can now actually grab the floating Oculus DK2 and try to put it on!

glasses

Interaction Engine Essentials

So what does the Interaction Engine actually do? At the most basic level, it makes it easy to design grab and throw interactions. But while the Interaction Engine can tell when an object is being grabbed, that’s only a tiny part of what it can do.

That’s because basic grabbing is pretty easy. You could probably write code in 15 minutes that manages to parent an object to the hand when the fingers are curled in a certain way. This binary solution has been around for a long time, but it completely falls apart when you add another hand and more objects.

What happens when you grab an object with one hand, while also pushing it with the other? What happens when you push a stack of objects into the floor? Push one object with another object? Grab a complex object? Grab one object from a pile? All of these can cause massive physics conflicts.

Suddenly you discover that hand and object mechanics can be incredibly difficult problems at higher levels of complexity. The problem has gone from two dimensions – one hand plus one object – to five or more.

The Interaction Engine is a fundamental step forward because it takes in the dynamic context of the objects your hands are near. This lets you grab objects of a variety of shapes and textures, as well as multiple objects near each other that would otherwise be ambiguous. As a result, the Interaction Engine makes things possible that you can’t find in almost any other VR demo with any other kind of controller. It’s also designed to be extensible, with interaction materials that can easily be customized for any object.

We’ll come back to the Interaction Engine later when we look at designing the brand-new Weightless Training Room. But first, here are some of the other updates to the core experience.

Locomotion UI using Detectors

Locomotion is one of the biggest challenges in VR – because anything other than walking is already unintuitive. Fortunately, in a weightless environment, you can take a few liberties. The locomotion method in Weightless involves the user putting both hands up, palms facing forward with fingers extended and pointed up, then gently pushing forward to float in the direction they’re facing.

Interactions like this are very difficult to communicate verbally. In the original, there was no UI in place for giving the user feedback on what they needed to do to begin moving.

Now with our Unity Detectors Scripts, giving users feedback on their current hand pose is extremely simple. You can set up a detector to check if the palms are facing forward (including setting a range around the target direction within which the detector is enabled or disabled) and have events fire whenever the conditions are met.

weightless-locomotion

I hooked up Detectors to visual UI on the back of your gloves. These go from red to green when the conditions for EXTEND (fingers extended), UPRIGHT (fingers pointed up) and FORWARD (palms facing forward) are met. Green means go!

Pinch to Create Black Holes

In the original Weightless, you gained a “gravity ability” which let you attract floating objects to your hands with the press of a wrist-mounted button. This was fun, but often the swirling storm of objects would clutter your view, making it hard to see.

black-hole

Now you can now pinch with both your hands close together to create a small black hole which has the same effect. Similar to the block creation interaction in Blocks, you can resize the black hole by stretching it out before releasing the pinch.

The Training Room

To truly explore the potential of the Interaction Engine, I wanted to design a new section built around its unique strengths. Demoing Blocks to hundreds of people, I found that many would turn gravity off and then try to hit floating objects with other objects. To the point that some wouldn’t take the headset off until they succeeded! This inspired me to design an experience around grabbing and throwing weightless objects at targets.

Grabbing and (Virtual) Industrial Design

While developing the Interaction Engine it became clear that everybody grabs objects differently and this is especially true in VR. Some people are very gentle, barely touching the perimeter of an object while others will quickly close their whole hand into a fist inside the object. The Interaction Engine has to handle both situations consistently.

One area I wanted to explore was how the shape of an object could telegraph how it should be held to the user. Luckily, industrial designers have been doing this for a long time, coining the term ‘affordance’ as a way of designing possible actions into the physical appearance of objects. Just like the shape of a doorknob suggests that you should grab it, virtual objects can give essential interaction cues just by their form alone.

For the projectiles you grab and throw in the Training Room, I first tried uniformly colored simple shapes – a sphere, a cube, a disc – and watched how people approached grabbing them. Without any affordances, users had a hard time identifying how to hold the objects. Once held, many users closed their hands into fists. This makes throwing more difficult as the object could become embedded into your hand’s colliders after you release it.

Taking cues from bowling balls and baseball pitcher’s grips, I added some indentations to the shapes and highlighted them with accent colors.

bowling-ballbaseball

weightless-space-prototype-4

weightless-space-prototype-5

This led to a much higher rate of users grabbing by placing their fingers in the indents and made it much easier to successfully release the projectiles.

grab-types

The Interaction Engine’s Sliding Window

Within the Leap Motion Interaction Engine, developers can assign Interaction Materials to objects which contain ‘controllers.’ Each controller affects how the object behaves under certain conditions. The Throwing Controller decides what should happen when an object is released – more specifically, in what ways it should move.

There are two built-in controllers, the PalmVelocity controller and the SlidingWindow controller.  The PalmVelocity controller uses the velocity of the palm to decide how the object should move, to prevent the fingers from imparting strange and incorrect velocities to the object. The SlidingWindow controller takes the average velocity over a customizable window before the release occurred.

In the Training Room, I used the SlidingWindow controller and set the window length to 0.1 seconds. This seems to work well in filtering out sudden changes in velocity if a user stops their hand slightly before actually releasing the object.

Designing the Room

After honing in on the interaction of grabbing and then releasing a floating object toward a target, I began putting together some massing studies for environments I thought might be interesting to house the experience:

weightless-space-prototype-2

weightless-space-prototype

I tried some 360 environments, but I found I spent more time looking around trying to keep track of the targets than I did focusing on the interactions. Swinging in the other direction, I tried some linear tunnel-like spaces that focused my view forwards. While definitely more manageable, the smaller space for throwing meant I’d often unintentionally bounce projectiles off the walls. Whether or not I hit a target was more due to chance than intention.

weightless-space-prototype-3

weightless-space-prototype-6

I settled on a combination of the two extremes – a very wide cylinder giving the user 180° of open space with targets both above and below the platform they’re standing on.

Pinch and Drag Sci-Fi Interface

After a bunch of testing, I found that although my throwing had become pretty accurate, once the projectiles left my hand it was mainly a waiting game to see whether or not they would hit the target.

To turn this passive observation into an active interaction, I added the ability to pinch in the air to summon a spherical thruster UI. By dragging away from the original pinch point, the user can add directional thrust to the projectile in flight, curving and steering it towards the target. You can even make it loop back and catch it in your hand!

Since you’re essentially remote-controlling a small (and sometimes faraway) object, I tried to add as many cues to help convey the strength and direction of thrust:

  • A line renderer connecting the sphere center to the current pinch point, which changes color as the thrust becomes stronger
  • Concentric spheres which light up and produce audio feedback as the pinch drags through them
  • The user’s glove also changes color to reflect the thrust strength
  • The projectile itself lights up when thrusting
  • The speed, density, and direction of the thruster particle system is determined by thrust strength and direction

On the menu behind the player there’s also a slider to adjust the thruster sensitivity. Setting it to max allows even small pinches to change the trajectory of the projectile greatly. The tradeoff is that it’s much more challenging to control.

thrusters

I hope you enjoy Weightless and the Training Room as much as I enjoyed building them. Each of the 5 levels saves the best times locally, so let me know your fastest times! Adding Interaction Engine support to your own project is quick and easy – learn more and download the Module to get started.

The post Weightless Remastered: Building with the Interaction Engine appeared first on Leap Motion Blog.

VR Prototyping for Less Than $100 with Leap Motion + VRidge

$
0
0

Breaking into VR development doesn’t need to break the bank. If you have a newer Android phone and a good gaming computer, it’s possible to prototype, test, and share your VR projects with the world using third-party software like RiftCat’s VRidge. In this post, we’ll take a look at what you’ll need to get started with PC VR development for less than $100.

Your VR Prototyping Kit

  • $63 for the Leap Motion Controller and VR Developer Mount, now on sale in our web store. (While still on sale, note that prices are different outside the US and Canada.)
  • A Cardboard-compatible phone and a VR-capable computer. The requirements for both are listed on RiftCat’s website.
  • $15 for a Google Cardboard viewer. More if you decide to get one of the nicer ones.
  • $15 for the full version of VRidge (though you can try the free version first).
  • You still have $7 left over? Get yourself a fancy coffee. Treat yourself!

How it Works

VRidge is software that streams PC VR experiences to your phone via wifi. At the same time, it uses your phone’s internal gyros to provide the head tracking. This transforms your phone into a VR headset screen, simulating devices like the HTC Vive.

Since VRidge and our Unity Core Assets both take advantage of OpenVR, it’s possible for you to build and test your project using this minimal setup. The VR community is also using VRidge to play with experiences that would otherwise be unavailable – like Blocks:

Pros

  • Quick, affordable VR. Though in all honesty, you’ll probably get the itch to upgrade as soon as you can. (See Cons.)
  • Rapid prototyping. It’s nearly impossible to build a decent VR experience without being able to dive into it. That’s why we’re recommending this as a prototyping approach to developers who don’t have access to full headsets.

Cons

  • No positional tracking. This limits immersion, but mobile VR headset users will already be familiar with this. (Though there are hacks with other hardware that can provide positional tracking – see Chop’s post in the comments section!)
  • Additional latency. The experience within the headset will be at least a couple of frames behind what you would experience on the Oculus Rift or HTC Vive. You will “feel” the latency in ways that you wouldn’t on a full setup.
  • Higher odds of sim sickness. If you’re sensitive to motion sickness, the added latency may cause you to feel uncomfortable. Bear in mind that this can really ruin someone’s day! This is not a setup for public demos.

Getting Started

1. Setup your Google Cardboard with Leap Motion Controller. Attach the VR Developer Mount to the headset using the included adhesives. Once the Leap Motion Controller is properly mounted, use the USB extender to plug the controller into your computer.

2. Install and setup VRidge. See the full guide here or watch this video:

3. Install and setup SteamVR. See the full guide here or watch this video:

4. Install the Leap Motion Orion software.

5. Download and run Blocks through VRidge. If your setup is working properly, you should be able to play with Blocks in the headset.

6. Download the Unity Core Assets and Modules. You’re ready to build an incredible experience with your VR prototyping kit. Learn more about how the different Modules work in this blog post. When your project is ready, we’d love to feature it on our Developer Gallery.

Whether you have a small hardware budget or a cutting-edge setup, the future of VR is being built by indie developers just like you. The Leap Motion VR Developer Bundle is on sale until Saturday, September 10th – get yours now and build what inspires you.

The post VR Prototyping for Less Than $100 with Leap Motion + VRidge appeared first on Leap Motion Blog.

#ScreenshotSaturday Challenge: VR Musicality and Shopping Spree

$
0
0
After six weeks of intense competition, the 2015 3D Jam is now closed with 180+ submissions! Here are the winners of our final #ScreenshotSaturday Challenge round – the very best #3DJam screenshots and videos on Twitter this past week. Each of the five winners will receive an official 3D Jam T-shirt.

Now it’s time for the real fun to begin – public voting for your favorite 3D Jam projects is open until December 22! Your ratings will count alongside the 3D Jam Jury in choosing the finalists in the VR/AR and Open tracks. Head to our itch.io site to download the latest demos and vote for your favorites.

Take an Infrared #Selfie, Sculpt Pottery in VR, and 15 More Art/Music Experiences

$
0
0

Take an infrared selfie and post it @LeapMotion #3DJam. Create your dream house in VR. Weave light and sound with your bare hands. Or just paint some happy little trees! In today’s 3D Jam spotlight, we’re featuring 17 brand-new art and music experiences and utilities that will ignite your creative spark. They’re all free for download at itch.io/jam/leapmotion3djam.

(Don’t forget to rate each demo and boost your favorites in the rankings! For VR demos, make sure you check the runtime requirements on their game pages.)

ArchyTech

archytech

Creating the spaces where we live isn’t just for architects – now anyone can do it! Created by Latvian developers @GoVR_studio, ArchyTech is designed to “guide you through the fun process of building your dream house. All the tools you’ll need are at your fingertips, and Archy is there with his professional architectural suggestions.”

The game is designed as a small preview of what the future of architecture might be – one where physical design is opened up to the masses in the same way that digital design is becoming more accessible than ever. You can learn more about Go VR’s work, which includes virtual walkthroughs for architects, on their website: worldwithoutarchitect.com.

Requires: Windows, Oculus Rift

Hand Capture

hand-capture

A new motion capture and animation plugin for Autodesk MotionBuilder 2016, Hand Capture lets you “capture hand and finger movement in real time directly inside MotionBuilder.” These movements can then be assigned to the hands or fingers of 3D characters, or a wide variety of other object properties.

Requires: Windows, Autodesk MotionBuilder 2016 (trial available)

Handful of Tones

handful

Handful of Tones is a music app that lets you control the volume and pitch of a chord with your hands. According to creator and game design student Miko Sramek, it “n an abstraction of the hands rather than a direct translation – allowing for a much more organic connection between the user and the experience. Using one’s own hands to find and create harmonies, instead of just using a slider in a program or a notation system, allows for broader exploration of what is possible with tones.”

Requires: Windows

HappyLittlePainter

happy

If you’ve never watched Bob Ross smack his brush onto a canvas and instantly create a majestic evergreen, clear 27 minutes from your schedule and watch this video. You won’t be disappointed.

HappyLittlePainter is a simple, easy-to-use painting application inspired by Bob Ross and his happy little trees. Created by Finnish developer @unitycoder_com, it includes brush sounds and the ability to share your creations in an online gallery.

Requires: Windows, Mac, Linux with tool tracking enabled

#Headlight

headlight
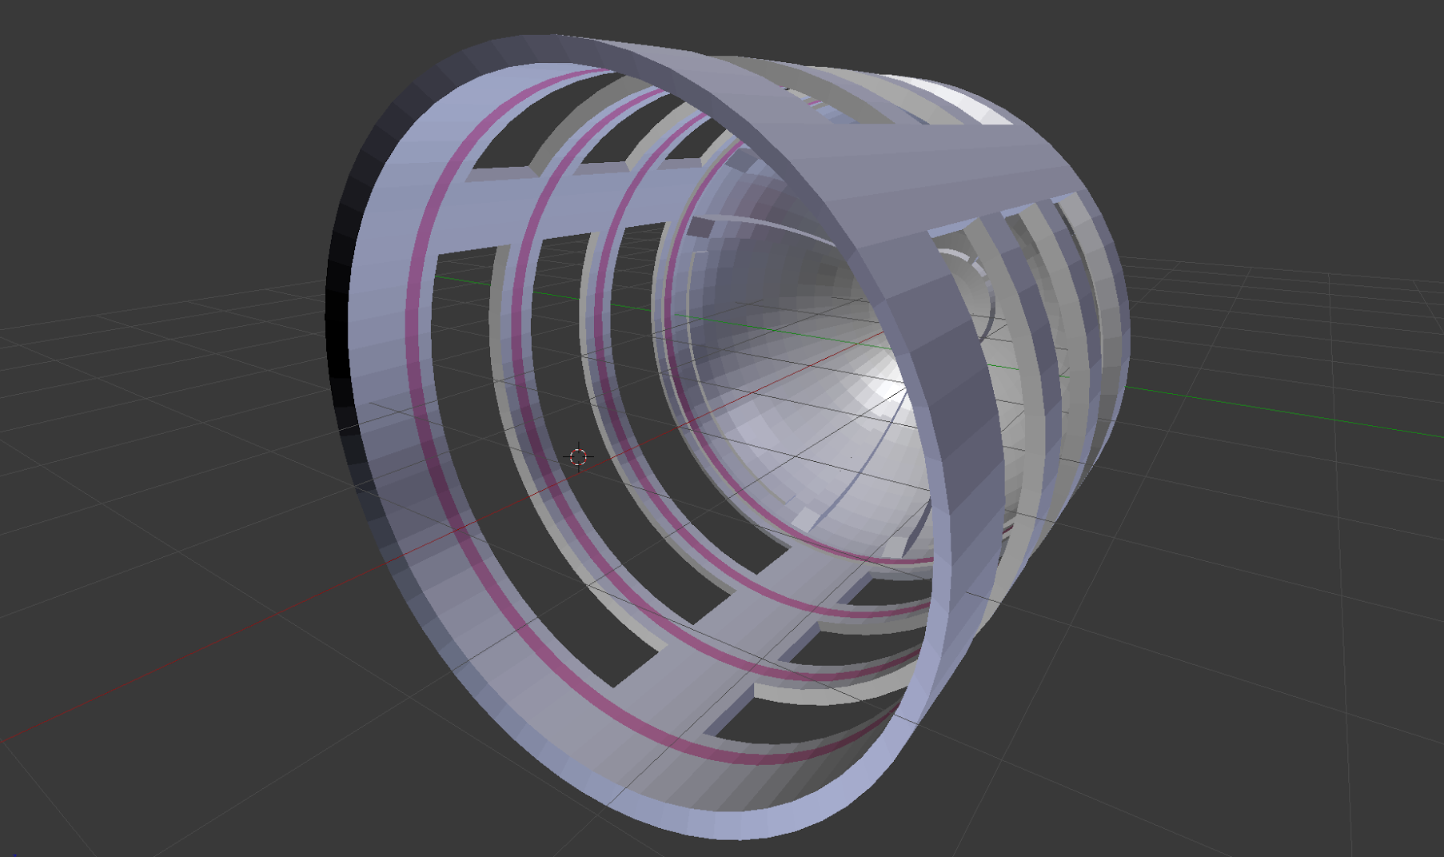
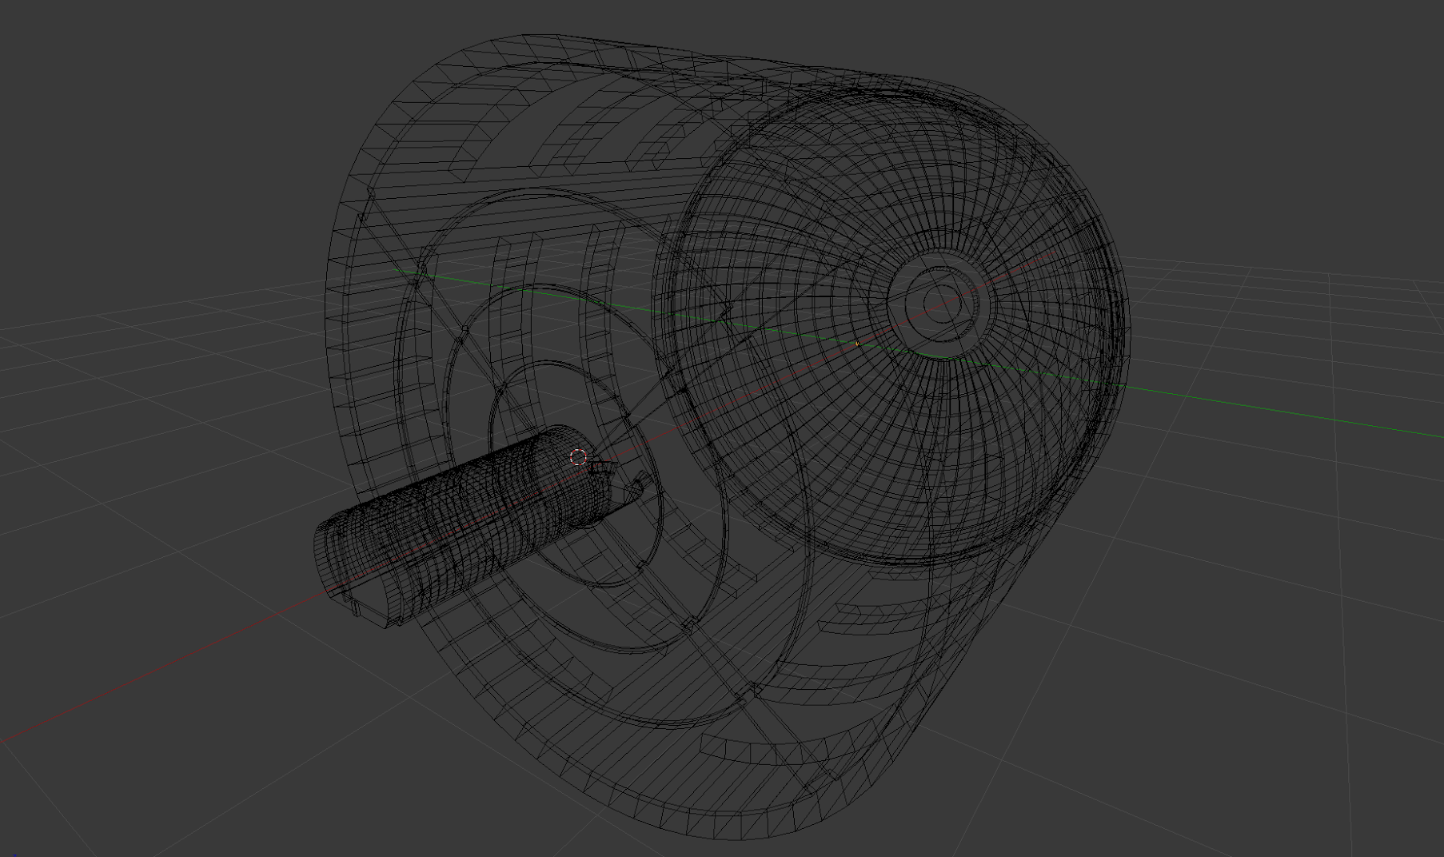
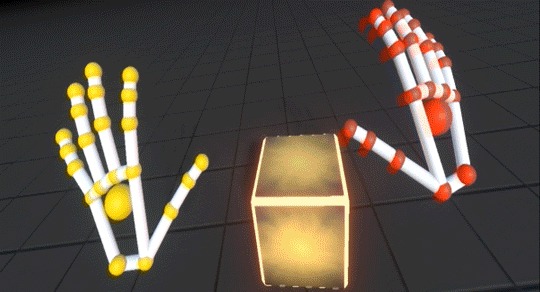
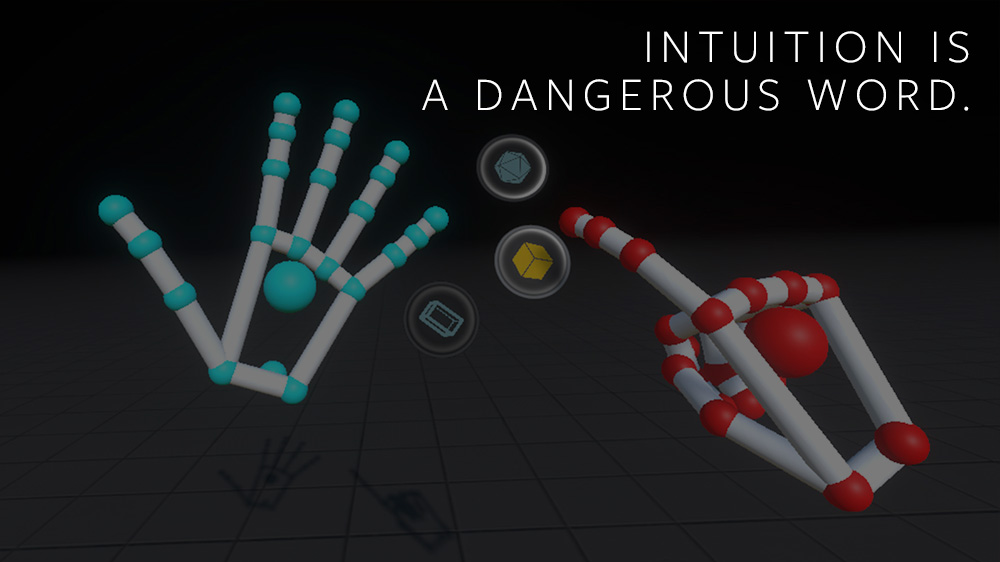
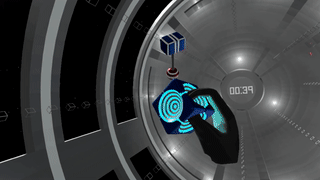
Created by Cipher Prime based on their art show We’ve Traveled So Far, #Headlight is an impressively innovative use of Leap Motion’s image passthrough – generating a Tron-style stream of liquid light that streams across the 3D objects captured by the twin infrared cameras.

Just hold up your controller like a smartphone, cycle through colors and brightness, and snap a picture. You can even share it on Twitter @cipherprime with the hashtag #Headlight. If you’ve been looking for a new profile picture, this is the way to go.

Requires: Windows, Mac

Iterazer VR

From 2014 semi-finalist Felix Herbst (Prefrontal Cortex), Iterazer is a tool to play with complexity and create intricate sculptures of light and geometry in 3D space. Spawn fractals in midair and control them with telekinesis. Artwork can be saved as panoramic images, ready to be shared both in VR and as traditional images.

Creating Iterazer involved giving the player some superpowers, said Felix: “At first, I wanted users to directly grab the controls and move them around. However, that becomes very cumbersome if you don’t want to constrain their movement – if the user pushes them out of arm’s reach, they couldn’t be retrieved anymore. By anticipating what should be grabbed (a bit like pointing at something) and then putting the ‘force’ into the moved object, these constraints aren’t necessary anymore. The artist gets empowered beyond what would be possible with physical controls.”

Requires: Windows, Oculus Rift

Jamming with Leap

jamming

The Hang is a musical instrument that superficially resembles a drum – though according to Wikipedia, its creators hate it when you call it a “hang drum.” Created by a team of four student developers, Jamming with Leap lets you create melodies on a virtual Hang.

“Our team (HisarCS.) consists of four high school students each thriving in their own given interests, music, 3D modelling and coding,” said Mert Bozfakioglu, one of the creators. “With this project, we intended to combine our interests into a product that everyone can enjoy. We learned how to use Unity, code in C#, design in Autodesk Maya, and use a Leap Motion sensor. This project was hard for all of us but with research that lasted for hours and endless nights of coding, we managed to create our first instrumental project.”

Requires: Windows, Mac, Linux

#LivingArchive

livingarchive

Originally presented as an interactive art installation in October in Birmingham, UK, The Phantom of JHB’s Sculpture #LivingArchive lets you navigate a 3D object in a hologram-like environment, using the classic Pepper’s ghost technique. The setup includes an Arduino, Macbook Pro, and a small LED Projector.

Requires: MacBook Pro, Arduino, Ultrasound sensor HC-SR04, Processing, Pure Data Extended

LMix

An open source 3D drop-music game, LMix lets you hit notes flying through space. This student project is fully open source with an MIT license, and includes songs from a number of different genres.

Requires: Mac, Windows

Lyra

Lyra is a virtual playground for musicians that lets you create music in VR. Created by Metanaut, a newly formed VR studio based in Taipei, Taiwan and Vancouver, Canada, it lets you chain chords, melodies, and instruments together in complex webs.

“We’re rethinking the music making process from the ground up for VR, rather than trying to translate existing paradigms to VR,” said Dilun Ho, one of the creators behind Lyra. “You can place and interact with customized instruments anywhere in 3D space. It’s a whole new fun immersive experience in composing and playing music.” You can sign up for their newsletter and follow the project at lyravr.com.

Requires: Windows, Oculus Rift

PaintThrush

Built in your browser with the LeapJS library, PaintThrush is a peaceful art app that creates procedurally generated birds. It was created in a single night by Kate Compton, a PHD student at UC Santa Cruz who previously worked on SimCity and made the planets on Spore. “I like procedural generation,” she told us, “and letting the computer do the hard work.”

Recommended: Google Chrome

Pensato

pensato

Ableton Live is one of the most powerful digital tools in a musician’s arsenal. But what if you could bring that power into VR? Designed for people familiar with digital music workflows, Pensato “brings the musical performance capabilities of Ableton Live into a VR environment and allows an artist to see audio-reactive changes in their performance.” This means that you can interact with widgets in VR that correspond directly with musical sequences and audio parameters linked from Ableton Live.

Pensato was originally conceived as a project for creator Byron Mallet’s Master’s thesis – at the time, using a set of VR gloves. Having rebuilt Pensato for the 3D Jam, Byron said that “it continues to surprise me how difficult it is to design user interfaces in 3D space for VR applications. By removing the ability a mouse gives you to decide whether to interact or not interact with the environment, and instead have a hand that is constantly in an intractable state, forces you to consider how to layer and reveal parts of  the interface in order to reduce the chance of accidentally triggering elements.” This is a design challenge that VR developers will need to continue imagining their way through as VR continues to evolve.

Requires: Windows, Ableton Live (30 day trial available), Python 2.7LoopMidi (optional), Showtime-Live (included in download)

Raybeem – Lightshow VR

raybeem

Created by LA-based game developers Sokay, Raybeem is “a VR app by ravers for ravers.” You can listen to the music of your choice in a variety of mesmerizing environments that react to the frequencies of the audio.

“In creating Raybeem, I was experimenting with a familiar idea (music with visualizations) with a new context (virtual reality),” said developer Bryson Whiteman. “I could explain the idea to people, but showing them personally is when they really understood it. I didn’t expect to get such positive reaction from people from such a rough execution.” You can learn more about Sokay’s work (which includes “a game about a tank that shoots flowers that makes people happy and another about a cop eating donuts raining down from the sky”) by downloading their free zine from zine.sokay.net.

Requires: Windows, Oculus Rift

Rhythm’n Dream

rythm

While some music games are built mainly around player reaction times, @CarniBlood wanted to build a game that required understanding and following the beats. “For now,” he said, “it’s been particularly concocted as a tool for kids to help them learning music: entertaining enough to focus, rewarding enough to persevere, with adorable animals acting like a teacher, giving guidance only when needed.”

Requires: Windows

VREZ

Rez is a classic game for the Sega Dreamcast and PlayStation 2 that combined rail shooter and musical synthesis, leading to some trippy synesthetic sequences. Polish indie developer Mindhelix decided to bring that vibe into VR with their own rhythm-based action shooter. They plan to keep working on bringing new sounds and visualizations to the table, so be sure to leave comments on their game page.

Requires: Windows, Oculus Rift

VR Guitar

Through Zach Kinstner’s #DevUp video series, we’ve watched VR Guitar evolve from an elegant concept to a powerful instrument that uses cutting-edge UX/UI design. While the virtual strings resemble a guitar, you can strum through dozens of different kinds of instruments! No previous experience with a real guitar is required, so dive in!

Requires: Windows, Oculus Rift

#ScreenshotSaturday Challenge: Alien Spiders and Data Pools

What Makes a Spoon a Spoon? Form and Function in VR Industrial Design

$
0
0

Martin Schubert is a VR Developer/Designer at Leap Motion and the creator of Weightless and Geometric.

In architecture school, we had many long discussions about things most non-designers probably never give much thought to. These always swung quickly between absurdly abstract and philosophically important, and I could never be sure which of the two was currently happening.

One of those discussions was about what makes a spoon a spoon. What is it that distinguishes a spoon from, say, a teapot? Is it the shape, a little bowl with a handle? Is it the size, able to be held in one hand? The material? Would it still be a spoon if it were 10 ft long or had sharp needles all over or if it were made of thin paper? What gives it its ‘spoonyness’?

spoon

After much discussion (and more than a few ‘Why are we talking about this again?’ sighs) we settled on a few things. In a way, we define a spoon by its ability to fulfill a function – a handheld tool for scooping and stirring. You could use something that we wouldn’t call a spoon, say a baseball cap, to scoop and stir. But that doesn’t mean we would call the baseball cap a spoon!

Leaving the more difficult conversation surrounding the nature of names, symbols, and even the discrete distinction between things in reality aside, we had found a small foothold to work from – defining through purpose. A spoon, it seems, is the physical manifestation of a concept. The result of needing an object to fulfill the function of handheld scooping and stirring. And more specifically a spoon (as opposed to a baseball cap being used like a spoon) is an object designed with that function as its driving principle.

“Form Follows Function”

This line of thinking is what eventually led to the famous one liner associated with modernist architecture and industrial design: form follows function. That a thing, from a spoon to a skyscraper, should derive its shape from its purpose or function.

Physical actions like scooping, stirring, cutting, shading, connecting, pushing or pulling serve as solid foundations for the design of an object’s form. Factoring in real-world physical forces – compression stress, tension, shear, brittleness, bending strength – we can get a pretty clear idea of how thick a plastic spoon’s handle should be to avoid easily snapping.

Similarly ergonomics – our understanding of the human body and how to optimize its interactions with other parts of a system – gives us another filter to narrow down an object’s form. A spoon’s handle has a direct relationship to the shape of a grasping human hand, because to perform its function well it must be comfortable to hold.

This sort of design thinking – how best an object used by a human can serve a physical function(s) under physical constraints – has literally shaped most of the objects we interact with every day. It has been an unquestioned driving force behind most 3D industrial design since we first started sharpening sticks and rocks.

forces
Ergonomics + Physical Functions + Physical Constraints

Designing Nonexistent Objects

And then along comes virtual reality. An inherently 3D medium requiring designed virtual 3D objects, but without the limitations and guidance of physical functions. Or physical constraints. What then makes a spoon a spoon in VR? Or in other words, what allows a spoon in VR to perform its function of being held, scooping and stirring?

Let’s look at scooping and stirring first. Suddenly the spoon’s shape becomes much less important. Import a 3D model of a spoon into Unity and you’ll be able to see the mesh in full 3D but it won’t do much else. To use its shape to scoop and stir we would need to involve a physics engine. We could assign the spoon a rigid body and some colliders to approximate its shape and then do the same for anything we’d want the spoon to interact with. All this and we’d still have a rather clunky spoon, capable of crudely pushing around other rigid objects within the physics simulation.

Let’s say we want to use the spoon to scoop some ice cream into a bowl. It’s possible using only physics simulations, but this is ridiculously inefficient. We would need to use things like softbody simulations or particle-based systems which are extremely computationally expensive.

flex

Instead, we might want to look at what we’re trying to achieve with this virtual spoon and then use the tools within the game engine to achieve that goal. For instance, we could write a script which would attach a scoop of ice cream to the spoon when it entered the tub trigger zone, and drop the scoop when the spoon entered the bowl trigger zone.

scoops
‘Scoops’ by Reddit user /u/Cinder0us

In this example, the spoon’s shape (or mesh) is completely separate from its function of scooping and stirring, which is handled through scripts and trigger zones. We could replace the spoon mesh with a teapot mesh and it would still function the same (though that would be really weird). In VR, unless we’re using only physics simulations, an object’s form is completely divorced from its function.

So then what should the driving force behind virtual object industrial design be? What should virtual form follow?

Well let’s look at that third function of our physical spoon – being held. There are many ways we could handle grabbing a virtual spoon within a VR experience. From the crudest, touching the spoon snap attaches it to your hand/controller, to an extremely nuanced simulation of real-life grabbing as detailed in building the Leap Motion Interaction Engine.

blocks
Leap Motion’s Interaction Engine allows human hands to grab virtual objects like physical objects

Once again, however, the shape of the virtual spoon doesn’t actually allow the grabbing to occur. It’s still handled through scripts and approximated colliders. But there is one very important role that the virtual spoon’s shape does fulfill – it signals to the user that it should be able to be picked up. And how does it do that? There are two closely related terms which might offer some guidance: skeuomorphism and affordance.

Skeuomorphism

Skeuomorphic designs are ones which retain ornamental design cues from structures that were necessary in the original design. For instance, using a postal mailbox to represent an email inbox or an envelope to represent an email. In VR, skeuomorphism is instantly appealing since, unlike with desktop or mobile, we don’t have to abstract 3D objects into 2D. We could actually recreate the mailbox as it exists in the physical world – complete with physically simulated hinges and collisions and physical envelopes representing email inside.

mailbox
A physical mailbox and examples of 2D and 3D skeuomorphic representations.

Job Simulator by Owlchemy Labs is a great example of skeuomorphic VR design. The entire premise of the experience is to simulate (in a cartoony, videogame way) real environments and props. It works incredibly well as an intuitive experience for new VR users. Once they’ve figured out how to pick things up using the HTC Vive controller’s trigger, users are off to the races. They don’t need to be told how to use the phone in the office level. They just grab it and hold it to their ear the same way they’ve done hundreds of times with a real phone!

However, despite the advantage of instant familiarity when skeuomorphism is used as a primary design methodology, it’s limiting – even in VR where we can recreate physical objects in full 3D. When understood in reference to real-world counterparts virtual objects will never be able to fulfill all of the expectations users have.

For instance, in building Job Simulator, developer Devin Reimer estimates it took 500 hours alone to make the liquid subsystems work convincingly. Approximating heat transfer from hot and cool liquids, mixing colored liquids together and allowing users to slosh them around took a huge amount of development time and this was only to meet the minimum cartoonish requirements for believability. As Alex Schwartz, CEO of Owlchemy Labs, said “Watching playtesters do a thing that they expect to work in real life and then seeing that it doesn’t, that’s how our to do list fills up.”

job-simulator
Job Simulator by Owlchemy Labs and their liquids subsystem

Using purely skeuomorphic design in VR casts the real world as an unattainable and unnecessary reference point for a medium with far more to offer. However, we also shouldn’t just ignore the physical world when designing for VR. Affordances are the critical functional component that designers need to graft from the physical world to create intuitive VR interactions.

Affordance

First defined in 1977 by psychologist James J. Gibson, and later popularized by Donald Norman The Design of Everyday Things, an affordance is “the possibility of an action upon an object.” For example, the handle on a tea cup affords the action of picking up the cup, just as the raised shape of a button might afford being the button being pushed.

Affordances are suggestions of actions a user could take. These suggestions are created by the sensory characteristics of an object. (It’s worth noting that an affordance refers to the relationship between the object and the user, not the specific components of the object itself.)

Physical interface elements like handles, buttons, switches, and dials – and the actions they afford – have been in use for centuries. As human beings, we understand them from an early age as we explore the physical world around us. Digital interface elements like scroll bars, clickable buttons, and more recently swipeable and pinchable elements have only existed for a very short time. When the personal computer was first introduced in the 1980’s, the desktop (even in name) and much later the first iOS were far more skeuomorphic than anything we would see on devices today.

mac-ios
The Macintosh’s desktop and earlier versions of iOS apps.

Skeuomorphism has been a necessary design stepping stone for teaching users how to interact with new technologies. It acts as a set of comforting training wheels for users as they begin to understand the language and patterns of a new platform. Today, the pace of new tech adoption has increased dramatically. Seeing children glued to screens at airports or in waiting rooms, it’s clear that swiping and tapping has become almost as common to them as grabbing a handle or flipping a switch.

We learn fast, but we are still in the early days of VR. We may again need to lean a little toward the skeuomorphic side of design to ease users into a virtual world which feels both exotic and familiar, new but filled with expectations from a lifetime of 3D experience. Our goal though should be to experiment to find new affordances native to VR which could not have been possible in the real world.

A great example of this is the ‘infinite backpack’ used in Fantastic Contraption. Once users pull a wooden strut out from over their shoulder the affordance is clear. Suddenly they’re grabbing and building much more efficiently than they ever could have in the real world.

infinite-backpack
The infinite backpack in Fantastic Contraption

Thinking back to our spoon, how could its function of scooping and stirring be better fulfilled in VR? Perhaps, as with the struts in Fantastic Contraption, by pulling the ends apart a user could elongate it so that it could scoop and stir at a distance. Using known affordances like pulling – and evolving them so that pulling now allows something new like infinite material elongatation – is one way designers can leverage users’ experience with the real world to create intuitive yet magical moments only possible in VR.

Industrial design and architecture took their first steps into the virtual world with the rise of 3D games over the past couple of decades. However, aside from a few notable exceptions, they’ve been mostly representative. Set dressing for the real game of moving a character through an obstacle course. Now for the first time users will experience virtual objects and architecture 1:1 as they do real things and spaces. Perceptually the line between the physical and the virtual has started to blur and the distinctions will only become more fluid with the advance of VR and the rise of AR. Three-dimensional design has a blank canvas like never before in history.

We’ve already seen some really interesting explorations of this newfound freedom. Cabibbo’s gooey creations, Funktronic Labs’ pop-up work table and Frooxius’ Sightline: The Chair all take advantage of properties unique to VR. Satisfyingly reactive squishiness, holographic there-when-you-need-it-gone-when-you-don’t controls and messing with object permanence are just scratching the surface of what’s now possible.

isaacfunktronicsightline

What can architecture become without the constraints of real world physical forces, gravity, materiality, light, acoustics, or even the requirements of staying static or Euclidean? What can industrial design become when there literally is no spoon (sorry, you knew it was coming)? I don’t know, but I’m excited to find out.

non-euclidean
An example of impossible, non-Euclidean spaces in VR.

The post What Makes a Spoon a Spoon? Form and Function in VR Industrial Design appeared first on Leap Motion Blog.


Explorations in VR Design

$
0
0

Until the rise of VR, we lived on the edges of a digital universe that was trapped behind glass screens. Immensely powerful and infinitely portable, but still distant and inaccessible.

Now the glass is breaking. We can see and reach into new worlds, and the digital is taking substance in our reality. You are now one of its many artists, architects, sculptors, and storytellers.

Designing a fluid and seamless experience for VR/AR is impossible without a deeper understanding of the medium. But VR/AR is still largely unexplored. There are no hard-and-fast rules. That’s why this is not a technical paper or “best practices” documentation. It’s a journey through the work of hundreds of developers and designers along the bleeding edge.

Over the next few months, we’re going to explore every aspect of VR/AR design. How to architect a space. How to design groundbreaking interactions. And how to make your users feel powerful. From world and sound design, to experimental hand interfaces and objects, everything you need to build a more human reality.

All the world’s a stage, and you are now its set designer. In our first Exploration, we look at some ideas around architecting spaces, and how we prototype new worlds. Learn more in World Design: Setting the Stage.

The post Explorations in VR Design appeared first on Leap Motion Blog.

World Design: Setting the Stage

$
0
0

Explorations in VR Design is a journey through the bleeding edge of VR design – from architecting a space, to designing groundbreaking interactions, to making users feel powerful.

Designing the stage where your users will play is an incredibly important part of VR. Like an architect or a set designer, you have the power to create moods and experiences through a physical environment. How you structure that space will depend entirely on how users can interact and explore it.

Physical Structure and Human Expectations

Your space will typically have foreground, middleground, and background elements. The right balance can create a spine-tingling sensation of presence and guide your user. The foreground includes objects and interfaces that you can interact with directly. Your hands always occupy the foreground.

Within the middle distance of the scene, there may be elements that you can bring into the foreground, or which frame the environment. Finally, the background (or horizon) establishes the broader world where your experience is set. (For a more in-depth look at these three layer depths, see Tessa Chung’s posts Making Sense of Skyboxes in VR Design and How to Design VR Skyboxes.)

In his book The Ecological Approach to Visual Perception, James J. Gibson breaks terrain features into eight categories – opening, path, obstacle, barrier, water margin, brink, step and slope. Each feature is a building block that affords different responses.

  • Ground can be open or cluttered. Open environments let you move in any direction, while cluttered environments guide locomotion through openings.
  • Paths afford motion between other terrain features.
  • Obstacles are human-scaled objects that afford collision.
  • Barriers, such as walls, are a kind of obstacle that tends to block vision as well as movement.
  • Water margins prevent locomotion.
  • Brinks, such as the edge of a cliff, are dangerous. Users will either avoid these places or plunge into them with reckless abandon.
  • Steps afford both descent and ascent.
  • Slopes also imply descent or ascent, but might be too steep or slippery.

In developing your space, you can also think about how it’s experienced at the human scale –  in terms of attention, structure, and affordance. As you move your gaze through the scene, where does it land? Where do you focus? How does the structure of the space around you make you feel and how does it influence you to move? How do the objects and scene elements you focus on communicate their purposes and statuses? These questions are informed by the physical structure of the space, and in turn identify problems (and potential solutions) with that space.

Prototyping Your World

Depending on your concept, world design may not be your first consideration. For example, the main focus in designing Blocks was the core interactions – pinch and grab. On the other hand, world design was the starting concept behind our spaceflight prototype VR Cockpit.

Real-world cockpits are incredibly complex, and we wanted to provide the same wonderful sensation of flight with a more streamlined set of interfaces. We already had the buttons and sliders and text displays as assets from earlier projects, so we needed an environment where these could be taken to a whole new level. As a result, we prototyped spaces first, rather than interactions.

To create VR Cockpit, our team rapidly designed different geometric models in Maya and exported them to Unity. With this approach, we were able to quickly experience and iterate different console styles. We ultimately chose a design where the consoles are curved, reflecting how your arms naturally swing in a radius.

cockpit-set-design

The Training Room in Martin Schubert’s Weightless: Remastered was similarly driven by the need to house a particular experience – throwing objects and destroying targets.

weightless-space-prototype-2weightless-space-prototype

After trying some 360° environments, he quickly found that the extra space was a distraction, as the targets were scattered. On the other extreme, linear tunnel-like spaces that focused the user’s view forwards caused the projectile to bounce around too much. Ultimately he converged on a very wide cylinder. This gives the user 180° of open space, with targets both above and below the platform they’re standing on.

weightless-space-prototype-6weightless-space-prototype-3

The final result was an open space where the user’s attention is funneled towards the targets:

The key lesson here? Prototype, test, and iterate. We’ve often encountered spaces and sets that look great on a monitor, but feel weird or claustrophobic in VR. There is no substitute for actually getting your eyes into the space and looking around.

Next week, we’ll take a look at one of the most dangerous words in the English language – “intuitive.” Plus a deep dive into the creation of Blocks, and what it all means for the future of VR/AR.

The post World Design: Setting the Stage appeared first on Leap Motion Blog.

Building Blocks: A Deep Dive Into Leap Motion Interactive Design

$
0
0

Explorations in VR Design is a journey through the bleeding edge of VR design – from architecting a space, to designing groundbreaking interactions, to making users feel powerful.

In the world of design, intuition is a dangerous word. In reality, no two people have the same intuitions. Instead, we’re trained by our physical experiences and culture to have triggered responses based on our expectations. The most reliable “intuitive actions” are ones where we guide users into doing the right thing through familiarity and affordance.

orion_6

This means any new interface must build on simple interactions that become habit over time. These habits create a commonly shared set of ingrained expectations that can be built upon for much more powerful interfaces. Today, we’ll look at broad design principles around VR interaction design, including the three types of VR interactions, the nature of flow, and an in-depth analysis of the interaction design in Blocks.

3 Kinds of Interactions

Designing for hands in VR starts with thinking about the real world and our expectations. In the real world, we never think twice about using our hands to control objects. We instinctively know how. The “physical” design of UI elements in VR should build on these expectations and guide the user in using the interface.

There are three types of interactions, ranging from easy to difficult to learn:

spectrum

Direct interactions follow the rules of the physical world. They occur in response to the ergonomics and affordances of specific objects. As a result, they are grounded and specific, making them easy to distinguish from other types of hand movements. Once the user understands that these interactions are available, there is little or no extra learning required. (For example, pushing an on/off button in virtual reality.)

Metaphorical interactions are partially abstract but still relate in some way to the real world. For example, pinching the corners of an object and stretching it out. They occupy a middle ground between direct and abstract interactions.

Abstract interactions are totally separate from the real world and have their own logic, which must be learned. Some are already familiar, inherited from desktop and mobile operating systems, while others will be completely new. Abstract interactions should be designed with our ideas about the world in mind. While these ideas may vary widely from person to person, it’s important to understand their impact on meaning to the user. (For example, pointing at oneself when referring to another person would feel strange.)

Direct interactions can be implied and continually reinforced through the use of affordance in physical design. Use them as frequently as possible. Higher-level interactions require more careful treatment, and may need to be introduced and reinforced throughout the experience. All three kinds of interactions can be incredibly powerful.

Immersion and Flow

As human beings, we crave immersion and “flow,” a sense of exhilaration when our bodies or minds are stretched to their limits. It’s the feeling of being “in the zone” on the sports field, or becoming immersed in a game. Time stands still and we feel transported into a higher level of reality.

Creating the potential for flow is a complex challenge in game design. For it to be sustained, the player’s skills must meet proportionately complex challenges in a dynamic system. Challenges build as the player’s skill level grows. Too challenging? The game becomes frustrating and players will rage-quit. Not challenging enough? The game is boring and players move on. But when we push our skills to meet each rising challenge, we achieve flow.

flow-channel

To design for flow, start with simple physical interactions that don’t require much physical or mental effort. From there, build on the user’s understanding and elevate to more challenging interactions.

Core Orion Interactions

Leap Motion Orion tracking was designed with simple physical interactions in mind, starting with pinch and grab. The pinch interaction allows for precise physical control of an object, and corresponds with user expectations for stretching or pulling at a small target, such as a small object or part of a larger object. Grab interactions are broader and allow users to interact directly with a larger object.

Towards the more abstract end of the spectrum, we’ve also developed a toolkit for basic hand poses, such as the “thumbs up gesture.” These should be used sparingly and accompanied by tutorials or text cues.

thumbs-up

Building Blocks! The User’s Journey

As a VR experience designer, you’ll want to include a warm-up phase where the core interactions and narrative can be learned progressively. Oculus Story Studio’s Henry and Lost begin with dark, quiet scenes that draw your attention – to an adorable hedgehog or whimsical firefly – setting the mood and narrative expectations. (Without the firefly, players of Lost might wonder if they were in danger from the robot in the forest.) Currently, you should give the viewer about 30 seconds to acclimate to the setting, though this time scale is likely to shrink as more people become accustomed to VR.

While Blocks starts with a robot tutorial, most users should be able to learn the core experience without much difficulty. The most basic elements of the experience are either direct or metaphorical, while the abstract elements are optional.

thumbs-up

Thumbs up to continue. While abstract gestures are usually dangerous, the “thumbs up” is consistently used around the world to mean “OK.” Just in case, our tutorial robot makes a thumbs up, and encourages you to imitate it.

Orion_2

Pinch with both hands to create a block. This metaphorical interaction can be difficult to describe in words (“bring your hands into, pinch with your thumbs and index fingers, then separate your hands, then release the pinch!”) but the user “gets it” instantly when seeing how the robot does it. The entire interaction is built with visual and sound cues along the way:

  • Upon detecting a pinch, a small blue circle appears at your thumb and forefinger.
  • A low-pitched sound effect plays, indicating potential.
  • When spawning, the block glows red in your hands. It’s not yet solid, but instead appears to be made of energy. (Imagine how unsatisfying it would be if the block appeared grey and fully formed when spawning!)
  • Upon release, a higher-pitched sound plays to indicate that the interaction is over. The glow on the block cools as it assumes its final physical shape.

orion_3_abridged

Grab a block. This is as direct and natural as it gets – something we’ve all done since childhood. Reach out, grab with your hand, and the block follows it. This kind of immersive life-like interactions in VR is actually enormously complicated, as digital physics has never been designed for human hands reaching into it. Blocks achieves this with an early prototype of our Interaction Engine.

orion_8

Turn gravity on and off. Deactivating gravity is a broad, sweeping interaction for something that massively affects the world around you. The act of raising up with your hands feels like it fits with the “lifting up” of the blocks you’ve created. Similarly, restoring gravity requires the opposite – bringing both of your hands down. While abstract, the action still feels like it makes sense. In both cases, completing the interaction causes the blocks to emit a warm glow. This glow moves outwards in a wave, showing both that (1) you have created the effect, and (2) it specifically affects the blocks and their behavior.

orion_6

Change the block shape. Virtual reality gives us the power to augment our digital selves with capabilities that mirror real-world wearable technologies. We are all cyborgs in VR. For Blocks, we built an arm interface that only appears when the palm of your left hand is facing up. This is a combination of metaphorical and abstract interactions, so the interface has to be very clean and simple. With only three large buttons, spaced far apart, users can play and explore their options without making irreversible changes.

Revisiting our three interaction types, we find that the essential interactions are direct or metaphorical, while abstract interactions are optional and can be easily learned:

blocks-spectrum2

  • Direct: grab a block
  • Metaphorical: create a block, press a button
  • Abstract: thumbs up to continue, turn gravity on and off, summon the arm interface

From there, players have the ability to create stacks, catapults, chain reactions, and more. Even when you’ve mastered all the interactions in Blocks, it’s still a fun place to revisit.

Text and Tutorial Descriptions

Text and tutorial prompts are often essential elements of interactive design. Be sure to clearly describe intended interactions, as this will greatly impact how the user does the interaction. Avoid instructions that could be interpreted in many different ways, and be as specific as possible.

Using text in VR can be a design challenge in itself.  Due to resolution limitations, only text at the center of your field of view may appear clear, while text along the periphery may seem blurry unless users turn to view it directly.

Another issue arises from lens distortion. As a user’s eyes scan across lines of text, the positions of the pupils will change, which may cause distortion and blurring. Furthermore, if the distance to the text varies – which would be caused, for example, by text on a flat laterally extensive surface close to the user – then the focus of the user’s eyes will change, which can also cause distortion and blurring.

The simplest way to avoid this problem is to limit the angular range of text to be close to the center of the user’s field of view. For example, you can make text appear on a surface only when a user is looking directly at the surface, or when the user gets close enough to that surface. Not only will this significantly improve readability, it makes the environment feel more responsive.

Users don’t always necessarily read static text within the environment, and tutorial text can clutter up the visual field. For this reason, you may want to design with prompts that are attached to your hands, or which appears near objects and interfaces contextually. Audio cues can also be enormously helpful in driving user interactions.

Designing for any platform begins with understanding its unique strengths and pitfalls. Next week, we’ll look at designing for Orion tracking, plus essential tips for user safety and comfort.

explorations-dangerous

The post Building Blocks: A Deep Dive Into Leap Motion Interactive Design appeared first on Leap Motion Blog.

Designing for Orion Tracking: A Quick Guide

$
0
0

Explorations in VR Design is a journey through the bleeding edge of VR design – from architecting a space, to designing groundbreaking interactions, to making users feel powerful.

Last week, we saw how interactive design centers on human expectations. Of course, it also begins with the hardware and software that drives those interactions. The Leap Motion Orion software opens up two fundamental interactions – pinch and grab. Using our Unity Core Assets detectors scripts, it’s also possible to track certain hand poses, such as thumbs-up.

In this exploration, we’ll cover some quick tips on building for the strengths of Leap Motion technology, while avoiding common pitfalls. For a more in-depth look at critically evaluating your project’s interaction design, see our post 6 Principles of Leap Motion Interaction Design.

The Sensor is Always On

As an optical tracking platform, Leap Motion technology exhibits the “live-mic” or “Midas touch” problem. Unlike a touchscreen or game controller, there is no tactile barrier that separates interaction from non-interaction.

This means that your project must include neutral zones and poses, so that users can play and explore without accidentally triggering something. This is fairly easy for physical interactions like pinch and grab. More abstract interactions, such as the thumbs-up and gravity gestures used in Blocks, should be both extremely limited in their impact and rarely a part of casual movement.

At the same time, safety should never be at the expense of speed. Except for drastic changes like locomotion, do not require a pause to begin an interaction, or your users will get frustrated.

Dynamic Feedback

The absence of binary tactile feedback also means that your experience should eliminate ambiguity wherever possible. All interactions should have a distinct initiation and completion state, reflected through dynamic feedback that responds to the user’s motions. The more ambiguous the start and stop, the more likely that users will do it incorrectly.

Our earlier guide to the interaction design in Blocks provides some insights on building interactions that provide continuous dynamic feedback. These principles have also been baked into the UI Input Module, which features a circular cursor that changes color as the user’s finger approaches the interface.

uiwidgets

In general, be sure to clearly describe intended poses and where the user should hold their hand to do that pose. If the intended interaction is a motion, make a clear indicator where the user can start and stop the motion. If the interaction is in response to an object, make it clear from the size and shape of the object how to start and stop the interaction.

Keeping Hands in Sight

If the user can’t see their hand, they can’t use it. While this might seem obvious to developers, it isn’t always to users – especially when focused on the object they’re trying to manipulate, rather than looking at their hand.

One way to approach this is to use visual and audio cues to create a clear safety zone, indicating where the hands should be placed. You can notify the user when their hands enter (or exit) the zone with a simple change in color or opacity. Another approach is to develop user interfaces that are locked to the user’s hand, wrist, or arm, as these draw user gaze more reliably than interfaces fixed in the world.

Finger Occlusion

As with any optical tracking platform, it’s important to avoid the known unknowns. Before Orion, we recommended encouraging users to keep their fingers splayed and hands perpendicular to the field of view. While this is still one of the most reliable tracking poses, the new pinch/grab interactions that we’ve built with Orion revolve around a different set of standard hand poses – ones that both feel natural and can be reliably tracked.

weightless-social-3

Nonetheless, it’s still important to encourage users to keep their hands in view, and to guide them through interactions. Be sure to avoid interactions that depend on the position of fingers when they are out of the device’s line of sight, and reward correct behaviors. This can be achieved through a range of instructions and cues – from sound and visual effects to interactive and object design.

Now that we’ve looked at optimizing for Orion, what about the human at the center of the experience? Next up, a look at user safety and comfort.

The post Designing for Orion Tracking: A Quick Guide appeared first on Leap Motion Blog.

Ergonomics in VR Design

$
0
0

Explorations in VR Design is a journey through the bleeding edge of VR design – from architecting a space, to designing groundbreaking interactions, to making users feel powerful.

What’s the most important rule in VR? Never make your users sick. In this exploration, we’ll review the essentials of avoiding nausea, positive ergonomics, and spatial layouts for user safety and comfort.

The Oculus Best Practices, Designing for Google Cardboard, and other resources cover this issue in great detail, but no guide to VR design and development would be complete without it. (See also the Cardboard Design Lab demo and A UX designer’s guide to combat VR sickness.)

Above all, it’s important to remember that experiences of sensory conflict can vary a great deal between individuals. Just because it feels fine for you does not mean it will feel fine for everyone – user testing is always essential.

Restrict Motions to Interaction

Simulator sickness is caused by a conflict between different sensory inputs, i.e. the inner ear, visual field, and bodily position. Generally, significant movement – as in the room moving, rather than a single object – that hasn’t been instigated by the user can trigger feelings of nausea. On the other hand, being able to control movement reduces the experience of motion sickness. We have found that hand presence within virtual reality is itself a powerful element that reinforces the user’s sense of space.

Remember when we said there were no hard-and-fast rules for VR design? Consider these to be strongly worded suggestions:

  • The display should respond to the user’s movements at all times. Without exception. Even in menus, when the game is paused, or during cutscenes, users should be able to look around.
  • Do not instigate any movement without user input (including changing head orientation, translation of view, or field of view). This includes shaking the camera to reflect an explosion, or artificially bobbing the head while the user walks through a scene. There are rare exceptions which we’ll cover in a future exploration on locomotion.
  • Avoid rotating or moving the horizon line or other large components of the environment unless it corresponds with the user’s real-world motions.
  • Reduce neck strain with experiences that reward (but don’t require) a significant degree of looking around. Try to restrict movement in the periphery.
  • Ensure that the virtual cameras rotate and move in a manner consistent with head and body movements.

Ergonomics

What will the digital experiences of the future look like, and how will you use them? You might imagine the large holographic interfaces in movies from Minority Report and Matrix Reloaded to The Avengers and Ender’s Game. But what looks awesome on screen doesn’t always translate well to human experience – because fictional interface designers don’t need to worry about ergonomics.

To take the most enduring example, the Minority Report interface fails by forcing users to (1) wave their hands and arms around (2) at shoulder level (3) for extended periods of time. This quickly becomes exhausting.

tumblr_nyo3nqtgmh1tslewgo1_400
This isn’t an interface. It’s a workout!

But with a more human-centered design approach, it’s possible to bring science fiction to life in other ways.

One way to avoid user fatigue is to mix up different types of interactions. These allow your user to interact with the world in different ways and use different muscle groups. More frequent interactions should be brief, simple, and achieved with a minimum of effort, while less frequent interactions can be broader or require more effort. You’ll always want to position frequently used interactive elements within the human comfort zone (explained later in more detail).

No one enjoys feeling cramped or boxed in. Our bodies tend to move in arcs, rather than straight lines, so it’s important to compensate by allowing for arcs in 3D space. That’s why many of our projects feature interfaces that are curved in an arc around the user, resembling a cockpit.

Human beings are great at gauging position in the horizontal and vertical planes, but terrible at judging depth. This is because our eyes are capable of very fine distinctions within our field of view (X and Y), while judging depth requires additional cognitive effort and is much less precise.

As a result, designing interactions for human beings means that you’ll need to be fairly forgiving of inaccurate motions. For example, a user might make a grabbing gesture near an object, rather than directly grabbing the object. In these cases, you may want to have the object snap into their hand. Similarly, continuous visual feedback is an essential component for touchless interfaces.

Throughout the development process, always keep your user’s comfort in mind from the perspective of hand, arm and shoulder fatigue. Again, user testing is essential in identifying possible fatigue and comfort issues.

For more general ergonomics guidelines, be sure to consult our post Taking Motion Control Ergonomics Beyond Minority Report along with our ergonomics and safety guidelines.

Ideal Height Range

vr-distance 
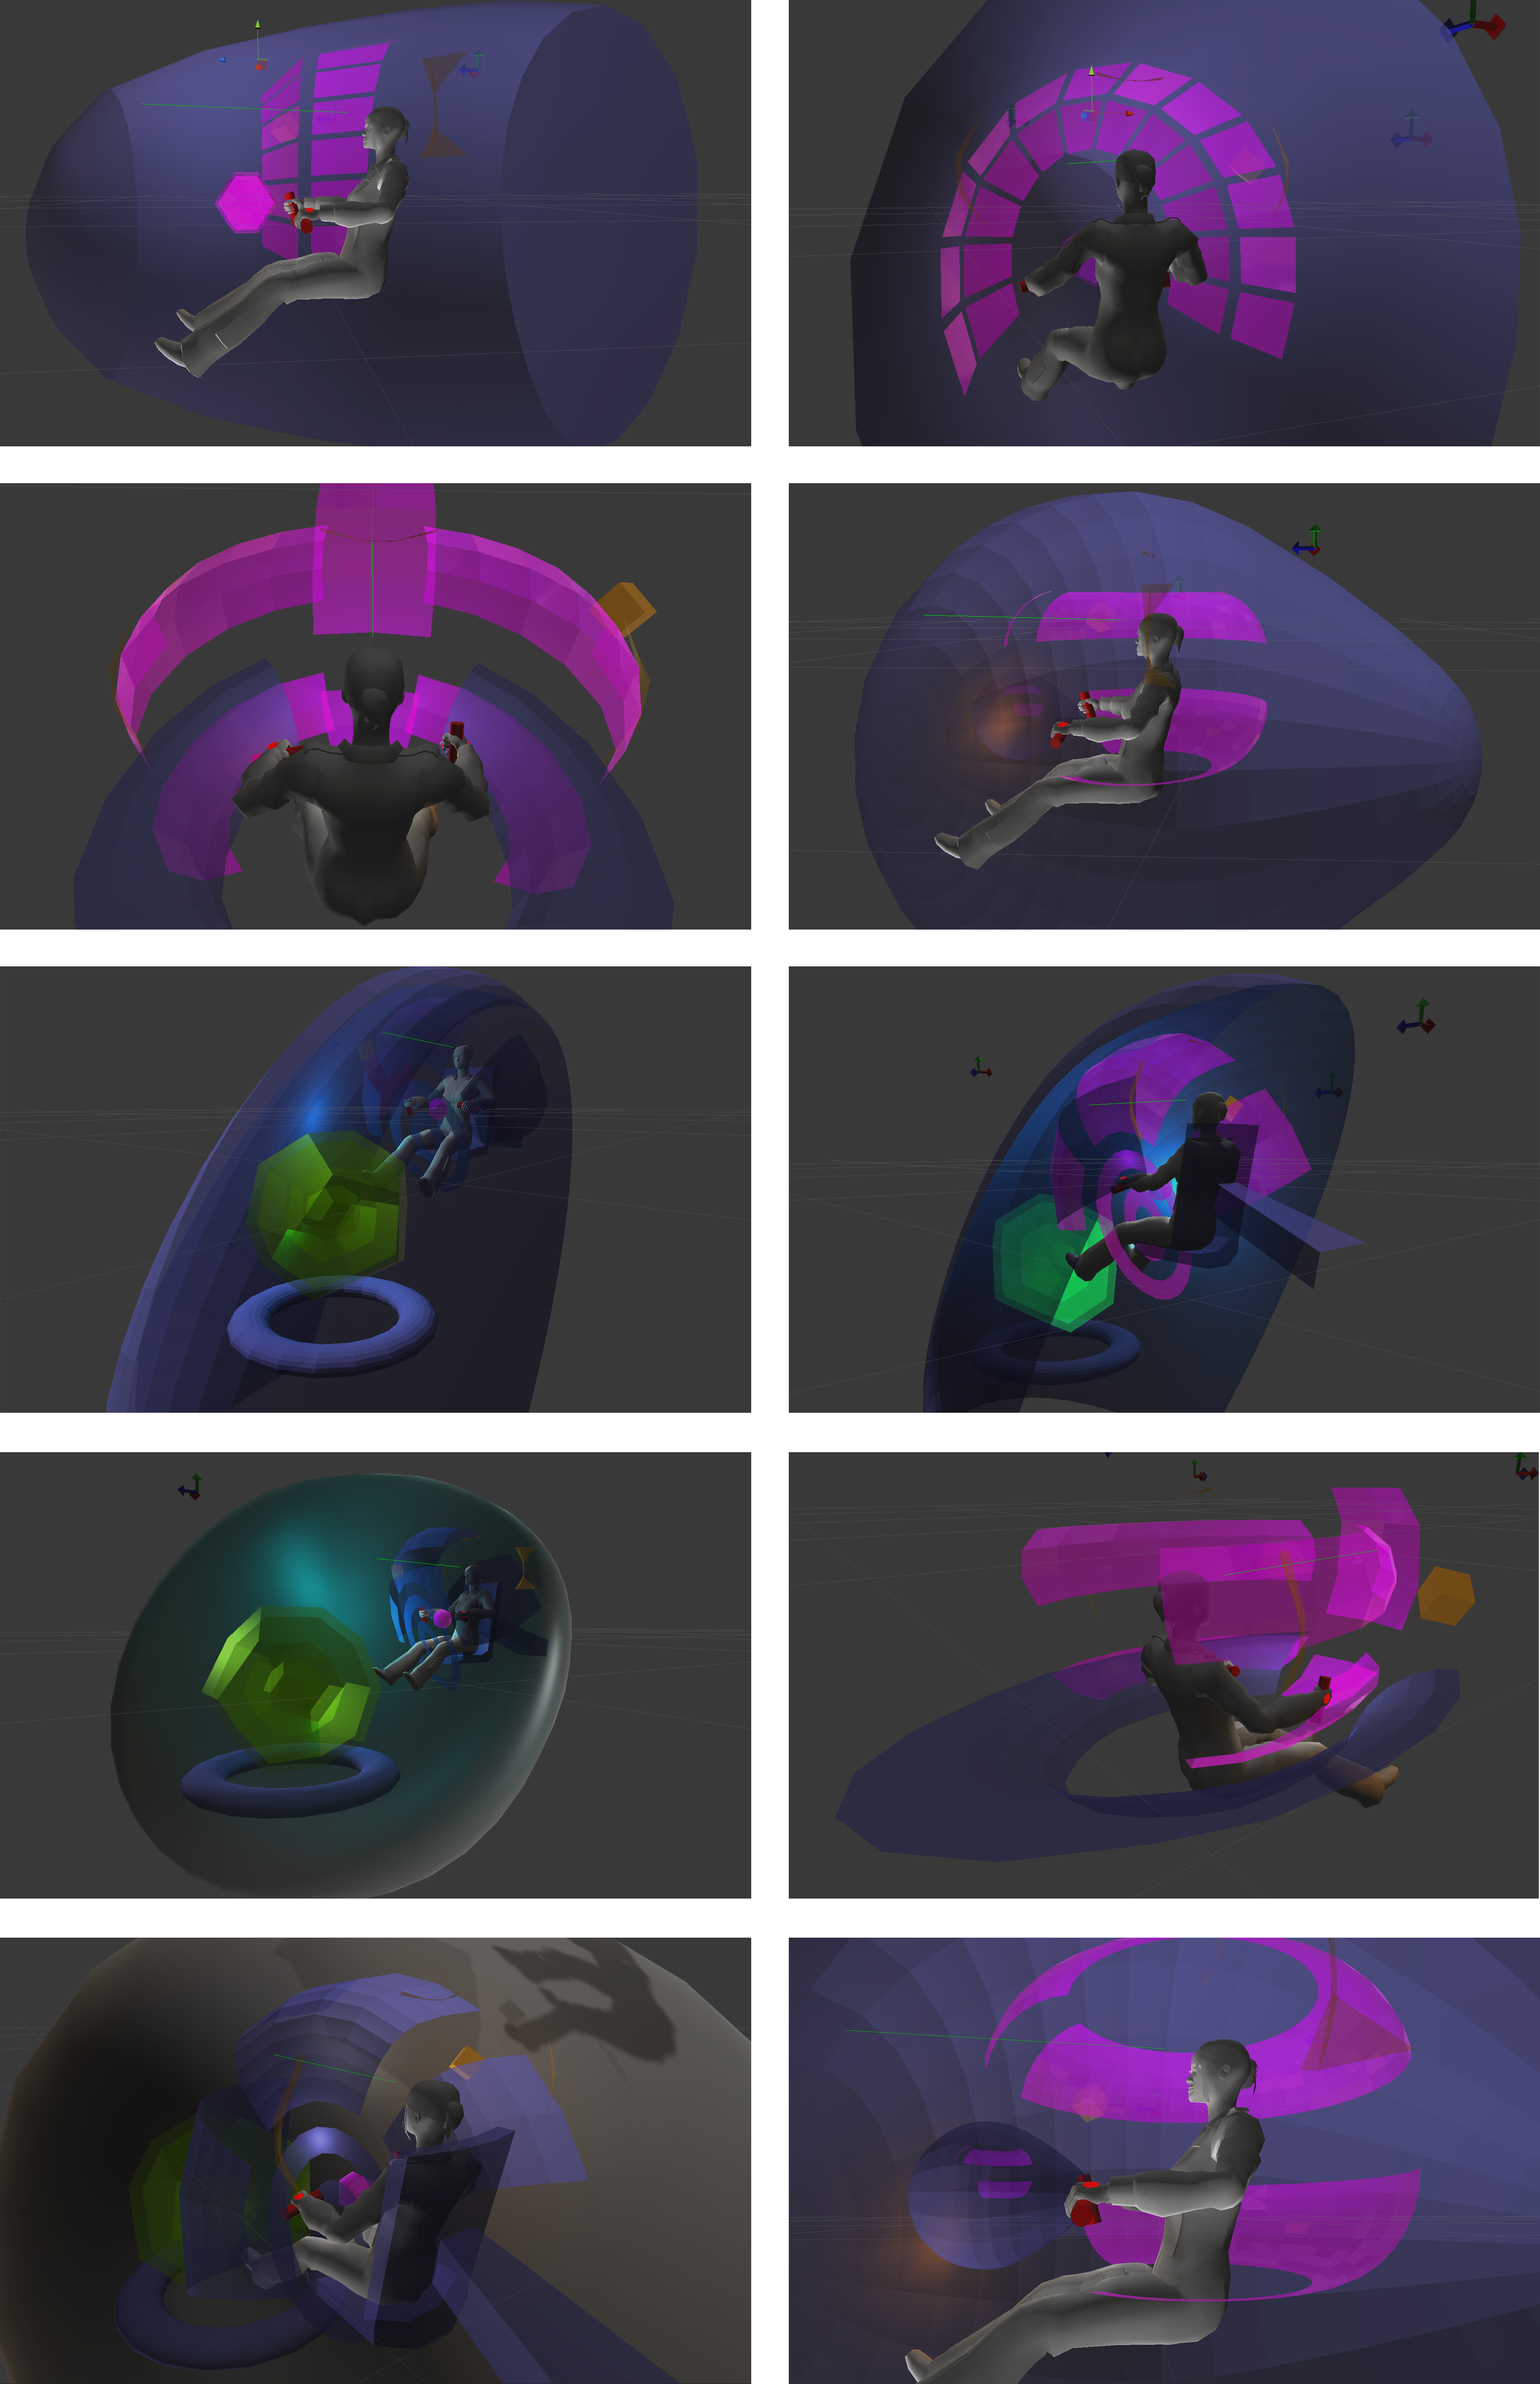
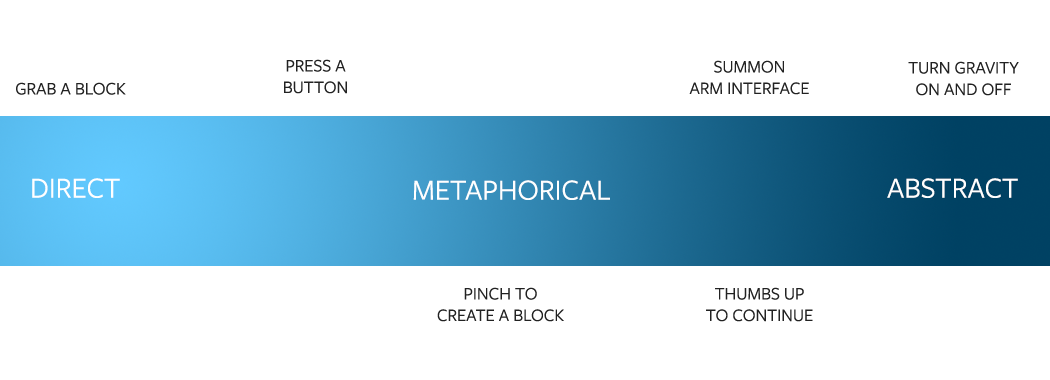
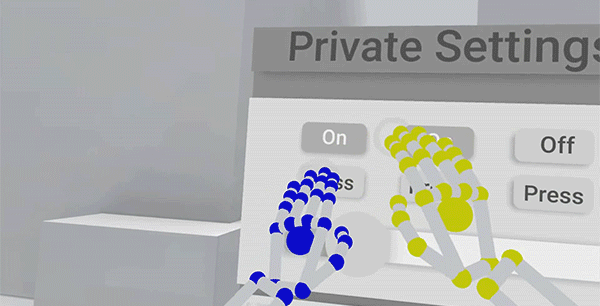
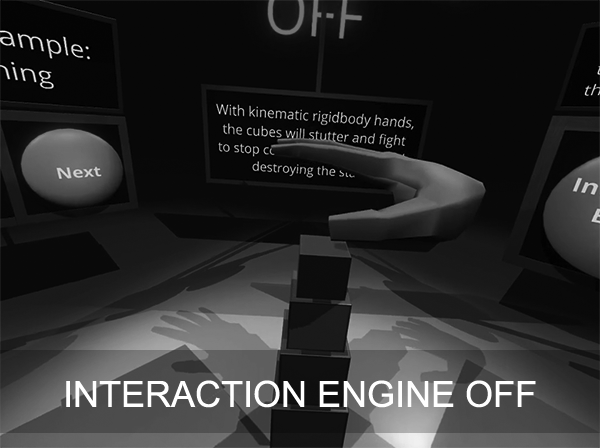
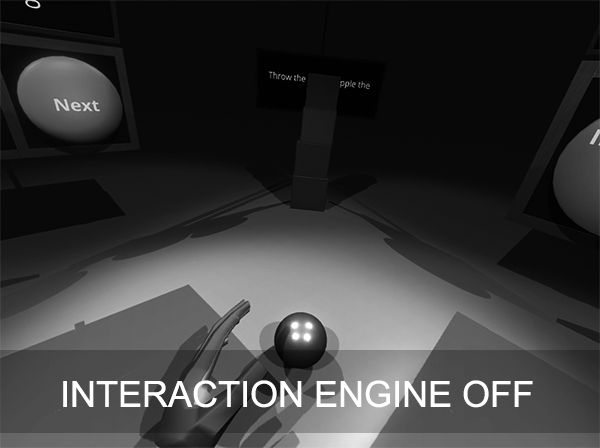
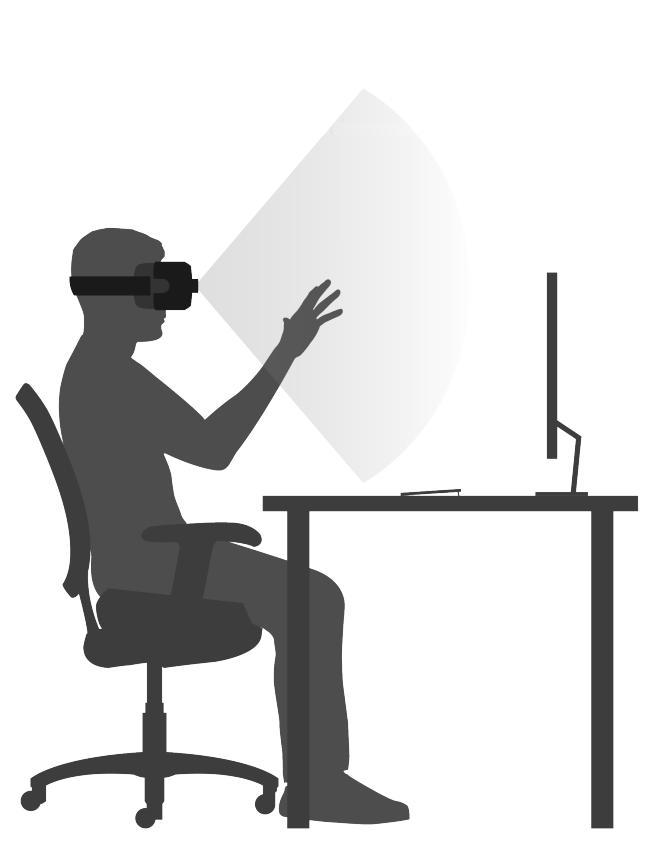
Interactive elements within your scene should typically rest in the “Goldilocks zone” between desk height and eye level. For ergonomic reasons, the best place to put user interfaces is typically around the level of the breastbone.

Here’s what you need to consider when placing elements outside the Goldilocks zone:

Desk Height or Below

Be careful about putting interactive elements at desk height or below. For seated experiences, the elements may intersect with a real-world desk, breaking immersion. For standing experiences, users may not be comfortable bending down towards an element.

Eye Level or Above

Interactive objects that are above eye level in a scene can cause neck strain and “gorilla arm.” Users may also occlude the objects with their own hand when they try to use them.

Our Interaction Engine is designed to handle incredibly complex object interactions, making them feel simple and fluid. Next week’s exploration dives into the visual, physical, and interactive design of virtual objects.

The post Ergonomics in VR Design appeared first on Leap Motion Blog.

Viewing all 481 articles
Browse latest View live