Quantcast
Channel: Leap Motion Blog
Viewing all 481 articles
Browse latest View live

Leap Motion and Ultrahaptics Join Forces

$
0
0
Ultrahaptics and Leap Motion join forces

Today, we’re announcing a strategic deal with Ultrahaptics that combines the two companies and solidifies our collective role as the world’s leading spatial interaction company.

Ultrahaptics is a long-time Leap Motion developer and the two companies have been working together for nearly six years. Their haptic technology creates tactile sensations in mid-air using ultrasonic waves. This deal will create a vertically integrated technology company that brings us that much closer to fully immersive, rich and physically intuitive virtual interfaces.

This will not in any way affect our unwavering support for the incredible Leap Motion community.

In fact, joining forces will not only lead to new and exciting products, but entirely new categories of technologies that could only come from deep collaboration between these teams.

Our two companies together will be more than the sum of their parts. At Leap Motion we’ve always been about breaking down the barriers between people and technology to reach the true potential of both. This announcement represents the next step in this quest, and we are honored to have you continue with us on this journey.

The post Leap Motion and Ultrahaptics Join Forces appeared first on Leap Motion Blog.


#BuildYourNorthStar Workshop Brings AR to Life in 48 Hours

$
0
0
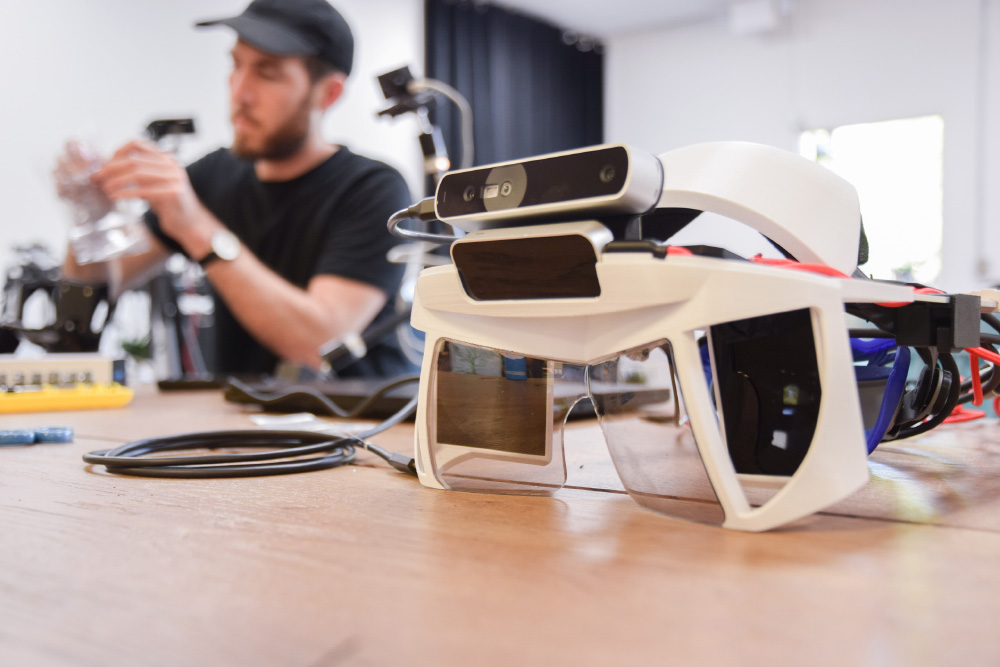
The North Star augmented reality headset.

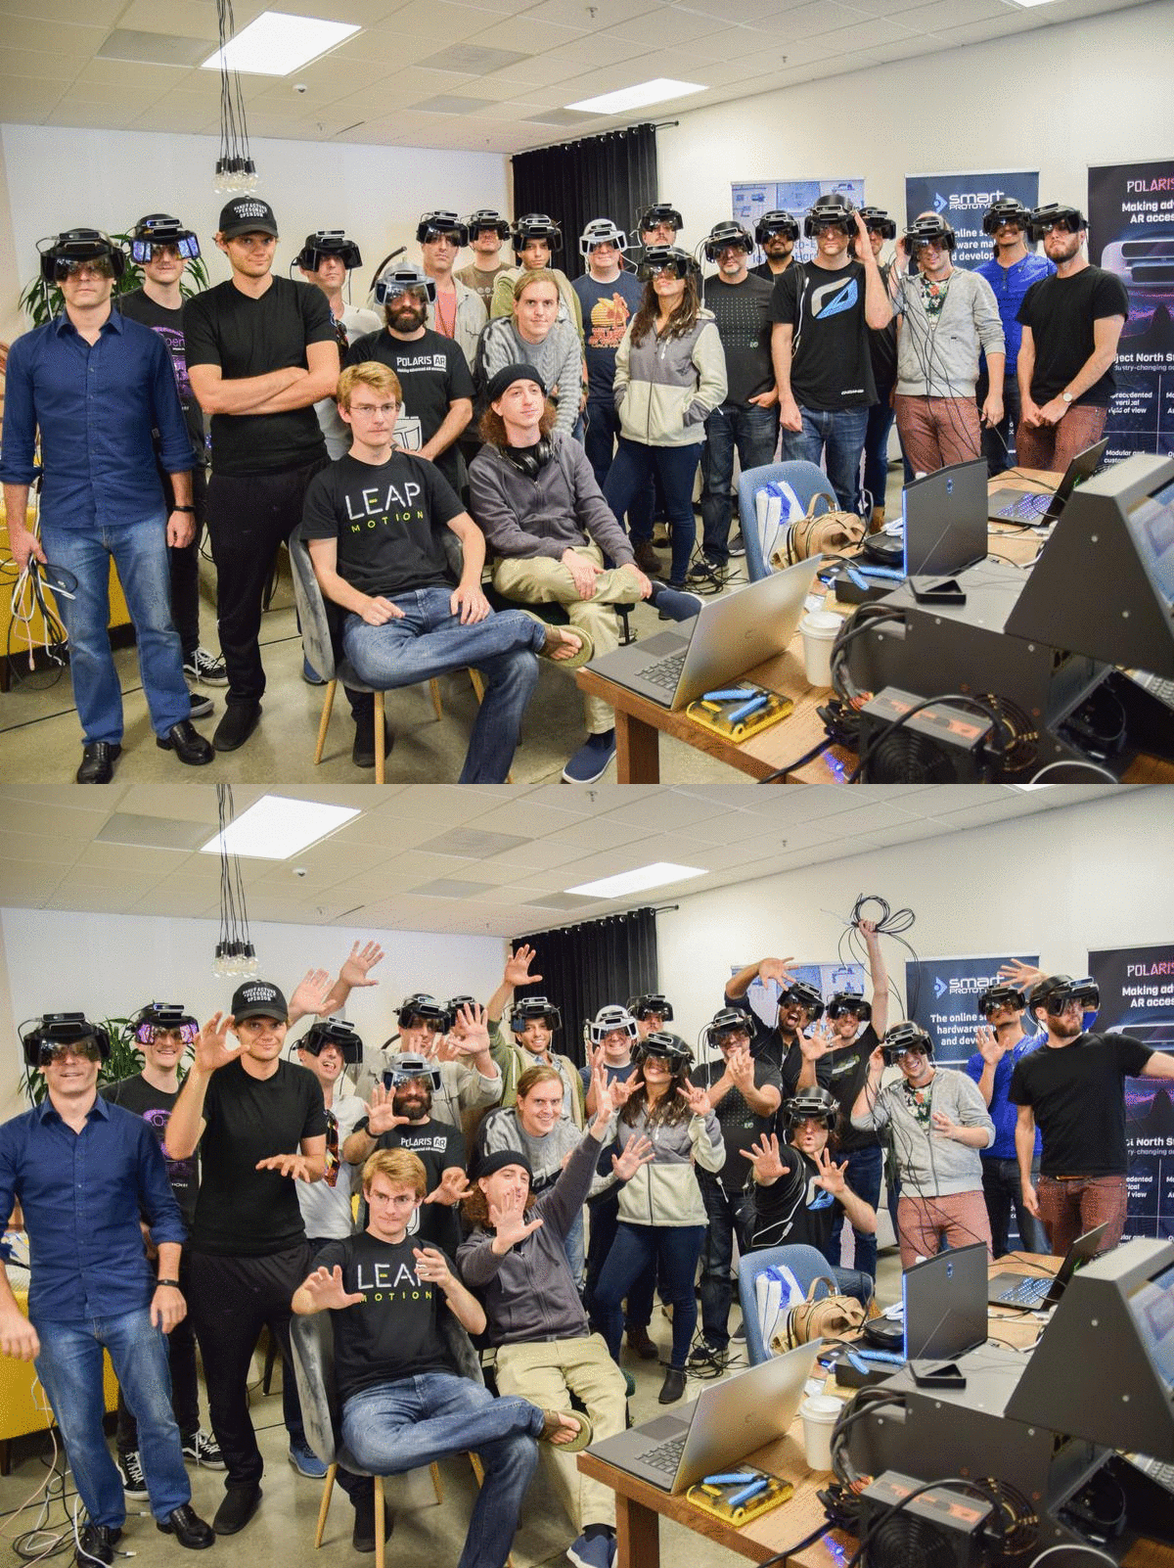
Building the world’s most advanced augmented reality headset isn’t exactly for beginners. But at the world’s first #BuildYourNorthStar workshop, over 20 participants built their own open-source Project North Star headsets in just 48 hours – using components now available to everyone.

The workshop took place in Sunnyvale, CA, just after AWE. It was hosted by Polaris AR (part of product development company NOA Labs) in cooperation with Occipital, whose tracking and depth camera solution Structure Core made inside-out positional tracking possible.

In support of the event, our team donated Leap Motion Controllers. Our CTO David Holz and engineer/AR tennis champion Jonathon Selstad joined the workshop, along with former Leap Motion engineer Adam Munich.

Noah’s North Star Development Journey

Noah Zerkin, one of the workshop co-hosts and R&D Project Manager at NOA Labs, has been sharing his own North Star development journey on Twitter:

Noah has been active in the augmented reality and open hardware communities for over a decade. He had experience building homebrew data gloves and mocap systems for years before discovering Leap Motion. Noah created what may be the first 3D-printable mount for the Leap Motion Controller on the Oculus DK1 in 2013.

Last year, Noah took the leap by building his own North Star headset with custom-produced reflectors and hardware. This isn’t as crazy as it sounds – as R&D project manager at NOA Labs, he lives in Shenzhen, one of the biggest prototyping and manufacturing hubs on the planet.

Realizing they could help other AR developers by providing pre-produced North Star components, Noah Zerkin and NOA Labs created Polaris AR. It enables developers, makers, and organizations to purchase standalone modules, kits, and accessories for Project North Star – as well as ready-assembled and calibrated headsets. Supported by NOA Labs, Polaris AR also plans to offer Project North Star customization options.

Project North Star Components Now Available for Everyone

The North Star augmented reality headset.

The workshop was “epic,” says Noah. “Every possible hitch we ran into got taken care of by one participant or another. By the end, everybody had a working world-class AR headset to take home. Thanks to the stellar group of people who chose to join us for this event, it really couldn’t have gone better.”

While NOA Labs and Polaris AR are making the components of Project North Star available to the broader community, Leap Motion continues to advance the core technology. You can learn more about the #BuildYourNorthStar workshop in Noah’s Polaris AR blog post, and get your own modules, kits, and accessories here.

Closeup of the North Star augmented reality headset.
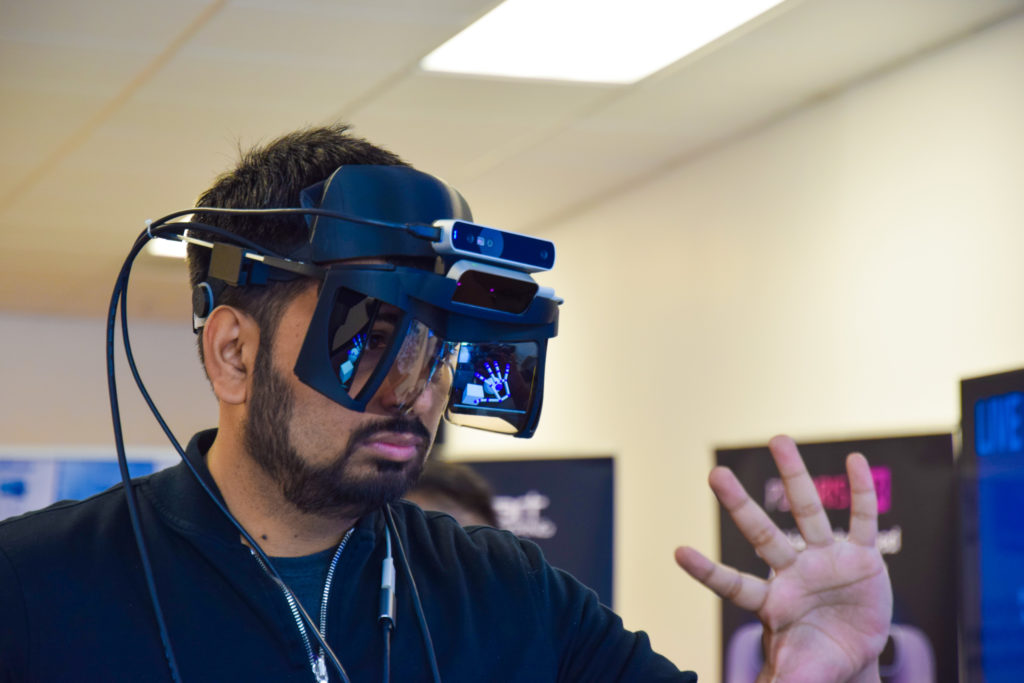
The North Star augmented reality headset with Leap Motion hand tracking.

The post #BuildYourNorthStar Workshop Brings AR to Life in 48 Hours appeared first on Leap Motion Blog.

Hand tracking and haptics: Why I believe they’re symbiotic

$
0
0
Tom Carter. CTO haptic company Ultrahaptics

Earlier this year, Ultrahaptics and Leap Motion joined forces to combine our expertise and create the world’s leading spatial interaction company. In today’s guest blog, Ultrahaptics CTO, co-founder and long-time Leap Motion developer Tom Carter talks about the story behind the haptic technology he invented – and why adding haptics to hand tracking is so powerful.

I’ve been researching and working in haptics for close to ten years. The more I work on haptics, the more I understand how central touch is to being human. Every day, touch helps us make sense of the world around us. It’s the foundation of our sense of presence and fundamental to intuitive interaction and emotional connections.

Haptic technology is going to bring this vital sense fully into the digital world in the 2020s. And it’s going to be transformative. But for that to happen, haptics needs hand tracking. Here’s why.

Haptics and hand tracking are symbiotic

The touch receptors in your hands are highly specialized and very densely clustered. They allow you to feel very subtle distinctions in texture and pressure.

It’s the feedback loop between motor control and the rich data stream coming from these sensors that makes naturalistic interaction possible. Think of trying to button a shirt while wearing a pair of gloves. It’s possible, but without tactile sensations it’s significantly slower and more laborious.

When you put together hand tracking and haptic feedback, you’re closing the circle on that feedback loop in the digital world. Action and tactile sensation are symbiotic in our hands. The digital technologies that enable these are too.

So, I guess it’s not surprising that the story of Ultrahaptics doesn’t begin with haptics. It begins with hand tracking.

It all started with the Kinect

Much as I’d like to say that Ultrahaptics started when I picked up my first Leap Motion Controller, that’s not quite true.

I started work on what would become Ultrahaptics in the final-year project of my undergraduate degree. That was back in 2011, before Leap Motion had launched their first product. Microsoft Kinect for Xbox had just come out, and the idea of being able to control a computer with 3D movements was fascinating.

What I realised, though, was that you were now using your hands to operate a computer without being in contact with anything. It worked just fine when you were doing big, sweeping movements, or grabbing larger virtual objects. But actions that required fine motor control (such as pressing a virtual button) were really difficult.

I was thinking about how you could restore the sense of touch to address this problem. That’s when my professor had a crazy idea about how maybe we could use ultrasound.

Virtual touch technology

This started a ten-year journey to create a “virtual touch” haptic technology that uses ultrasound to create tactile sensations in mid-air.

How Ultrahaptics’ technology works with Tom Carter

There’s no need for controllers or wearables, which is one of the reasons why our technology and Leap Motion are such a good match. (If you want to dig into how the tech works a bit more, our company backgrounder [takes you through it step by step.)

Simple idea, fiendishly complex execution

Sounds simple? In many ways it is – it’s a beautifully simple and fundamentally sound idea. Actually turning it into a functioning piece of hardware was a whole other story.

It took about a year to get from that initial idea to a simple lab prototype. One thing that was clear from the outset, though, was that we weren’t going to get anywhere without accurate hand tracking. You need to know exactly where a user’s hand is in 3D space in order to position the tactile sensations on it.

A seven-year friendship

That’s where Leap Motion comes in. David Holz sent me a beta Leap Motion device in 2012 – I still have it today. That also started a friendship where, over the course of the next seven years, David and I frequently talked about our visions for the future.

Leap Motion hand tracking has been a part of almost everything we’ve built. We’ve played around with other devices, but we always came back to Leap Motion, because it really is the best.

My Leap Motion beta device – I still have it today.

From haptic idea to haptic device

In the early days of Ultrahaptics, it took 20 minutes on the most expensive graphics card you could buy to do the maths to render a single, static tactile point. We’ve iterated many, many times since then, to the point where now we have a library of ready-to-use sensations (such as rotating circles, hand scans, sparkles or ripples) that are growing more sophisticated all the time.

The hardware has also evolved hugely. Last year, we launched our new STRATOS platform. I could go on about this for ages, because we’re really proud of it, but I’ll confine myself to the key headlines.

STRATOS creates tactile sensations in a different way to our previous products (if you’re interested in the detail, check out this blog). It enables a much wider range of haptic sensations. A big breakthrough was also to arrange the ultrasonic transducers in a “sunflower” spiral design based on the Fibonacci spiral. By doing this, you get stronger and better-defined tactile effects.

Joining forces: where do we go from here?

Leap Motion’s hand tracking technology has always been a critical component of what we do. When the opportunity came up to bring the two teams together, we couldn’t pass it up.

At Ultrahaptics we fundamentally understand the value of high-performance hand tracking, because we rely on it ourselves. We’ll be supporting David and the rest of the Leap Motion team to continue to advance Leap Motion’s capabilities and performance – together with collaborating on some pretty awesome joint projects.

Ultrahaptics and Leap Motion are both about enabling people to reach into and interact with the digital world using only their hands. We’re different pieces of the same puzzle. I’m personally thrilled to be working with the amazing Leap Motion team and community as we build the interfaces that will power the next generation of human-computer interaction.

The post Hand tracking and haptics: Why I believe they’re symbiotic appeared first on Leap Motion Blog.

Vivid Vision: Curing Lazy Eye with VR + Leap Motion

$
0
0

Could virtual reality retrain our brains to reverse some types of vision problems? Founded by a former lifelong “lazy eye” sufferer, medical technology firm Vivid Vision has already deployed to hundreds of eye clinics, with startling results in two independent studies.

“Our clinics treat patients using Vivid Vision games that require reaching and grasping. This allows the patient to practice eye-hand coordination skills in a life-like environment where we can assess their performance in real time.”

– James Blaha, CEO of Vivid Vision

A five-year journey to become a global medical technology provider

As a child James Blaha suffered from strabismus, commonly known as being “cross-eyed” or “wall-eyed.” As a result, his brain started ignoring input from his non-dominant eye. This left him with incredibly poor vision in that eye and robbed him of depth perception.

James’ condition, known as amblyopia or “lazy eye,” is estimated to affect 1.75% of the population (or around 135 million people worldwide). Early intervention is often the key, as with conventional therapies the condition is very hard to treat beyond 8 years of age.

As an adult, James decided to try retraining his brain using a combination of Leap Motion hand tracking and VR. Only weeks later, he was able to perceive stereo depth and read with his amblyopic (non-dominant) eye.

After a five-year odyssey that included being part of a Leap Motion startup accelerator program, his medical technology company, Vivid Vision, is now transforming how eye clinics treat strabismus, amblyopia, and other disorders of binocular vision, such as convergence insufficiency.

Standard treatments are beyond boring

Vivid Vision’s VR system shows the patient two different images – one for the strong eye and one for the weak eye. By reducing the signal strength of objects in the strong eye, and increasing them for the weak eye, it becomes easier for the eyes to work together. Over the course of treatment, the system gradually reduces the difference between the two.

Standard behavioural therapies tend (as James puts it) to be “excruciatingly boring.” This has real consequences for patients, especially children, who may not complete treatment courses.

VR and hand tracking also have unique capabilities conventional therapies cannot match. Importantly, VR headsets can show a different image to each eye. Leap Motion hand tracking also makes it possible for patients to interact in 3D – enabling them to practice eye-hand coordination skills in a life-like environment.

How VR medical technology can hack your brain – for good

James Blaha created a game that forces your eyes to work together in order to win. This effectively tricks the player’s brain into strengthening the weaker eye.

Using Leap Motion hand tracking, the game lets the player navigate various controls and play six different games. These include an asteroid shooter, a 3D variant of the classic Atari game Breakout, and targeting levels that force the user to rely on depth and colour perception. The system has a range of difficulty levels and is suitable for all ages.

Outcomes can be digitally tracked and evaluated over time, giving eye care professionals new tools and greater insight into patient outcomes.

Multiple studies show positive results

“I remember the exact time I first saw in 3D. It was the opening screen for the Bubbles game…. I asked my vision therapist, ’uh…I see something odd.’ And when I described it, she said ‘you’re seeing in 3D! That’s depth perception!’  I remember getting chills down my whole body and then crying because… I could see.”

Andrea, 35

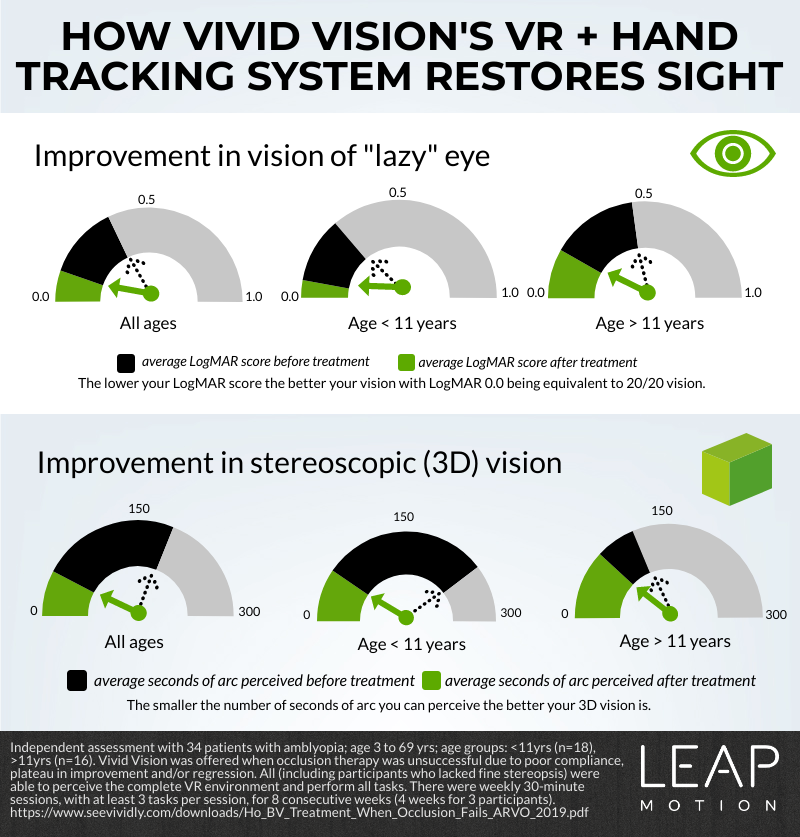
A preliminary 2017 study and a more in-depth study published earlier this year showed that Vivid Vision improved both sight in patients’ “lazy” eye, and depth perception.

In the 2019 study, the results were particularly dramatic for the improvement of sight and for children. On the LogMar score (a standard measure, in which LogMAR 0.0 is equivalent to 20/20 vision), the sight of children under 11 in the study improved from an average of LogMAR 0.23 to an average of LogMAR 0.06.

This means that the children came out of the study with close to 20/20 vision in their “lazy” eye.

How Vivid Vision's VR + hand tracking system restores sight

To date, Vivid Vision’s VR system has been deployed to more than 300 optometry and ophthalmology clinics worldwide. New clinics are being added all the time, and the Vivid Vision team believe their medical technology will ultimately improve the lives of millions of people worldwide.

The post Vivid Vision: Curing Lazy Eye with VR + Leap Motion appeared first on Leap Motion Blog.

#ScreenshotSaturday Challenge: VR Guitar, Wizard Bowling, and More

Making a Fist with the Raptor Hand

$
0
0

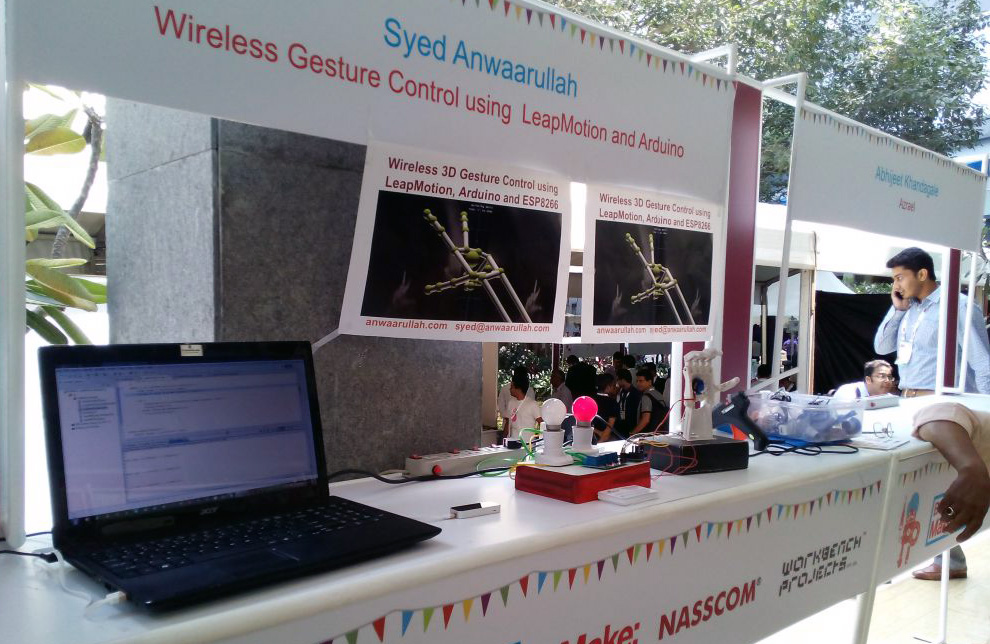
There are no limits to what you can hack together with the Leap Motion Controller – which is why this year’s Leap Motion 3D Jam includes an Open Track for desktop and Internet of Things projects! In this post, hardware hacker Syed Anwaarullah walks through his 3D-printed robotic hand project, which appeared at India’s first-ever Maker Faire. The Arduino Leonardo and ESP8266 WiFi module that he used are both on the 3D Jam approved hardware list, and the project is completely open source!

After having played around with wirelessly controlling Arduino with Leap Motion through Bluetooth two years back, I didn’t get an opportunity to tinker more with Leap Motion and Arduino. But when the call for project submissions for India’s first Mini Maker Faire opened, I decided to re-do this project, albeit using the popular ESP8266 WiFi module instead of a Bluetooth one.

To get started, I updated the Leap Motion SDK and noticed a bunch of improvements, including new features in the Visualizer. I cloned my earlier code and started testing out the Java example.

After getting this done, we turn to programming the Arduino to configure the ESP8266 to receive data and then have some fun. In my first approach, I tried to use the ESP8266 in Client Mode, wherein it connected to the WiFi Router and received data from my PC. This seemed cumbersome as I had to carry the WiFi Router to demo the project. I decided to configure the ESP8266 in Access Point Mode (AP/Hotspot) and get the PC directly talking to the ESP as a Client.

After writing a simple Client Socket code in Java, and testing out if the data was being received at the ESP, it was now time to glue them all together.

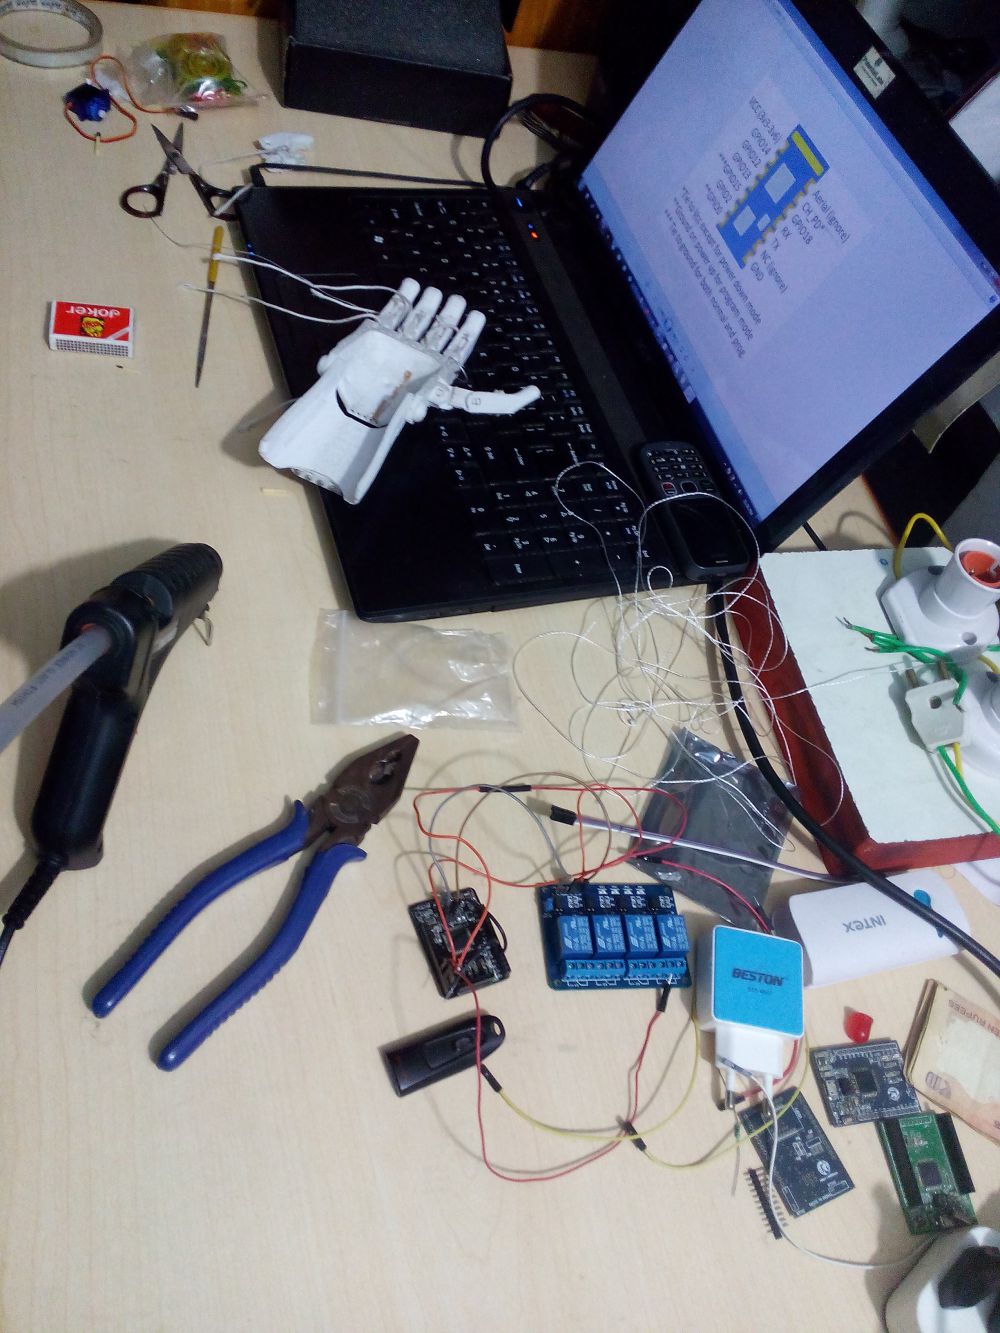
And this is how it started off:

first_setup

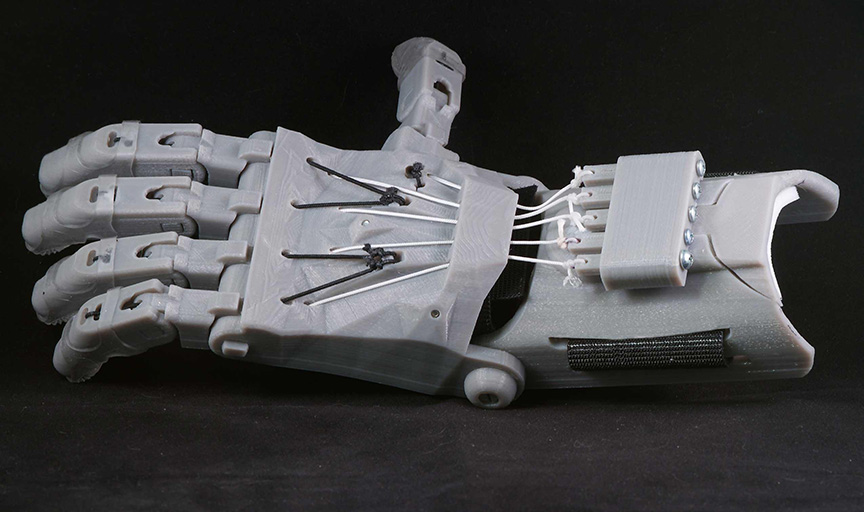
I had a printed Raptor Hand and I felt the demo would be made much better by getting a human arm to control a prosthetic arm.

prosthetic_arm

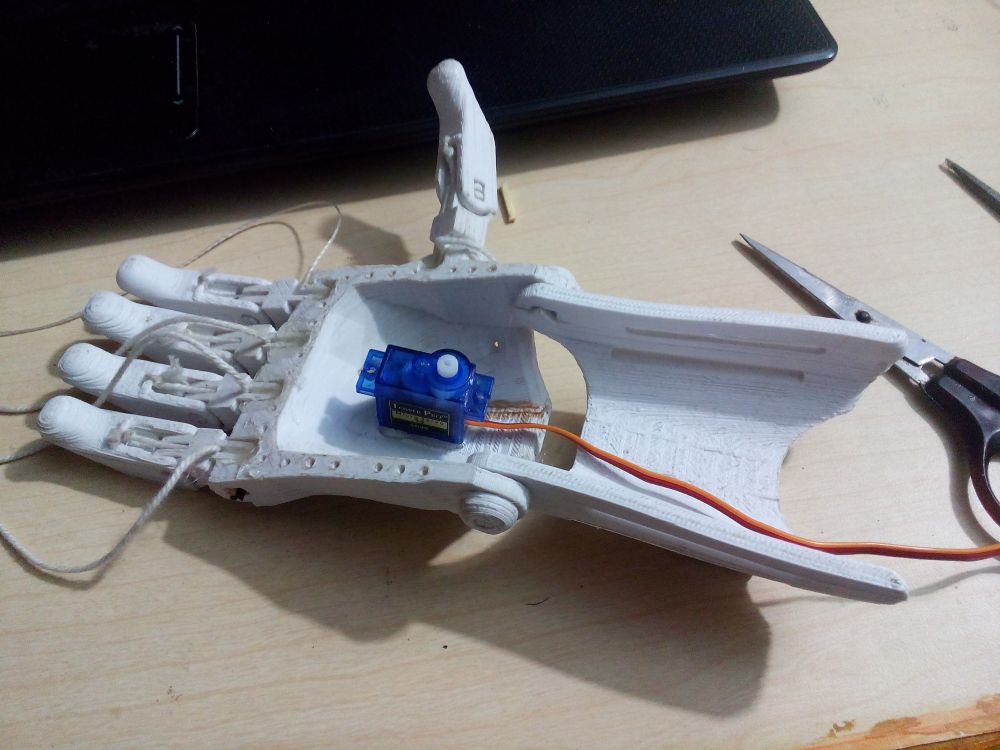
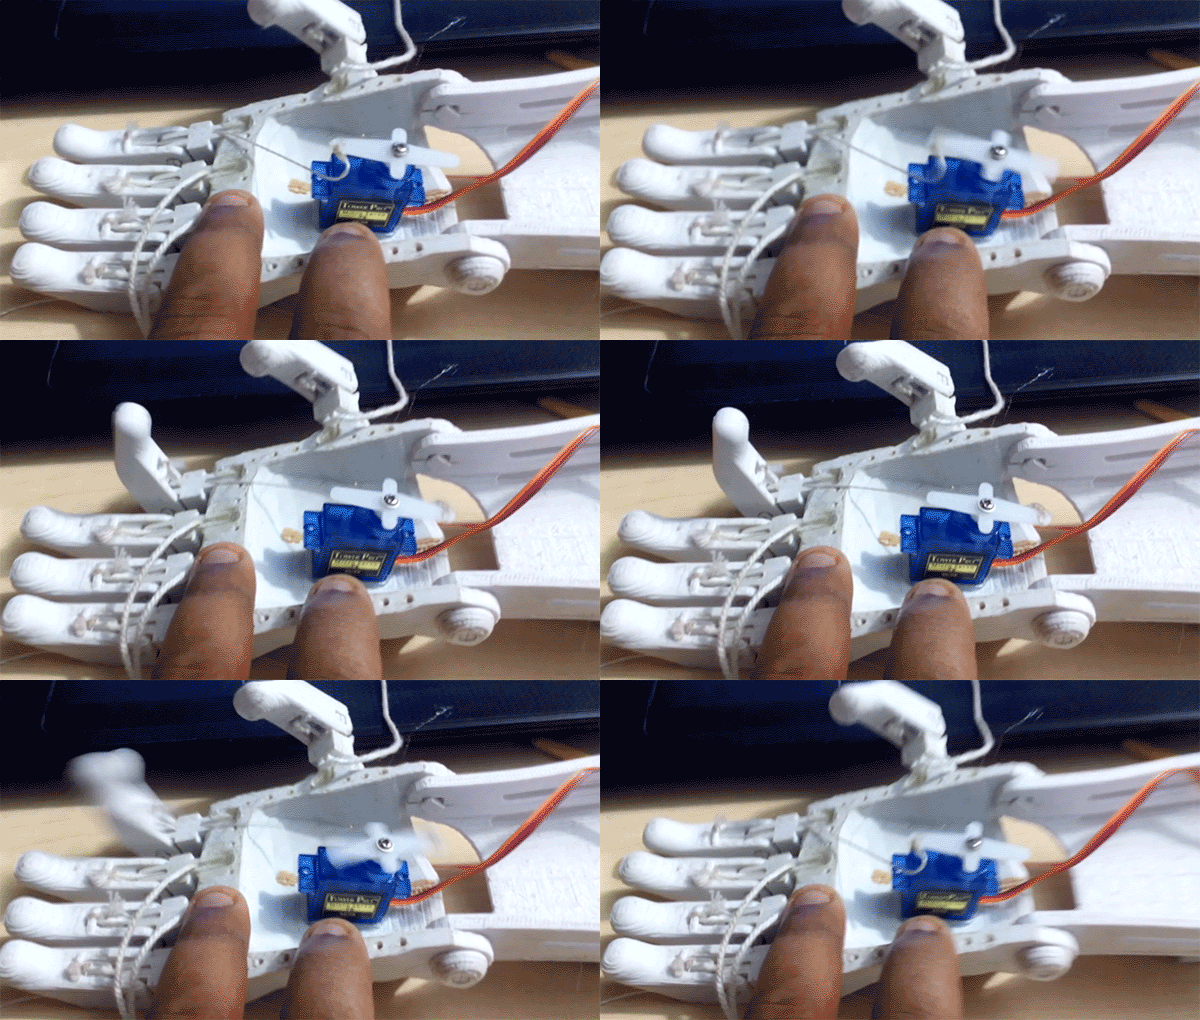
Here, you can see I’m using a simple SG-90 Servo Motor to control the Arm movement.

After gluing, filing, and threading around, the project was almost in shape and ready to be demoed at the Maker Faire.

raptor-hand-h

And after dozens of man-hours, we finally got it all working:

The LeapMotion counts the number of fingers and sends it over the to an Arduino Leonardo derivative board which has an ESP8266 (ESP03) hard-wired beneath. The following actions take place:

Finger(s) Count: 1 → Turn ON Yellow Light
Finger(s) Count: 2 → Turn OFF Yellow Light
Finger(s) Count: 3 → Turn ON Red Light
Finger(s) Count: 4 → Turn OFF Yellow Light
Finger(s) Count: 0 → Close Arm
Finger(s) Count: 5 → Open Arm

It was now time to show this “off” at the Maker Faire:

img_20151015_125649

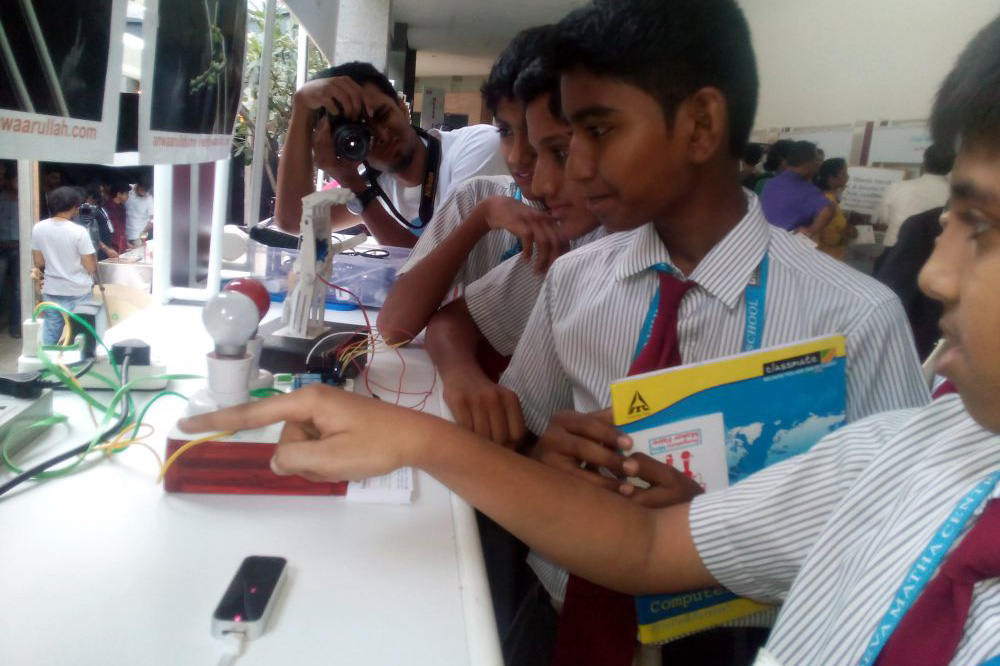
Most of the folks enjoyed opening/closing the prosthetic arm. Kids enjoyed it a lot (and I had a good time interacting with them) and other Makers.

img_20151015_151030

And now, let’s dig into the working and the code behind all this fun.

The entire code (Java and Arduino) can be cloned from this repo on BitBucket. The project is also listed on Leap Motion’s Developer Gallery.

Quick Code Notes

  • The method establishWiFiConnection() in Arduino configures the ESP8266 in Client Mode and createWiFiHotspotServer() configures ESP in AP mode.
  • I’m using an Arduino Leonardo which has the Hard Serial Port wired to Serial1 class. If you’re using a Uno, you can use Software Serial Digital Pins 11 and 12 connected to a 4 Channel Relay Module (which is active low triggered)
  • The IP Address in Java Class 192.168.4.1 is the IP Address of the ESP when running in AP mode. When running the ESP in Client Mode, replace this with the dynamic IP assigned to the ESP

If you need any help in implementing this (or other related stuff), you can email me at syed {Shift+2} anwaarullah d0t com.

An earlier version of this post appeared on Syed’s blog.

The post Making a Fist with the Raptor Hand appeared first on Leap Motion Blog.

3 Robots About to Break Into Your Everyday Reality

$
0
0

Happy Halloween! At Leap Motion, we’ve seen our fair share of impressive motion-controlled robots that will one day bring about the robocalypse. (We’re looking at you, hexapod!) But the robot revolution is just getting started.

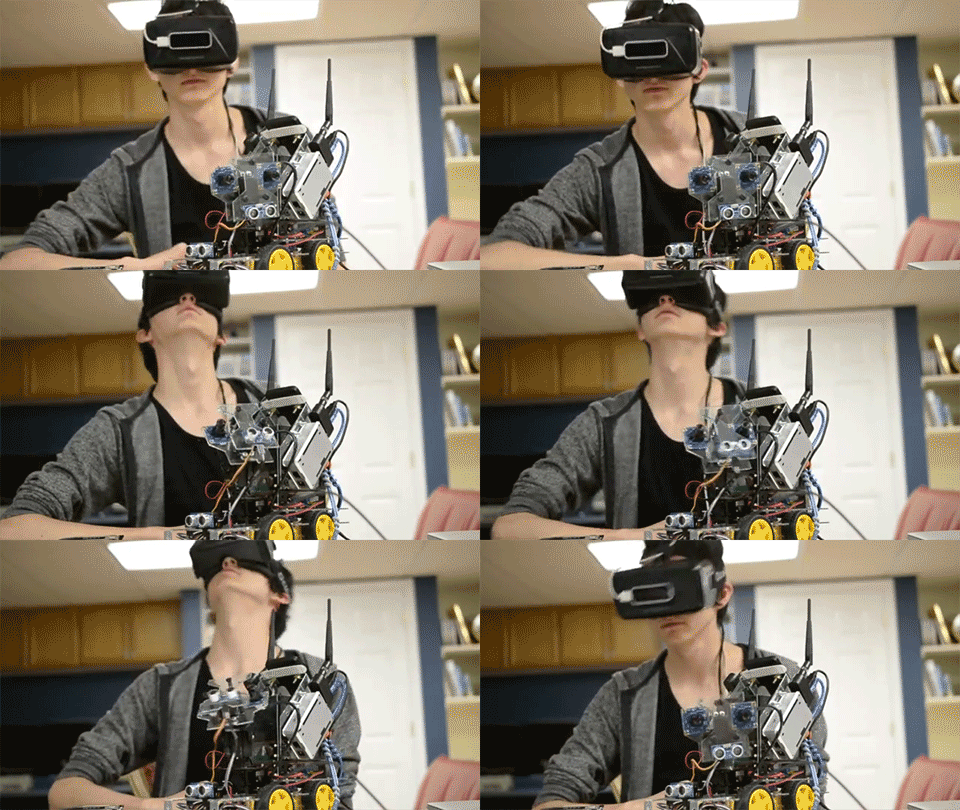
This month, two different robot arms featuring Leap Motion control have vastly overshot their Kickstarter funding targets, promising to bring miniaturized adaptive robotics to your desktop in new and exciting ways. On another level, a high school student’s robotics project is combining the Oculus Rift and motion control to create an experience that takes you wherever the robot goes.

Babbage: The VR Telepresence Rover

Last month, Alex Kerner kicked off the first of a series of videos exploring how he built Babbage, a versatile telepresence robot, from soldering to software. We caught up with Alex earlier this week to ask about his vision for the project.

“What really got me into robotics is that it’s an emerging technology,” he said, “so there’s a lot of room to be innovative without having to make something incredibly sophisticated. I love the idea of building something from scratch on my own, which is why Iron Man is my favorite superhero. Robots in particular are fascinating to me, because of the mechanical sophistication and innovation required to make them function.”

As for the augmented reality side of the equation, Alex sees it as a way to make robotic controls more seamless and intuitive. “Instead of having to learn the controls, or program an AI to interpret commands, it’s as easy as reaching through the screen and doing it myself. It opens up a lot of opportunities for complex systems that would be frustrating to control conventionally, such as the movement of the head.”

babbage

Named after computer science pioneer Charles Babbage, Alex’s robot is controlled through a spiderweb of different languages, which he plans to integrate in the months ahead:

  • The motors are controlled with Node.js using the Johnny-five library.
  • The sensors are read by the Arduinos, which in turn run the Firmata sketch to relay commands from the Beaglebones.
  • A third Arduino board runs custom C++ and communicates via I2C, as Johnny-five has no library to support multiple sonars.
  • Python is used to capture the web video from the cameras and directly overlay the graphics.
  • The Oculus Rift’s accelerometer is read with a custom C++ app (with plans to rewrite this into the Python app instead).
  • The Nokia runs C# code for voice recognition (which is still a work in progress).
  • Unlike most VR projects, Babbage doesn’t involve a 3D engine.

What’s it like being inside Babbage as he explores the world? “As of right now, the video feed is a little jerky, but it feels immersive,” said Alex “The idea of a telepresence robot is to make the operator more like a driver than a commander, and that’s exactly what it feels like.” At this stage, he says, bringing the latency down will be an important step in reducing sim sickness.

Where VR and robotics collide, Alex believes that telepresence will be a major step forward in how humans interact with the world. “It’s a technology that could potentially make mundane transportation obsolete. Anything that a human can do with a vehicle, a remote operated drone, or even on foot could be done using a telepresence robot. Rovers like Babbage will probably see a lot of use in places where it’s too dangerous to go on foot, like rescue or military operations, or even as an opportunity to live an active life for someone who is disabled or homebound.”

Future videos will demonstrate the laser system, sonar, visual system and face recognition, and the Leap Motion input – including a future “snapshot” gesture. We can’t wait to see how Babbage’s journey progresses.

Dobot: A Robotic Arm for Everyone

Dobot is intended to take the industrial robotic arm beyond the maker community and into everyday life. With a 4-axis parallel-mechanism arm connected to an Arduino, the Dobot has seven distinct control methods, including wireless, voice, and Leap Motion controls.

According to one of the creators behind the project, “as industrial robot engineers, we wanted to find a highly functional and agile, desktop robot arm, but were unsatisfied by low cost, low precision and poor functionality desktop robotic arms on the market. The consumer-level robot arms at the time were mostly servo-based. When users bought the robots, they found that the precision wasn’t high enough to replicate the applications shown in Kickstarter demos, like writing, grabbing things, not along helping them with more complicated tasks.”

From there, the group quit their jobs to develop a high precision robot based on stepper motors. The Leap Motion Controller was a natural input choice for its popularity among makers and developers. “With Leap Motion, we can achieve a nature way to manipulate the robot arm, and an easy approach to understanding how it works. In this case, Dobot is not only a professional tool to work with, but a great desktop platform for everyone to enjoy.”

7Bot: An Arm that Can See, Think, and Learn

Another Kickstarter campaign that recently blew past its funding goal, 7Bot is a 6-axis robot arm designed to be a miniature version of the popular IRB 2400 industrial robot. You can teach it how to move by holding its arm and guiding its movements, control it over the web, or through your hand movements:

For us, one of the most exciting things about this video was the extremely low latency on display. We caught up with the 7Bot team to ask about their process. According to Eric, one of the developers on the team, “Leap Motion is an essential control method for 7Bot. It allows everyone, including one of our grandfathers, to control 7Bot at ease.”

“Leap Motion can detect the hand gestures very accurately. But sometimes there are jitters, which are highly undesirable in controlling the robot. We applied a median filter to eliminate jitters, and some simple mapping relations were also used to make this application more intuitive to users. The high capture rate of the Leap Motion Controller and high processing rate of the median filter achieve such a low latency, which is only 0.1 to 0.2 seconds in theory.”

What’s next for 7Bot’s Leap Motion integration? The team plans to add more end-effectors to 7Bot, including one with 5 fingers, like those used in prosthetics. This means that a future version could effectively mirror your real life hand and finger movements.

The world is yours to hack – what will you build? The 2015 3D Jam is running right now with over 25 types of approved hardware, including Arduino, the Parrot AR drone, Lego Mindstorms, Mini Pan-Tilt Kit, OWI Robotic Arm Edge, and more! Bring your hardware dreams to life and register now.

The post 3 Robots About to Break Into Your Everyday Reality appeared first on Leap Motion Blog.

A Brief History of Time Dial

$
0
0

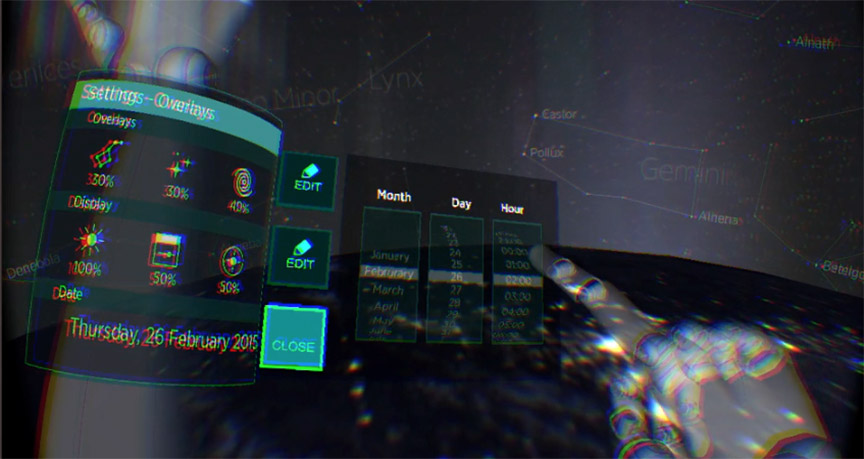
At Leap Motion, we’re making VR/AR development easier with Widgets: fundamental UI building blocks for Unity. In part 3 of our Planetarium series, Barrett talks about the strange physics bugs we encountered with Time Dial.

One of our new VR Widgets, the Time Dial, surprised (and indeed amused!) us at several special moments during our intense production push. The Time Dial Widget is our hand-enabled VR interpretation of a typical touch interface’s Date Picker. We built it with a combination of Wilbur Yu’s Widget interaction base, Daniel’s data-binding framework (more on those two later), and a graphic front-end that I coded and built – again using Unity’s new 3D GUI.

Immediately after adding the shiny new Time Dials to the Arm HUD’s flyout panel, the Arm HUD itself went essentially haywire. As we would change the Month, Day or Hour, buttons on the Arm HUD would begin to trigger by themselves, making panels fly open or disappear. Yikes! We soon realized that while our Widget physics for springy buttons being pushed by virtual hands worked reliably in typical situations, we were spinning the earth at spectacular, epic velocities. This made Unity’s physics engine cry, triggering the Widget buttons without the need of virtual hands.

Between epic velocities and accidental gyroscopes, we’re pretty sure we broke a few digital laws of physics.

Additionally, we discovered that the Time Dials would continue spinning indefinitely after we let them go… sometimes. This was one of those intermittent, tricky-to-solve bugs we love so much. But through dogged observation, Gabriel discovered this only happened if we were pointed east or west. Weirder. In the end, he deduced that while we were clamping the Time Dial’s rotation to its X-axis, if the Earth and Time Dial were in just the right alignment, the Earth’s momentum would transfer to the Time Dial. We had accidentally created a gyroscope!

Interestingly, these bugs emerged after quite prodigious amounts of rigorous user testing. Literally dozens of user tests have been run at our office, all carefully recorded and scrutinized. But running our Widgets through the crucible of Planetarium’s forces, ranging from the fingertip scale to the astronomical, gives us valuable insight on how to make the Widgets even more robust for developers. In the future, we’ll be moving away from using Unity’s physics engine, and coding our own, simpler interactions.

Next: Travelling Around the Globe (and Under the Sky) in Planetarium

The post A Brief History of Time Dial appeared first on Leap Motion Blog.


Traveling Around the Globe (and Under the Sky) in Planetarium

$
0
0

At Leap Motion, we’re making VR/AR development easier with Widgets: fundamental UI building blocks for Unity. In part 4 of our Planetarium series, Gabriel takes us into Planetarium’s navigation scheme.

One of the major features of Planetarium is the ability to travel around the globe using motion controls. While this approach is still rough and experimental, we learned a lot from its development that we’d like to share. Later on in the post, we’ll even take a look under the hood at the code involved with the movement and spinning physics that tie everything together.

Lessons in UX Prototyping

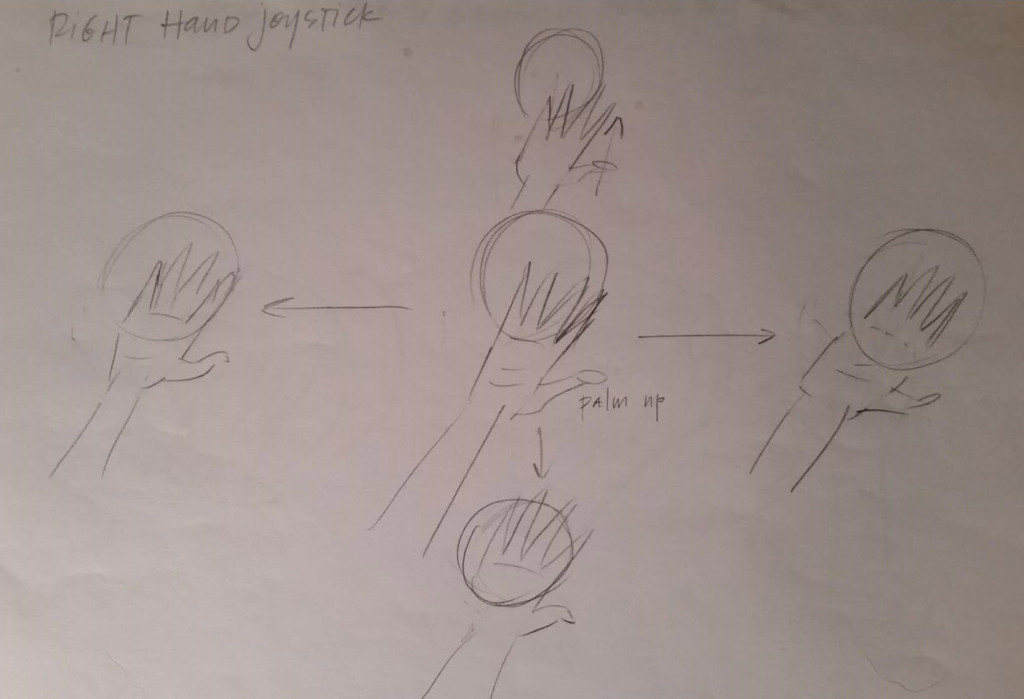
Our initial idea for navigation controls was a simple Joystick – in other words, a system relating hand position to player velocity. When the Joystick design began, we had already created a reliable palm-outward grabbing gesture that would pull constellations into the user’s hand. We decided to use the same grabbing gesture to initiate and end navigation, but would distinguish navigation from star grabbing by having the palm face the user.

We also added visual feedback in the form of a “Joyball,” or object that people could hold. If the user turned their hand over, they would immediately end navigation. This way, people would seem to be holding an object, and thus avoid turning their hand over unintentionally. Along with linear movements, the ball could also be twisted to rotate the player.

early-joyball

Early sketch for Joystick UI

Based on our user testing, however, this design failed due to a simple matter of ergonomics. We discovered that when users moved their hand around to move the globe, their hands naturally started to tilt downwards when they moved their arm to the left across their body. Because they needed to keep the palm facing upward, it was difficult for users to move their arm to the right, away from their body. There were also issues with motion sickness when the tracked hand would vanish without explicitly halting navigation, leaving the player moving around the globe.

After going back to the drawing board, we switched it to activate when the palm faces downwards. Now, just like grabbing a constellation, the line of sight through the user’s palm must intersect the earth. We added a gain curve to the linear and angular velocities, so that small movements yield precise control, while large movements cannot exceed a maximum speed. To avoid motion sickness, we made absolutely sure that the player would stop moving whenever the controls were not in use.

One very positive result from the user testing was that the palm-down navigation interaction was in many ways a significant improvement over a traditional Joystick. Simply pretending to fly with your hand allows for displacement and rotation that feel natural. All users were able to discover and reliably use the navigation controls, even though only one was able to articulate how the controls worked. With subsequent versions of the Joyball, we’ve implemented activation cues by highlighting the earth and presenting visual guides on the back of the hand. The representation of the Joyball is now a ship’s compass which always points north.

Here are some of the important UX design lessons that you can take from this experiment:

  • The user must always have control over their motion.
  • Good ergonomics is essential. Always be willing to modify other aspects of your interaction design to ensure user comfort across the board.
  • Line of sight is a very useful indicator for determining what the user wants to interact with.
  • Use visual feedback to make your application more intuitive.

How to Avoid the Hand Lag Feedback Loop

Now that we’ve looked at the navigation mechanics of Planetarium, there’s an important problem we need to resolve. With this navigation system, the player moves according to the position of their hands relative to their body in virtual space. By default, the HandController script in Unity creates unparented hands in the scene, but this can create a feedback loop when the HandController moves with the player.

Why is this a problem? First, imagine that the HandController updates the position of the hands, and then the navigation system uses this position to move the player. In this case, the player’s movement will be smooth and correctly controlled.

Now, suppose instead that the order of operations is reversed. First the navigation is computed, then the hands are repositioned. This would result in a feedback loop in the navigation, since each movement of the player effectively displaces the hands. Unfortunately, the hand lag is completely invisible – by the time rendering begins, both hands and player position will have been updated.

The problem is that, in Unity, either order of operations is possible! Fortunately, the solution to this problem is simple – make the player’s body the parent of the hands. This ensures that updates to the body position immediately apply to the hands, thereby preventing hand lag.

Let’s Get Mathematical! Orbital Calculations in Unity

The JoyBall displacement can immediately be used for navigation in space, or on a flat map. However, adapting the controls to navigation on the surface of a globe requires some additional calculation.

Along with the Joyball, Planetarium also showcases a TouchMap navigation model. The TouchMap uses a latitude and longitude coordinate system, with the azimuth fixed at zero. The problem with this coordinate system is that if forward/backward motions of the Joyball are tied to latitude, while left/right motions are tied to longitude, a small motion left or right near the pole will rapidly spin the player around. This is because the poles are coordinate singularities and are numerically unstable.

Fortunately, we have a straightforward solution – move along geodesics! Even more fortunately, Unity provides an implementation of the required math. When a player moves the Joyball, they are in effect saying “I want the reference point to move towards the Joyball point.” Since the player is rotating around a planet, this means that they want to move along a rotation around the earth center that will transform the reference point to the Joyball point.

relativeDisplace = joyballPosition - referencePosition;
relativeDisplace *= gainDisplace;
orbit = Quaternion.FromToRotation(referencePosition - earthCenter, referencePosition - earthCenter + relativeDisplace);
player.transform.position = earthCenter + orbit * (player.transform.position - earthCenter);

This addresses linear movement (really orbital latitude and longitude), but doesn’t address spinning (azimuth). Spinning is implemented by twisting the Joyball around the axis that is “up” with respect to the player. Again, Unity has an implementation of the required math.

relativeRotation = referenceRotatio * Quaternion.Inverse(joyballRotation);
relativeRotation.ToAngleAxis(out angle, out axis);
angle *= Vector3.Dot(axis, player.transform.up);
angle *= gainAngle
player.transform.RotateAround(player.transform.position, player.transform.up, angle);

(API References: FromToRotationToAngleAxisRotateAround)

The parameters gainDisplace and gainAngle have values in the range from 0 to 1. They are responsible for establishing maximum speeds of movement and ensuring that small displacements of the Joyball yield precise control. Because the gains pertain to speed, calculations of the gains must take into account the framerate since they apply to linear and angular speed, not to displacements.

Implementing the TouchMap is both simpler and yet somewhat less intuitive. The latitude and longitude coordinates are a choice of Euler-Angle coordinates. (Note: these need not be the same as the Unity Euler-Angles.) To be specific, suppose that the basis of the Earth GameObject has the “forward” axis pointing to the North Pole, and the “up” axis pointing to latitude = 0 and longitude = 0, which is in the Gulf of Guinea.

To position the player at a specified latitude, longitude, and azimuth, we would begin by positioning the player at the origin of the coordinate system – on the earth’s “right” axis at a radius just above the surface of the earth, looking north so that:

player.transform.rotation = earth.transform.rotation

Next, rotate the player around the earth’s “right” axis to the specified latitude, then rotate the player around the earth’s “forward” axis to the specified longitude. Finally, rotate the player around the player’s own “up” axis by the specified azimuth. (The effect of this final rotation is equivalent to beginning by rotating the player around the Earth’s “up” axis by the azimuth.) At the north and south poles the longitude and azimuth rotations have the same effect, since they rotate the player’s “up” axis is parallel (or anti-parallel) to the earth’s “forward” axis.

Consequently, if the TouchMap implemented an update loop that first computed the player’s longitude, latitude, and azimuth to position the cursor, and then attempted to set the longitude, latitude, and azimuth to those same values, floating point errors near the poles would result in rapid uncontrolled motion. While this might seem to be easy to avoid, keep in mind that setting a single coordinate requires knowledge of the other two, which yields feedback. Likewise, applying a change to a single coordinate requires knowledge of the coordinate’s initial value.

As promised, the solution to this problem is simple – when the user is interacting, the TouchMap only sets latitude, longitude and azimuth. Conversely, the TouchMap reads in values only when the user is not interacting. In fact, we’ve established this pattern for all widgets:

  • When the user is interacting they have sole control of the widget state.
  • When the user is interacting, the widget only sends change requests to bound parameters.
  • When the user stops interacting, the widget reverts to displaying information about bound parameters.

If you made it this far, here’s an Easter Egg: if you type ‘w’ in the main scene of the Planetarium, it will make wickets appear around the equator of the planet. Take the navigation system for a test drive!

After all these orbital location calculations are complete, there’s one little wrinkle left to let us show the proper orientation of the night sky. Time. So now I’ll pass the ball back into Daniel’s court.

– Gabriel Hare, Physics & Algorithms

Calculating the Night Sky in Planetarium

Daniel here again, with another dash of astronomy. As you probably know, the earth’s rotation means that the stars appear to move through the night sky.

Given the orientation of the Earth’s axis, if you’re in the northern hemisphere, it will appear as though the stars rotate around the star Polaris (or North Star). Since the earth rotates once every 24 hours, the stars move across the sky once every 24 hours… almost! The 24 hour day is close to being accurate, but between it being slightly wrong (which is where we get the leap second) and the revolution of the earth around the sun, a 24-hour celestial day is not quite the same as a 24-hour terrestrial day. (It turns out programming accurate time calculation is hard, which is why all our times in Planetarium are simply in GMT and we decided not to work out time-zones.)

To understand why, imagine that you’re looking up at the midnight sky on June 1st. At that moment, you’re on the opposite side of the world from the sun. But if you look at the sky at midnight on New Year’s Eve, you and the Earth have since travelled halfway around the sun! This means that the stars will appear in different places than they did in June. In fact, the stars you can see throughout the year will fall a few minutes behind every night, and this tiny difference in each day adds up over time.

Astronomers solve this by measuring days in “sidereal time,” which measures accurate celestial time. The stars above you at midnight sidereal time on January 1st will be the same as the stars above you at sidereal midnight on June 1st, though that may be 2pm in the afternoon according to a terrestrial clock. The calculation to compute (relatively accurate) sidereal time is a bit verbose, but generally pretty simple.

Greenwich Sidereal Time = 6.5988098 + 0.0657098244 × (day number of the current year) + 1.00273791 × (Time of day in Universal Time)

(Obviously, this is a bit obtuse-looking and has a few nasty magic numbers. If you’re interested, you can look into how this time is derived here.) Once we know the proper sidereal time, we can rotate the earth and the viewer by the proper offset to finally display the proper night sky. Tomorrow, we’ll start digging into how we integrated the UI Widgets into the data model for Planetarium, so that these two systems will play nicely together. Trust me, accidental gyroscopes were just the beginning.

Daniel Plemmons, Designer and Developer

Next: Designing the Widgets Event and Data-Binding Model

The post Traveling Around the Globe (and Under the Sky) in Planetarium appeared first on Leap Motion Blog.

Designing the Widgets Event and Data-Binding Model

$
0
0

At Leap Motion, we’re making VR/AR development easier with Widgets: fundamental UI building blocks for Unity. This is part 5 of our Planetarium series.

Daniel here again! This time around, I’ll talk a bit about how we handled integrating the UI Widgets into the data model for Planetarium, and what this means for you.

The first iteration of Widgets we released to developers was cut almost directly from a set of internal interaction design experiments. They’re useful for quickly setting up a virtual reality interface, but they’re missing some pieces to make them useable in a robust production application. When we sat down to build Planetarium, the need for an explicit event messaging and data-binding layer became obvious.

events-model

We made a lot of use of editor fields to make customizing and connecting widgets easier.

There are two ways a developer might want to interact with a UI Widget. The first is detecting interaction events with the widget – like “Pressed,” “Released,” and “Changed.” Events are quick and dirty and they’re great for simple interactions, like kicking off sound effects, or buttons used to open doors in a game level. The other is connecting the Widget directly to a data model, having it always display the current state of the data model, and having any user input to the Widget be reflected in that model. This is the pattern we use when we’re controlling data like asterism opacities and false-color saturation.

Wilbur did a great job of building obvious interaction end-point functions into the original Widgets. There are clearly named, short functions like OnButtonPressed. In the original release, these functions are where developers would add their code detailing what the Widgets controlled. Making life even easier for us, C# has some simple patterns for generating and subscribing to events. I defined a few interfaces that we agreed every Widget would have to implement – ones that required definitions for Start, End, and Change events – and added implementations to the existing widgets. There’s a nice inheritance structure to the Widgets that meant we could implement the events once in classes like ButtonBase and SliderBase, and have them work in our more specialized versions of the Widgets. The events carry a payload of a WidgetEventArg object that wraps the relevant data about the Widget’s new state after the interaction.

However, when using events while trying to stay in sync with a data model that’s changed by multiple sources or requires data validation, problems tend to crop up where your UI and your data fall out of sync. To solve this, we developed a relatively light-weight data-binding layer to connect generic Widgets directly to the application’s specific data. This involved creating an abstract class for a DataBinder to be implemented by the end-user-developer. (Why abstract classes rather than interfaces? To allow for easy integration with the Unity editor which can’t serialize interfaces or generic types into accessible fields.)

With this setup, developers need only implement a getter and setter for the piece of data being interacted with by the Widget. Widgets have open, optional fields in the Unity editor where developers can drag in a data-binder, and from then on the Widget will automatically update its view if the data changes, and update the data if the user modifies the Widget. It handles all the pushing and pulling of state behind the scenes using the assessors that you define.

Having these easy-to-hook-up data-binders connected with the Planetarium data meant that I could work on building new features for the planetarium, while Barrett could work on a new feature in the Arm HUD. We had a well defined set of expectations about when and how data would flow through the system. When we’d go to have our code meet in the middle, we rarely had to do more than drag-and-drop a few items in the editor, which let us move a lot more quickly than if all our systems were tightly bound to each other’s architectures.

Next up, Wilbur Yu will talk a bit about how the Widgets were structured, which was a big part of what made adding data-binding as straightforward as it was.

Daniel Plemmons, Designer and Developer

Next: Exploring the Structure of UI Widgets

The post Designing the Widgets Event and Data-Binding Model appeared first on Leap Motion Blog.

Exploring the Structure of UI Widgets

$
0
0

At Leap Motion, we’re making VR/AR development easier with Widgets: fundamental UI building blocks for Unity. This is the final instalment of our Planetarium series.

Hi, I’m Wilbur Yu! You might remember me from such webcasts as Let’s Play! Soon You Will Fly and Getting Started with VR. In this post, we’ll look at how we structured Widgets to be as accessible and comprehensive as possible. For the purposes of the blog, we’ll look at the Button Widget in particular, but all of the Widgets follow a similar pattern.

Before we get started, here are the key points to keep in mind:

  • Readability is essential. Write understandable, simple functions.
  • Create base classes that contain physics and important abstract functions. Only one class or gameObject should be responsible for physics.
  • Minimize the number of colliders required for physics interaction

Prefab Structure

All Widgets are created using Unity’s Prefab feature. Here’s the prefab structure for buttons as an example:

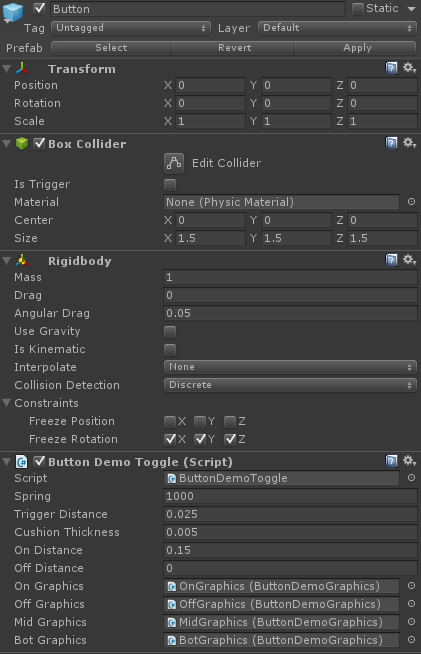
widgets1

Base Component: ButtonDemoToggle. The Widget parent contains no scripts and no components. This gameObject’s responsibility is to determine the world position and scale of the Widget.

Physics Component: Button. This gameObject contains a trigger collider used to determine if a hand is interacting with it and respond accordingly. When a hand is no longer interacting with it, the physics component will take over.

The physics component is designed such that all the important properties can be changed in the inspector. The script is only responsible for responding to the physical changes because it inherits from a base physics script that handles all the physical movements.

Graphics Component: OnGraphics, OffGraphics, MidGraphics, and BotGraphics. These components are optional. In this example, these components only contain scripts with graphical changes, linked by the Physics Component. This signals the Graphics Components when to change their states based on the Physics states.

Physics Structure

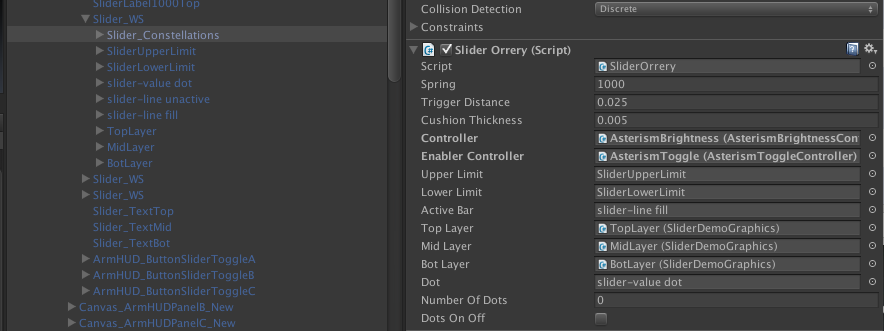
widgets2

This is an inspector view of the Button physics structure. From here, you can specify the spring constant, trigger distance, and cushion thickness (used for hysteresis). The script references the graphics components because it will call their functions based on the state in the physics component.

Here’s a snippet of how it’s being done currently in ButtonBase.cs:

    protected virtual void ApplyConstraints ()
    {
      Vector3 localPosition = transform.localPosition;
      localPosition.x = 0.0f;
      localPosition.y = 0.0f;
      localPosition.z = Mathf.Clamp (localPosition.z, min_distance_, max_distance_);
      transform.localPosition = localPosition;
    }

    protected void ApplySpring ()
    {
      rigidbody.AddRelativeForce(new Vector3(0.0f, 0.0f, -scaled_spring_ * (transform.localPosition.z)));
    }

    protected virtual void FixedUpdate ()
    {
      ApplySpring ();
      ApplyConstraints ();
    }

During each physics update (FixedUpdate), the spring is applied first, then constraint is applied afterwards to constrain its x-axis and y-axis movement. I chose to use our own formula for spring physics because Unity’s spring hinge doesn’t work well when the displacement of the object is less than 1 (as Unity distances equal meters). Since we’re always working with a space less than a meter from the camera, this became a problem, so we had to implement our own spring physics.

These base classes also have abstract functions, such as:

    protected virtual void Update()
    {
      CheckTrigger();
    }
    protected void CheckTrigger()
    {
      float spring_location = transform.localPosition.z;
      if (is_pressed_ == false)
      {
        if (spring_location > scaled_trigger_distance_)
        {
          is_pressed_ = true;
          ButtonPressed();
        }
      }
      else if (is_pressed_ == true)
      {
        if (spring_location < (scaled_trigger_distance_- scaled_cushion_thickness_))
        {
          is_pressed_ = false;
          ButtonReleased();
        }
      }
    }

    public abstract void ButtonReleased();
    public abstract void ButtonPressed();

ButtonToggleBase.cs (inherits ButtonBase):

    public override void ButtonReleased() { }
    public override void ButtonPressed()
    {
      if (toggle_state_ == false)
        ButtonTurnsOn();
      else
        ButtonTurnsOff();
      toggle_state_ = !toggle_state_;
    }
    public abstract void ButtonTurnsOn();
    public abstract void ButtonTurnsOff();

ButtonDemoToggle.cs (inherits ButtonToggleBase):

  public override void ButtonTurnsOn()
  {
    TurnsOnGraphics();
  }

  public override void ButtonTurnsOff()
  {
    TurnsOffGraphics();
  }

This example shows that the ButtonBase calls two abstract functions – ButtonPressed and ButtonReleased – when the button passes or retracts from a certain point. ButtonToggleBase overrides the previous two abstract functions, and whenever the button is pressed it also calls two other abstract functions: ButtonTurnsOn and ButtonTurnsOff. Finally, ButtonDemoToggle overrides the previous two abstract functions, and handles the graphics components during these events. As mentioned earlier, other Widgets follow a similar pattern.

Solving the Rigidbody Problem

The biggest problem we came across while using Widgets in Planetarium is that, when the Widgets are approaching astronomical speeds (e.g. flying around the Earth), the rigidbody inertia causes unexpected collisions. In turn, this causes unintentional event triggers. We decided that a major physics refactor with our own non-rigidbody implementation was necessary.

A sample code snippet would look something like:

LeapPhysicsBase:

    protected virtual void FixedUpdate()
    {
      switch (m_state)
      {
        case LeapPhysicsState.Interacting:
          ApplyInteraction();
          break;
        case LeapPhysicsState.Reflecting:
          ApplyPhysics();
          break;
        default:
          break;
      }
      ApplyConstraints();
    }
    protected abstract void ApplyPhysics();
    protected abstract void ApplyConstraints();
    private void ApplyInteraction()
    {
      transform.localPosition = transform.InverseTransformPoint(m_target.transform.position) - m_targetPivot + m_pivot;
    }

LeapPhysicsSpring (inherits from LeapPhysicsBase):

    protected override void ApplyPhysics()
    {
      float scale = transform.lossyScale.z;
      float localSpringConstant = springConstant * scale;

      m_springVelocity.z += -localSpringConstant * Time.deltaTime;
      transform.position += transform.TransformDirection(m_springVelocity) * Time.deltaTime;
    }

    protected override void ApplyConstraints()
    {
      transform.localPosition.Scale(new Vector3(0.0f, 0.0f, 1.0f));
    }

ButtonBase (inherits from LeapPhysicsSpring, but will no longer have ApplySpring, etc.)

—Wilbur Yu, Unity Engineering Lead

Thanks for following us on our journey through the stars with Planetarium! This demo release is just a taste of what we have in store for the future. Right now, the team is working on getting Planetarium’s source code ready for open license, and putting the finishing touches on the next major round of Widgets releases. We’re also working on adding new Widgets features, including easy-to-use graphics modification functions, event handling, and physics components.

Whether it’s gazing at the stars or soaring through space, we’d love to know what inspires you about VR. What kind of experience would you like to see (or build!) with Widgets?

The post Exploring the Structure of UI Widgets appeared first on Leap Motion Blog.

Simple, Elegant, Fun: Hauhet + Paper Plane by VRARlab

$
0
0

Over the next several weeks, we’re spotlighting the top 20 3D Jam experiences chosen by the jury and community votes. These spotlights will focus on game design, interaction design, and the big ideas driving our community forward.

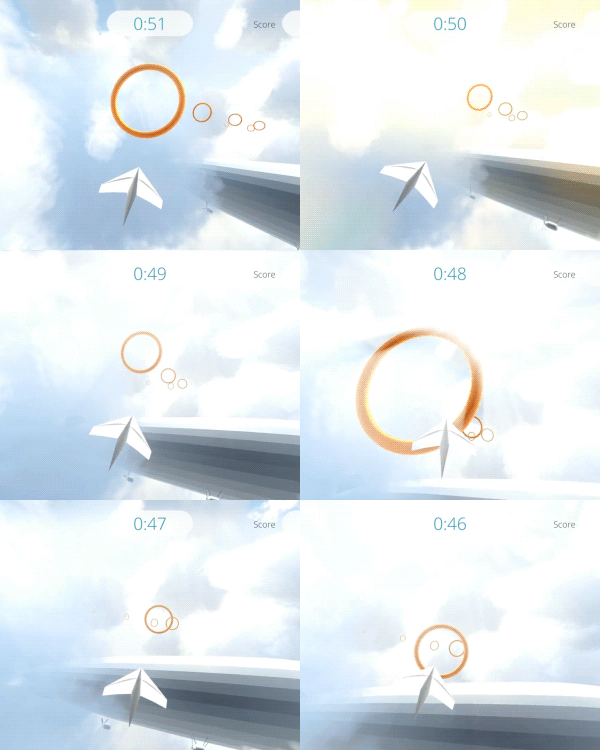
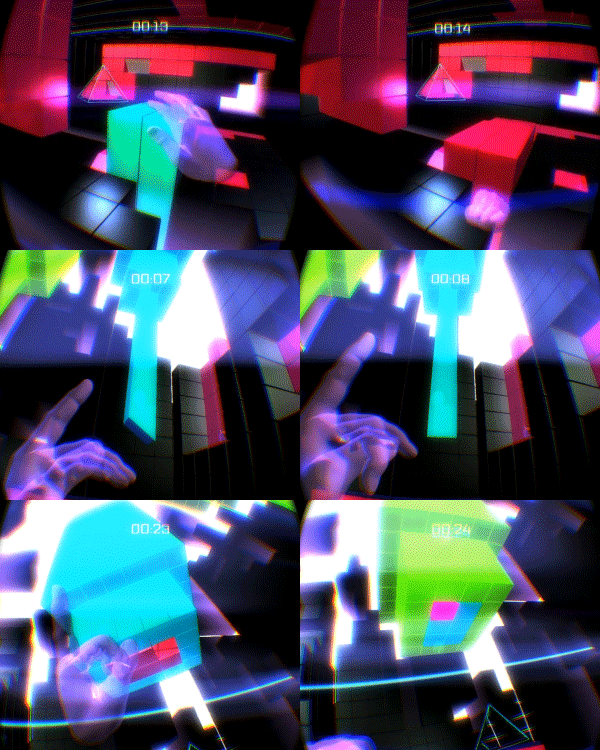
Today’s spotlight is a double-feature, as development studio VRARlab have two games in the top 20! Hauhet is a futuristic VR puzzle game, while Paper Plane lets you fly a plane through golden rings.

Can you tell us a bit about your studio’s overall vision? What’s the inspiration behind VRARlab?

We opened the laboratory about a year ago, as we saw the huge potential in VR as a totally new market. Our VR experiments are inspired by our love of science fiction and by the experiments of other developers who are also exploring virtuality. When we see the results of our work and how rapidly development is moving to this direction, we have a feeling that we are already stepping one foot into the future, where VR is a part of the everyday life of ordinary people.

0NZOqh4yOnnc

Hauhet is very abstract and futuristic, while Paper Plane is uses very classic arcade motifs. How did each idea come about?

Both projects are very different from each other. With Paper Plane, we studied the basic features of Leap Motion using fairly simple mechanics. We were interested in creating a project with a small entry threshold, where the use of the sensor within the gameplay would be quite natural. The idea of controlling a plane came quite by accident, when discussing the possible options of the game. We believe that in childhood many of us were running around in the house with the plane trying to avoid the corners. That’s the feeling we wanted to simulate.

The idea for Hauhet came during the discussion about different ways to look at interaction in virtual reality. Usually, we can see projects where the user is manipulating objects that affect the environment (i.e. the geometry of the level). We thought it would be interesting to turn the situation in the opposite way – controlling the geometry of the level by impacting the object. In this case, giving the ability to move part of the gaming scene by changing the direction of the laser beam.

What was it like incorporating Leap Motion into your Unity workflow?

My advice: don’t forget about the orientation of the axes and test on different computers. Unity provides a very natural way for the implementation of VR in your project. There are many differences from the desktop version associated with dimensions (distance between the eyes, the height of the neck, and so on). A more complex task is the movement of the player in VR. We have to figure out how to naturally recreate it so people will not feel uncomfortable and disoriented in space.

What types of tools or building blocks have helped you create a sense of immersion?

Methods of immersion can be quite different, and we try not to be limited to any guidelines. We are a lab – this means that we experiment a lot and constantly try to connect various gadgets and techniques. On our YouTube channel, for example, we show how to combine the Oculus and iPhone, turning it into the input device. Our designers plunge into the creation of special interfaces, as it’s very interesting and qualitatively expands new opportunities within the virtual environment.

What are some of the most exciting developments you’re seeing in augmented reality?

In addition to VR, we work with AR on various devices: mobile platforms, Google Glass, Epson Moverio. But unfortunately, at the moment the possibilities for AR are severely limited with difficulties in recognition of markers and positioning of augmented objects in space. We believe that VR will give impulse and direction to AR, including the possibility of hybrid realities.

VRARlab is on Twitter @VRARlab. Check out their latest experiments on YouTube.

The post Simple, Elegant, Fun: Hauhet + Paper Plane by VRARlab appeared first on Leap Motion Blog.

Master the Elements and Battle Evil Spirits in VR

$
0
0

Over the next several weeks, we’re spotlighting the top 20 3D Jam experiences chosen by the jury and community votes. These spotlights will focus on game design, interaction design, and the big ideas driving our community forward.

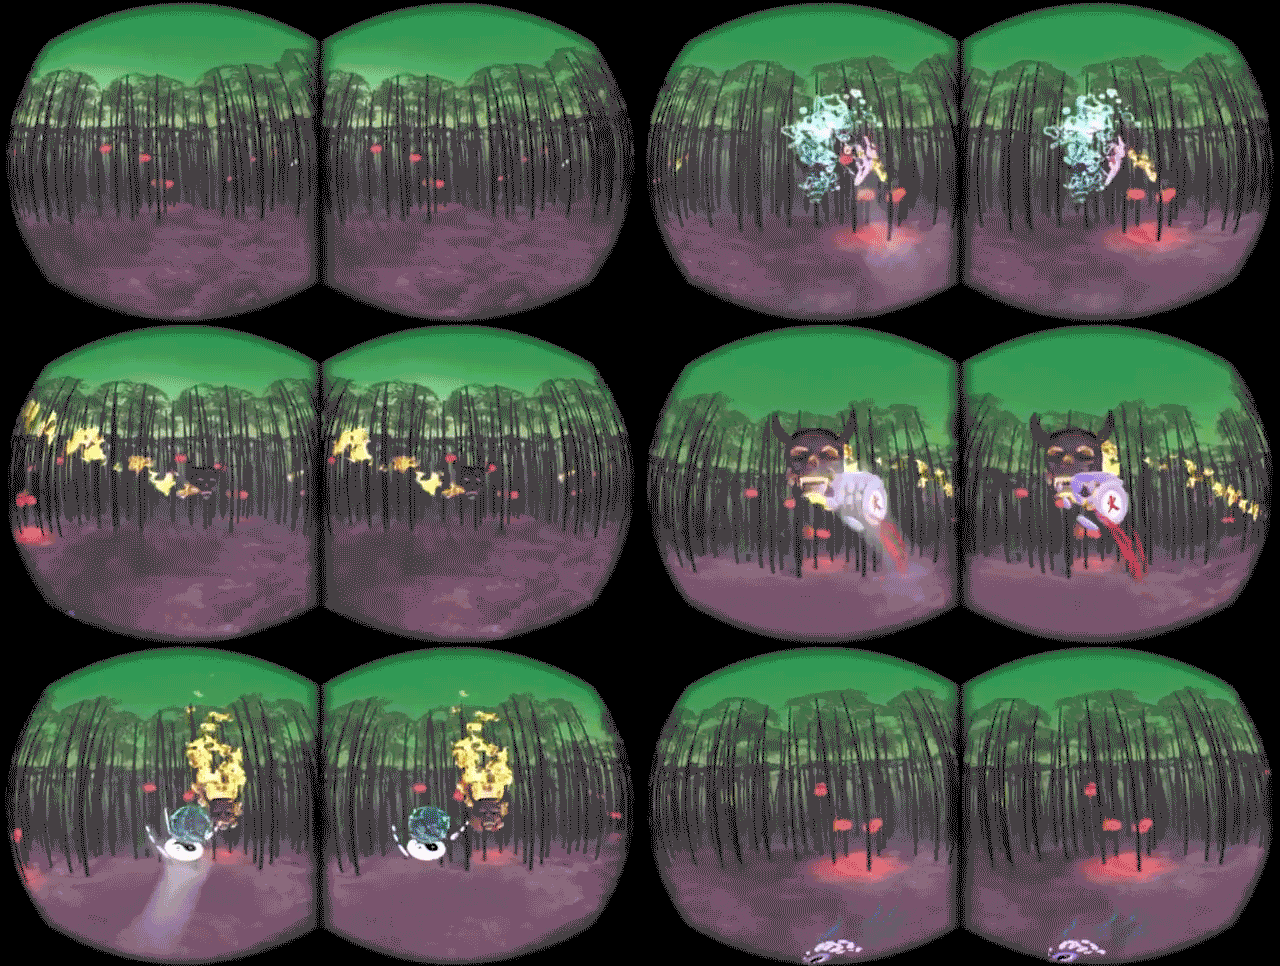
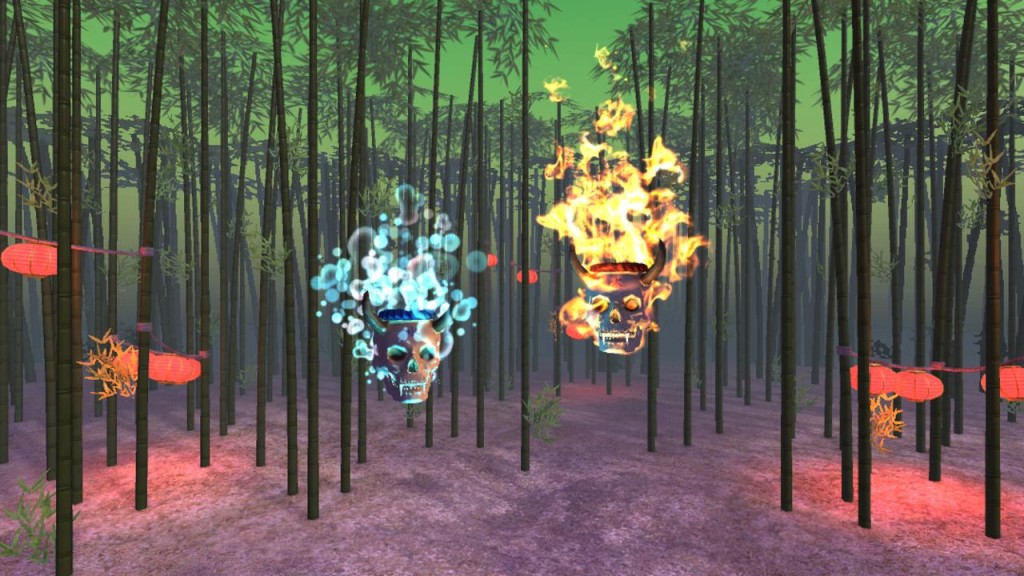
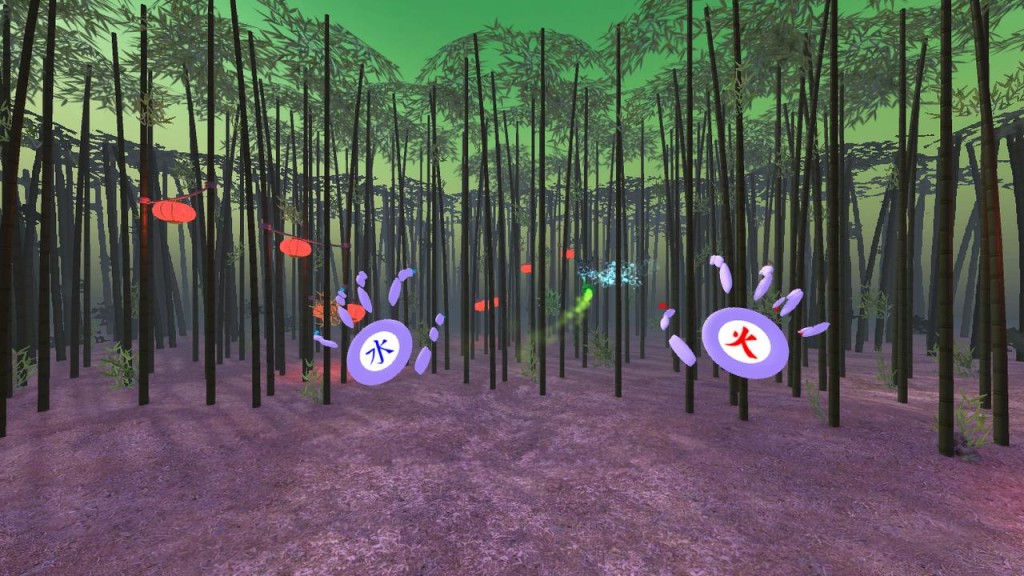
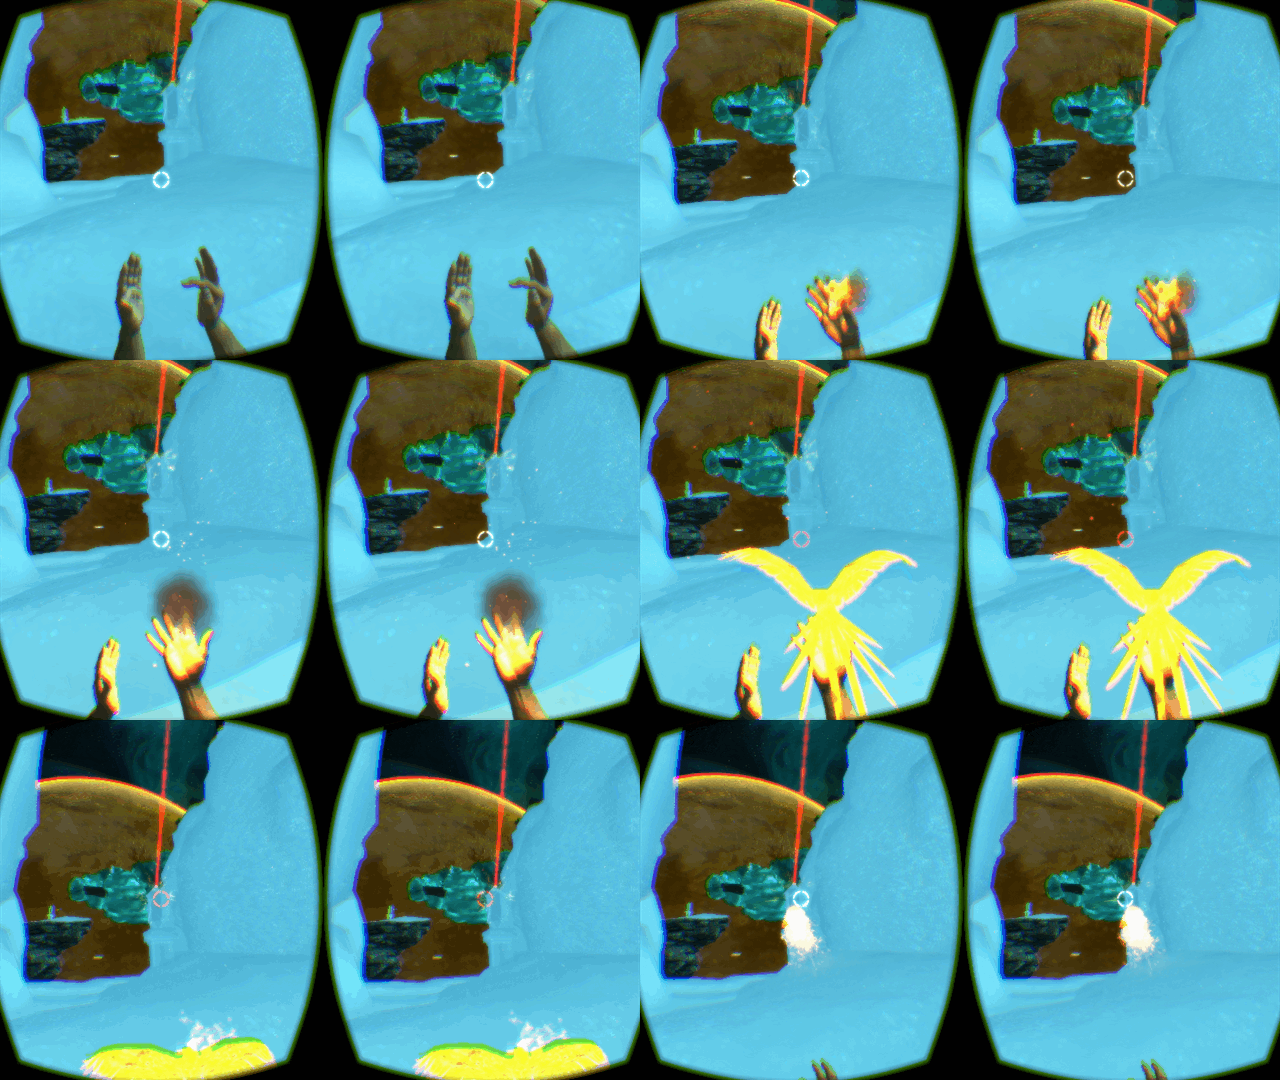
Kevin Tsang’s ElementL: Ghost Story placed 6th in the 3D Jam, and is one of several VR demos we’re showcasing this weekend at IndieCade East. In this VR demo, as a Taoist monk you’ve been sent to rid a village of evil spirits haunting a nearby bamboo forest. Use your mastery of the elements to put them to rest.

elementl

What was your thinking in creating a VR experience where you’re standing in one spot with 360° interactivity?

We wanted to take full advantage of 360° VR immersion by not limiting the view to one direction. Players are encouraged to look all around by the slowly circling skulls, to show that they can attack from any direction. We also used 3D audio cues to help direct players, so headphones are a must. We also didn’t want the player to be holding controllers for walking or have any automatic movement to help reduce VR sickness – so you’re rooted to the spot.

Tell us how you designed the enemies and forests of ElementL.

The bamboo scene was something that we could create quickly and also adds a sense of atmosphere which fits with the theme. Likewise, the enemies don’t need complex walking animations if they’re floating!

For the game design, we knew we wanted to make use of the Leap Motion’s left/right hand detection. We had planned a much more complex array of powers, but quickly decided that simple gestures with the left and right hand were more fun and easy to learn. It was at that point that we decided to have two elements – one for each hand and the corresponding enemy type.

ss5

What’s the connection between hand controls and magic powers?

We instantly wanted to do a first-person VR experience with your own hands, and we thought about various mechanics we could use – from punching to sword swinging to superhero powers. We settled on a fireball mechanic, as it felt most natural, and the lack of tactile feedback didn’t detract from the experience. Also, who doesn’t want to be a fireball tossing wizard?

What UX design tips do you have for other developers?

In VR the depth of your on screen prompts is important to allow the player to focus on them, ideally they will be at the same depth as the objects they are focused on at the time. You also never want to wrench control from the player in VR as this can be very disorientating. Also know the limitations of your system so you can craft a smooth experience for the player and improve accessibility for everyone. You have to ask yourself at each stage of development whether something is adding to the fun of the game or an unnecessary complication.

What inspires you as a game developer?

What I love most about making games is seeing other people play them and enjoy a new experience. Being able to create those experiences is a fantastic opportunity that we have as small indies thanks to affordable and powerful tools such as Unity, Oculus Rift and Leap Motion.

ss4

Kevin runs Mechabit, a Liverpool-based indie studio currently developing a game for PC and Xbox called Kaiju Panic. Follow his exploits on Twitter @spinaljack.

The post Master the Elements and Battle Evil Spirits in VR appeared first on Leap Motion Blog.

Widgets 2.1.0: Featuring Dial Picker + Data Binding

$
0
0

The latest version of Widgets is now available on the Developer Gallery! Version 2.1.0 introduces the Dial Picker Widget and data binding model, along with several performance optimizations.

After you download the latest demo and experiment with Widgets in your own projects, we’d like to get your thoughts as we forge ahead towards a full release. More on that later, but first, here’s what you’ll find in 2.1.0:

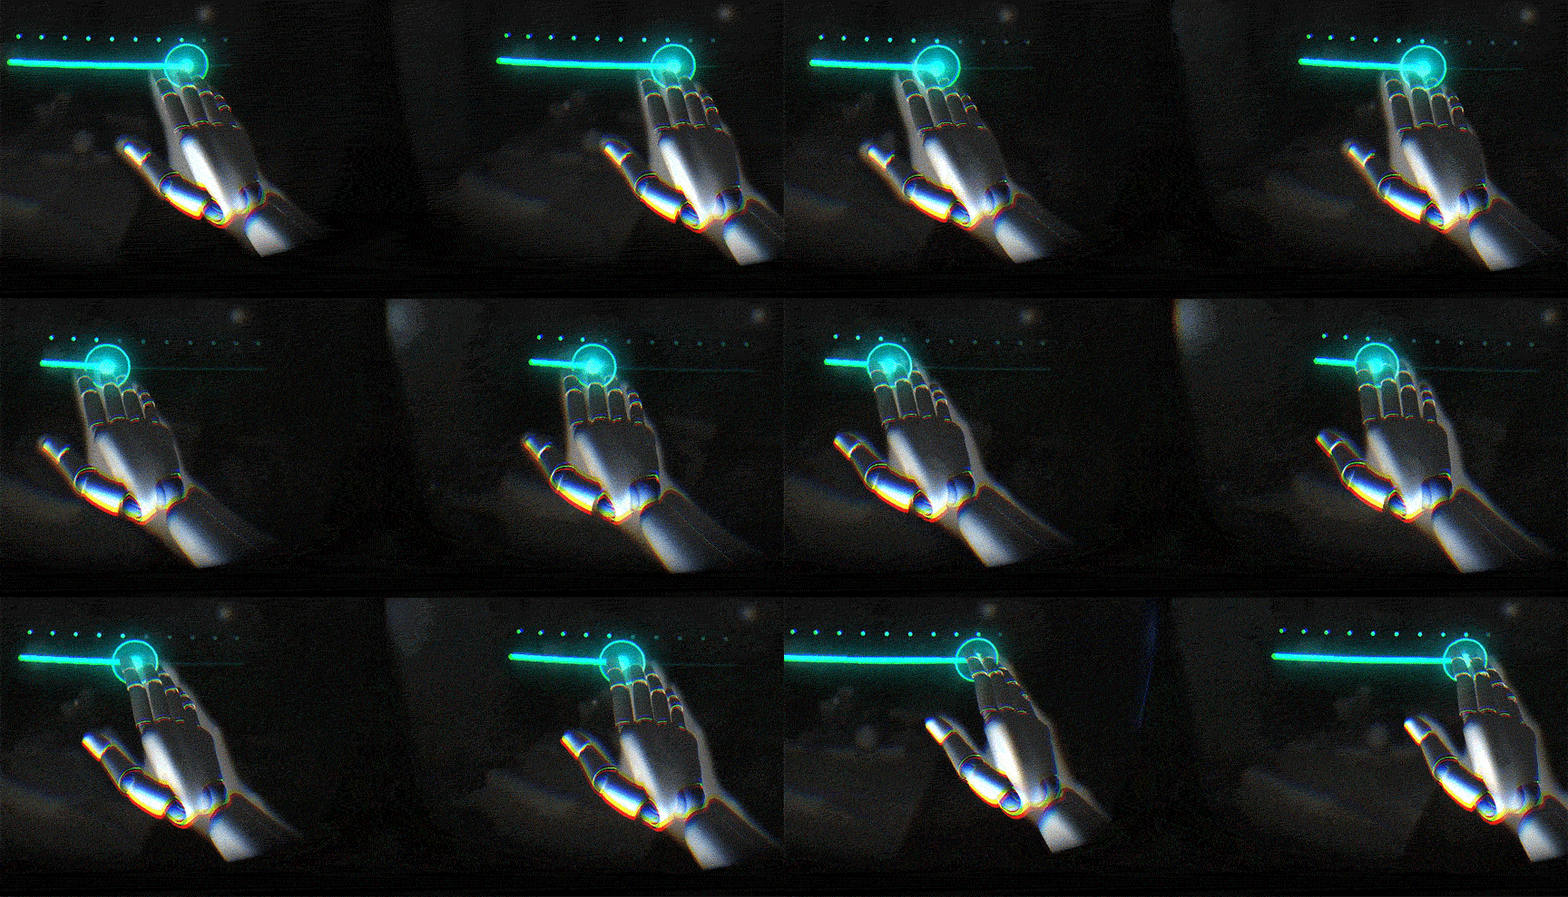
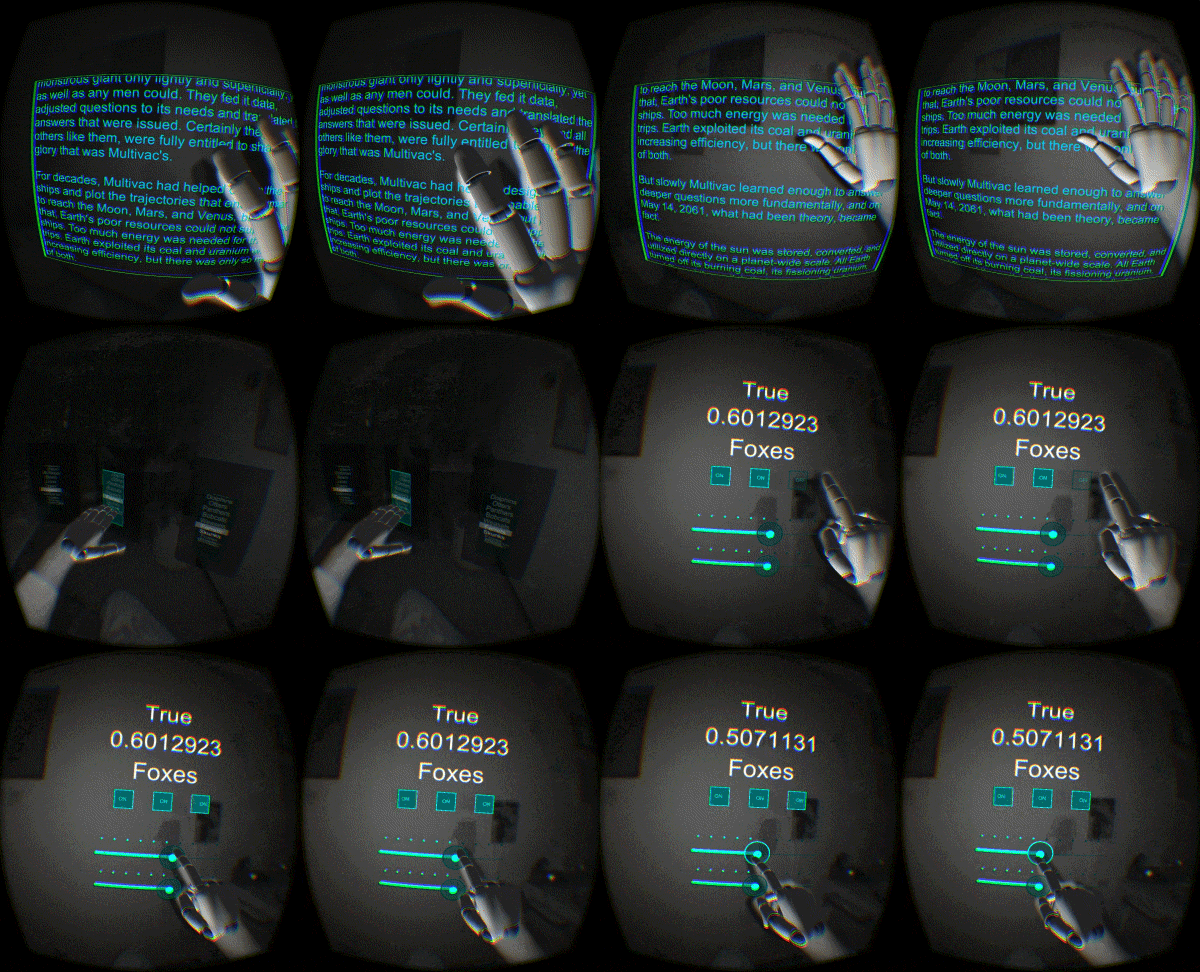
Dial Picker Widget. This widget (previously known as Time Dial) appears as the date and time menu of the Arm HUD in the Planetarium showcase. It can be used to select from a variety of options.

Data binding layer. Version 2.1.0 also introduces a data binder to Widgets, so that they can be easily and robustly integrated into your existing data models:

  • Without modifying existing code, developers can bind public variables (or properties, or methods) in their classes to one or more Widgets!
  • When a user interacts with a Widget, the bound value will be changed.
  • When a user is not interacting with a Widget, its state will reflect the current bound value.
  • You can see examples of data binding to multiple widgets in the BasicVRWidgets scene, as shown in the GIF at the top of this post.

Simplified physics instead of PhysX. As Barrett discussed in his recent blog post on Time Dial, we encountered some interesting physics bugs while developing Planetarium. Now that we’ve coded our own interactions:

  • Widgets can be safely used on accelerating and spinning objects (no more accidental gyroscopes)!
  • Low frame-rate oscillations are prevented.
  • The physics behavior may be extended in the future to enable grabbing and pulling.

Event hooks for different interaction events. With this latest refactor:

  • Graphics code has been refactored to make it easier to define custom graphics and behaviors.
  • The graphics state and event interface may be extended in the future as more modes of interaction (such as hover) are supported.

Unity 4.6 GUI. We also updated the Button and Slider Widgets to use elements of Unity’s 4.6 GUI. This allows for improvements in rendering time and takes advantage of the GUI layout system. Meshes and textures can also be used. You can see examples of various rendering methods in the BasicVRWidgets scene.

What Do You Think?

Widgets is still a work in progress, and we have a few more refactors in the weeks ahead. Right now, we’re working on getting the Arm HUD menu system ready for full release. We’re also working on a “hover” interaction mode, which would allow users to trigger events that would easily tie into the data model.

As we bring the full Widgets suite towards a full stable release, we’d love to hear your thoughts on the project. How are you using Widgets? What would make your development easier? Let us know in the comments.

The post Widgets 2.1.0: Featuring Dial Picker + Data Binding appeared first on Leap Motion Blog.

Let’s Make Fried Rice! Tool Tracking and Casual Cooking

$
0
0

Over the next several weeks, we’re spotlighting the top 20 3D Jam experiences chosen by the jury and community votes. These spotlights will focus on game design, interaction design, and the big ideas driving our community forward.

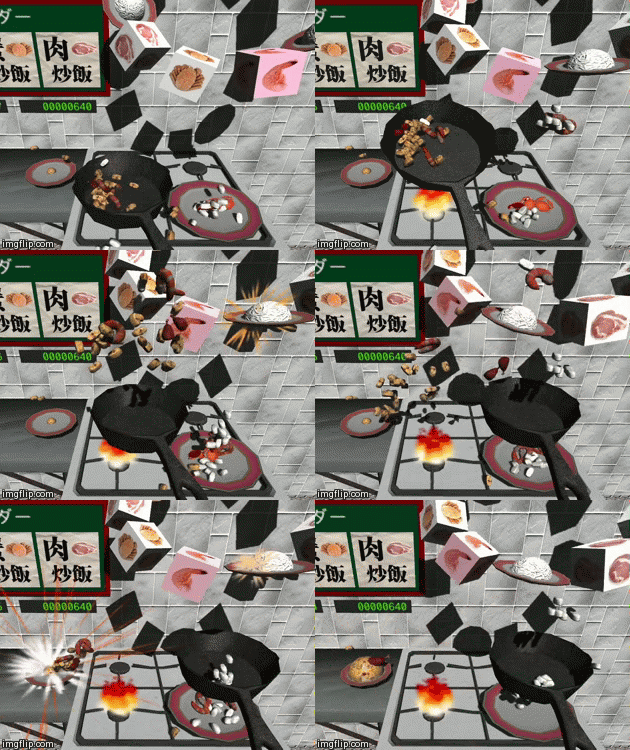
Let’s Make Fried Rice puts you in the shoes of a short order cook. Using tool tracking, grab your pan, extract ingredients, and churn out plates of hot fried rice as fast as your customers can order them. Download the desktop version for Mac and Windows, or the Rift version for Windows.

What was your process in designing the food physics?

lets-make-fried-riceAt the very beginning, we tried making it realistic, but the realistic formula was acting too tight. This was almost uncontrollable, as the rice dropped too quickly and the player almost couldn’t keep rice in the pan. After this observation, we reduced the gravity to one-third of the realistic value. Things worked more slowly, but that seemed much comfortable for our test players.
On the other hand, we tweaked the sensitivity of the Leap Motion Unity asset’s HandController 3 times its original value. This tweak aimed to keep players’ hands inside the Leap Motion tracking range. Before we did this, players tended to move their hands outside the sensing area, and that caused a poor game experience.

Cooking games are a very popular casual gaming genre. What does motion control add to the mixture?

Using a gamepad requires some gaming ability for the player, but motion control may work easier (as well as touch controls on smartphones and tablets). To make more casual games for a wider audience, motion control is a great option. What I love about Leap Motion is that it doesn’t require too much physical space.

Tool tracking is a little-used mechanic in Leap Motion gaming. Why did you decide to take it in that direction?

The reason is simple – tool tracking is much more natural for operating a frypan. I can imagine this also works well for other cooking tools that have straight handles. Human beings have already invented the best input method for pan cooking games. If we were to use different types of tools, I would want to add a spatula for the other hand.

Let’s Make Fried Rice was created by Yusuke Ando (lead programmer) and Hitoshi Nakagawa (UI and score system programmer). Follow them on Twitter!

The post Let’s Make Fried Rice! Tool Tracking and Casual Cooking appeared first on Leap Motion Blog.


Magicraft: Swords and Sorcery in VR

$
0
0

Over the next several weeks, we’re spotlighting the top 20 3D Jam experiences chosen by the jury and community votes. These spotlights will focus on game design, interaction design, and the big ideas driving our community forward.

Finishing in 5th place, Storm Bringer Studios’ Magicraft lets you play as a powerful mage in a land of swords and sorcery. While Magicraft is designed with VR in mind, a desktop version is also available – download it from our 3D Jam site or from the Steam Community.

What were your design inspirations in developing the enemies and atmosphere of Magicraft?

It all started when we received the DK1. Since then, I’ve been experimenting with binaural sounds and different inputs, because it was clear from the beginning there’s no place for keyboard and mouse in VR. I wanted to make a game where you could craft spells, and later use gestures and play the game with your bare hands.

23_s

Navigating worlds in VR is a real design challenge. How did you develop Magicraft’s locomotion scheme?

We tried different schemes and are still experimenting with those. Finally, we stopped with the hands-in-front navigation, and it worked quite well for the demo. We are still improving that.

At first, I was very excited when I began implementing image passthrough mode with hand isolation. Sadly, it was not stable enough to include in the demo. Seeing your own hands in VR is an extremely exciting experience. I remember the Plasma Ball demo, when I tried it for the first time, I could swear I felt when I was touching the ball. I showed the same demo to several friends and each of them said the same. This shows how easy it is to actually trick our brains and how important is to have the right controls in VR.

magicraft-battle

What are your plans for developing Magicraft further? Will we ever be able to destroy that ghost at the beginning?

(Laughs.) That was some old school gaming trick – showing the main boss who sets traps and finally in final level you’d encounter and defeat it. Currently, you cannot defeat him, as you need to use his attacks to proceed.

First, we’re going to release a mobile title on all mobile stores: Magicraft: Balance. It will set the mood for the future series. After that will be Magicraft: Elementals, another mobile title where players can craft spells. Imagine Minecraft for spell creation and using them in randomly generated dungeons. So expect more innovative puzzles and new monsters.

Magicraft: Balance

At the same time, we will start a Kickstarter campaign for the PC version, Magicraft: Arena, supporting VR and Leap Motion. So it will be a whole ecosystem – you can craft spells on mobile in your free time, and then test them against other players in VR using your bare hands!

Want to follow the world of Magicraft as it continues to develop? Like Storm Bringer Studios on Facebook.

The post <i>Magicraft</i>: Swords and Sorcery in VR appeared first on Leap Motion Blog.

Gooze: Virtual Horror Based on a Real-Life Ruin

$
0
0

Over the next several weeks, we’re spotlighting the top 20 3D Jam experiences chosen by the jury and community votes. These spotlights will focus on game design, interaction design, and the big ideas driving our community forward.

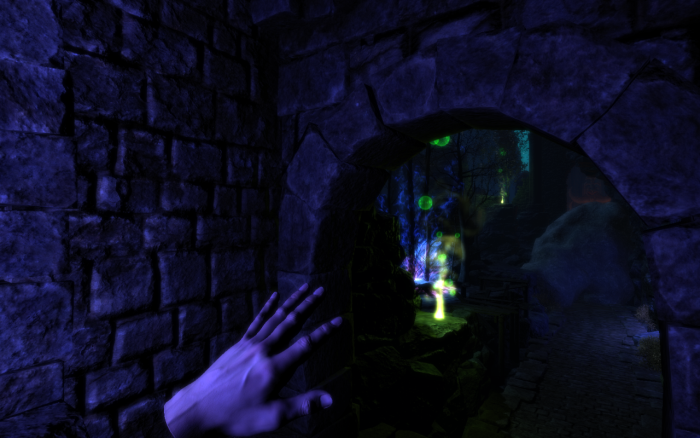
Finishing in 12th place, Fiery Things’ Gooze is a survival horror demo based on a real abandoned hospital near Berlin. The game, available for the Oculus Rift, involves solving puzzles to travel from room to room – all while avoiding strange entities. We caught up with creator Daniel Wiedemann to ask about the real-life inspiration behind the demo.

gooze3

What made you decide to start your own game studio?

During my career as an art director in an ad agency in Hamburg, Germany, I created several very ad-related mini games, but never “just” for entertainment purposes only, even though this had always been my childhood dream. So I decided to move to London and do a MSc in Creative Technology on top of my Diploma in Communication Design. In 2013, I created my first real entertainment-only game called LizzE – And the Light of Dreams, a third-person hack and slay.

LizzE by the way, among other techy features, already made use of the Leap Motion Controller as an optional input device. Rival Theory became interested in the project, as I made good use of their AI engine in the game, and they wanted to make a “studio showcase.” For that I needed a studio. That’s how I started with FIERY THINGS.

Personally I grew up with titles like Indiana Jones and the Fate of Atlantis, Sam & Max, Command and Conquer – as well as Doom, Quake (still love to have a Quake 3 Arena match from time to time), Unreal Tournament and of course Counter Strike. But I remember FEAR to be an especially intriguing experience as it combined gameplay with cinematic horror storytelling in a way that made me lust for more of these goosebumps moments.

gooze8

How did you arrive upon the concept of Gooze?

The title “Gooze” is derived from exactly that term – “goose bumps.” In the beginning of 2014, I started with my PhD on The interrelationship between game design, new generation interfaces and user experience in digital games. As one of my research projects, I just knew I finally wanted to create a horror game.

At that time I was already experimenting with the DK1 and also backed Virtuix’s Omni and Sixense’s STEM Kickstarters. So in theory I had this awesome VR hardware setup that could track the player’s body quite accurately and would offer a sophisticated way to interact with a VR environment. This and my conceptual thinking lead me to the idea to combine a horror environment, like being trapped in a derelict asylum, with the almost-obvious puzzle-solving capabilities of the hardware. Once I saw that Leap Motion released its VR mount, I gave it an immediate try and found that users (even though tracking wasn’t as reliable as I had hoped) were amazed by being able to see their hands in VR and interact with virtual objects.

Even though horror in VR is an extremely intriguing concept, it also comes with a downside: you need to be very careful and way more subtle in VR than in any other medium. It’s easy to overwhelm your users and scare them to an extreme like no other medium can, as they feel truly present in the environment you created. But you certainly don’t want to scare them so much, that they just take off their VR goggles, completely eliminate the experience, and maybe never play your game again.

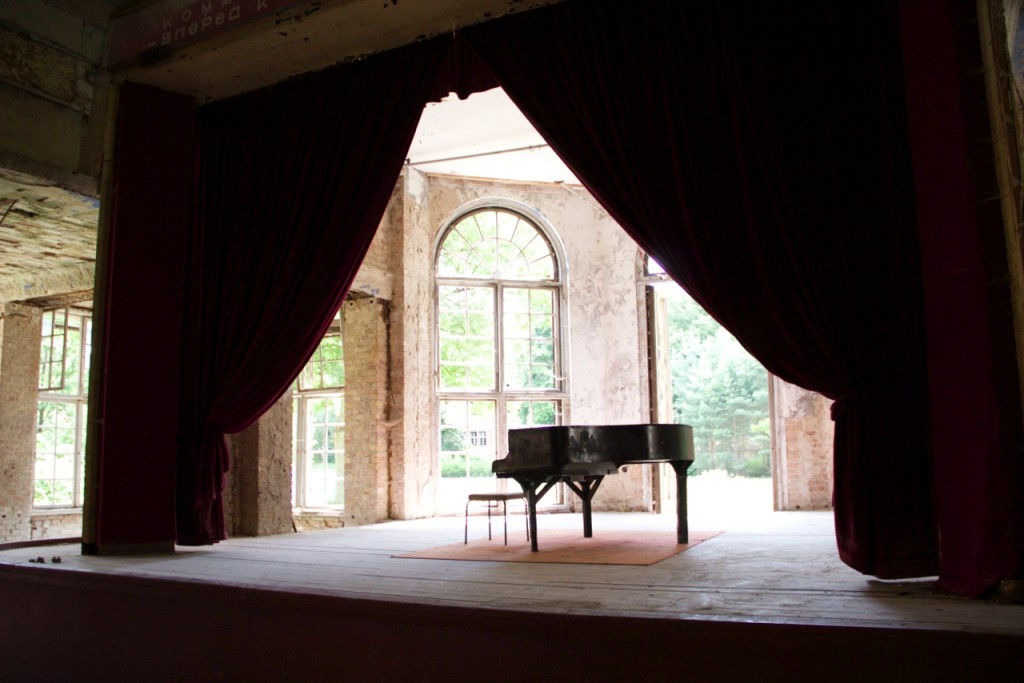
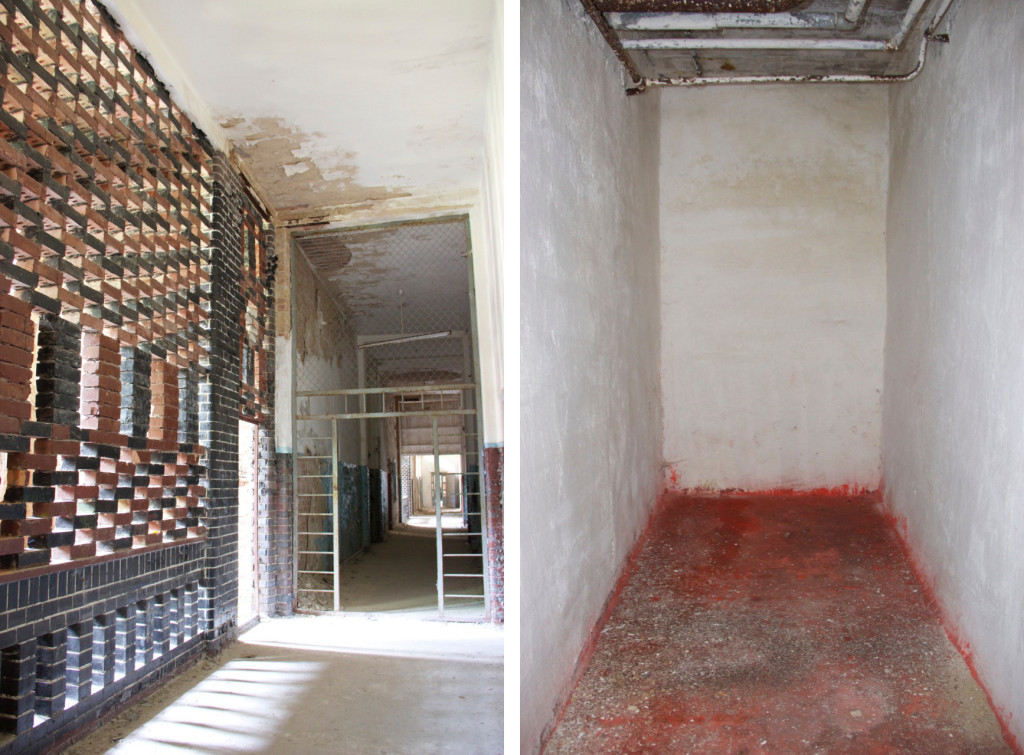
With Gooze I wanted to create a believable but still surreal environment. A friend of mine told me about this subculture called “urbex” (urban exploring). In it, people visit almost forgotten but completely derelict and rotten places, to enjoy the certain aesthetics that come from the decay of architecture and everyday objects. So I decided to go on a trip myself, to a ruinous lung healing clinic close to Berlin, built in the late 1800s, that was later adopted by the Russians as a military hospital and then forgotten.

gooze4gooze7

In this truly authentic and scary place, over two days I crept into all sorts of corners of their cellars with just my flashlight and my camera to take over 600 pictures for textures, visuals, and puzzle inspiration. Furthermore, I noticed certain scary effects that came from anomalies in the architecture that will definitely find their way into the game at some point and hopefully work as well on others in VR as they did on me.

What was it like combining Leap Motion and the Oculus Rift?

Combining Leap Motion with the Rift using the VR mount was fairly straightforward. Only when you start to aim for more precise interactions it became tricky. For whatever reason I had extremely bad tracking in my development space (maybe the paint of the walls or something) and even though tracking seemed more robust in other places it still needed some extra handling to get to a more acceptable manner of interactions. But the same issues were visible in most of the other demos I tried as well.

My personal tips for improving the VR experience are:

  • Restricting the tracking of hands to a certain distance (maybe to 0.5m or 20″), as the average arm can only be so long.
  • Restrict to only track the two closest registered hands at a time, as for first-person applications this is mostly likely what you want and reduces any “ghost“ hands to a minimum.
  • Even though this currently isn’t implemented in Gooze, you can handle loss of tracking while holding a virtual object so that the grab itself stays active as long as the hand doesn’t get registered inside the view again (without a grabbing pose).
  • A more general VR topic is performance. You want to stay as close to the current Hz setting of the Rift as possible with your frame rate, to deliver an user experience with as little nausea as possible. One way to do this is optimizing and maybe removing effects in your game like in any other, which should be done anyway. But for these momentary frame rate drops I implemented a dynamic resolution feature, that scales the internal render texture up and down according to the current situation. Not optimal but definitely an improvement on not having this feature.

In your ideal world, how do you see the VR space evolving?

Standardization of VR inputs by different devices on a node base seems important for development purposes, as we can’t require all users to use the same hardware setups (Sixense is going the right way there with their announced open SDK for example).

Wirelessness and miniaturization will also be key to be interesting for certain user groups and myself. Comparing my Rift + Leap Motion setup and the Zeiss VR One or Samsung’s Gear VR goggle, the mobility and ease of setting it up is an immediate blessing.

I think in the beginning, games will make the most of the technologies because of their interactivity. Watching 360° movies and even 360° 3D movies also seems extremely interesting, but the technology is not yet sophisticated enough, nor do filmmakers currently know what to do with it. Just imagine a movie in 360° where everything is happening all around you and you need to turn to look at things happening. How do you make sure the viewer is not missing essential parts of the plot? I think there will be interesting, maybe even partly interactive, solutions coming up for this.

What’s next for Gooze? Any plans to expand or develop further?

Even though I currently need to work on a non-VR-related children’s edutainment app about how the weather works, I certainly will develop Gooze further afterwards. It will have optional support for the Omni and the STEM system and have around 3-5 playable rooms in the beginning and most importantly some scary entities in it. There is also a plot, which will become more understandable to the user. In the end, the user will need to work his way through a believable but still surreal environment, with entities that’ll hopefully scare the sh*t out of him.

gooze1

Follow Daniel’s latest forays into the real and virtual worlds @WiedemannD.

The post <i>Gooze</i>: Virtual Horror Based on a Real-Life Ruin appeared first on Leap Motion Blog.

Step into the Darkness with Observatorium

$
0
0

Over the next several weeks, we’re spotlighting the top 20 3D Jam experiences chosen by the jury and community votes. These spotlights will focus on game design, interaction design, and the big ideas driving our community forward.

Ready to step into the darkness? In Dominic Ricci’s survival horror demo Observatorium, you’ve been sent to a strange building in the middle of the woods, ostensibly to retrieve something your friend left there. Observatorium is available for Mac and Windows from the 3D Jam site.

What was the ideation process behind Observatorium?

The process for Observatorium started with thinking about what game the motion controller would merge fluidly with. I thought about Nazi zombies, and how you had to board up windows by walking up to them and pressing a button. My thought was, well, what if you were actually picking up the planks used to board the windows? Would that immerse you more in the experience? Would it heighten the tension of time ticking down if you’re the one actually placing them to protect yourself? That was the core idea that everything started with, the idea of the windows.

Horror is a genre I particularly like designing for. I make games to evoke emotion, and I think horror games open the way to incredibly atmospheric and tension-filled experiences. Motion controllers, by virtue of their function, provide the player with a more immersive way to interact with what is happening in the game, and even more identify with the character. The combination of that and a horror atmosphere was something I felt would be something special, and result in a visceral experience on the part of the player.

What made the game come together was that every Leap Motion game that I saw and played with was a one-shot demo, or single mechanic experience. Nothing I played tried to convey a more traditional play experience, 3D or otherwise – instead it focused on the unique interface of the controller and centered around that. I wanted to implement all of those mechanics into a linear 3D campaign experience.

What was developing with Unity/C# and JavaScript like for a Leap Motion + Oculus mashup?

When I put together the team for Observatorium, I kept a few things in mind. I knew I wanted to have some sound work (Thomas Kelleher) and concept art (Zoe Serbin) on the side, but I wanted an engineer I could really work with on the Leap Motion controls, to help implement them and really fine tune them to feel as natural as possible.

For developers looking to pursue VR, Leap Motion, or both in the future, I can simply recommend working with at least one other person – someone to bounce ideas off of, and to give a different perspective on the programming and code. Leap Motion has what I consider to be a very good API built in for Unity3D, but without Chris Toczauer, my stellar engineer, the project wouldn’t have come close to the vision I initially had for it.

I would also advise being heavily educated with the engine itself, whether Unity, Unreal, or another, before jumping straight to alternate control schemes. It’s a lot easier to understand how the Leap Motion API fits into Unity if you understand Unity itself in the first place.

There were a few notable roadblocks during the development process, and a lot of them I still find pretty funny despite the headaches they gave us. We had a situation where the player would “trip” and fall down. When we tried to fix that by locking it in a particular axis, it just stayed at whatever level it was when it went upstairs. So, if you tried to go back down, you just floated at the level you went up to.

Unity itself proved challenging at points. Small things like objects being set to static caused us a brief setback, because we thought our whole pick up mechanic wasn’t working and we couldn’t figure out why. Of course, once that was unchecked then there was no problem, but it was concerning at the time.

The final “roadblock” I would mention was simply the scope of the game, mainly the 3D environment. A big part of why I make games is to emulate reality. That means I like 3D, and to a lesser extent, that means I prefer realistic environments. For a six-week project with no artists, that’s just a tad bit of an obstacle, but I wanted to get it done. I did, and at times it meant 60-hour weeks just on this project, but the end result was what I was aiming for, and I consider that roadblock overcome. That would be my main advice – if you have a roadblock, work through it as best you can.

VYZcCe

As a writer, what are your thoughts on the intersection between fiction writing and game design?

I’m in games because I feel it’s the best way to tell a story, because life is interactive, and no other medium currently reflects that.

It’s all about telling a story, or an experience; it’s just the tools that are different. There’s a fun story there – I decided to go into game design as a career when I was about 10. At the time, I identified the main parts of developing games, i.e. art, design, and engineering. I have always had magnificent abilities at drawing smiley faces, but sadly that’s where they end, and young as I was I wasn’t quite good enough to teach myself programming at the time. Not the genius.

Sooooooo… what is the least resource-intensive result? Design. Good writing and storytelling skills are integral to design, so I started writing in my free time. At the time I was doing some community management on Bungie.net, so I was fortunate enough to have a lot of feedback for my work. I was bad, very bad, but as I slowly got better with time, I eventually drew connections between writing stories and telling stories on their own.

By telling stories through film, video games, and art, I generally began to obtain a better understanding of what it meant to have a compelling narrative. I’m in games because I feel it’s the best way to tell a story, because life is interactive, and no other medium currently reflects that. The possibilities for VR tie into that as well, and I am excited to see where that goes in the future.

baqL0h

What’s next for Observatorium?

My team is satisfied with the results for Observatorium. Placing as a semi-finalist, even not in the top numbers, is a good accomplishment for us, and notably for me a drive to do better. I always measure myself against the best. (I’m looking at you, Aboard the Lookinglass!) Even with it being done during my responsibilities and crunch for school, I give myself no excuse for not performing better. I will continue to work hard and turn out better content in the future.

Due to various responsibilities, Observatorium will likely stay in its current state, but with the chance for us to revisit it later and improve it for the Leap Motion marketplace if time allows. VR is going to continue to present intriguing possibilities as it improves. A fellow classmate of mine at USC, Zachary Suite, recently made a VR experience where you sit in a wheelchair, and wheel yourself around through the game. That, to me, is something exceptional, and if not for Observatorium, I am nonetheless excited to see what we can do with it and Leap Motion in the future.

The post Step into the Darkness with <i>Observatorium</i> appeared first on Leap Motion Blog.

Take the Reins of a Ghostly Hayride: Cherry Pie Games’ Hollow

$
0
0

In the lead-up to IndieCade East, we’re spotlighting the top 20 3D Jam experiences chosen by the jury and community votes. These spotlights will focus on game design, interaction design, and the big ideas driving our community forward.

Recently updated with our official Unreal Engine plugin, Cherry Pie Games’ Hollow is a murky, mystical adaptation of Washington Irving’s classic horror tale. On horseback, you can explore a frighteningly familiar landscape where spectres haunt the edges of your vision. Hollow is available for Windows with optional (and highly recommended) Oculus Rift support.

QOsrQs

What’s your personal connection with The Legend of Sleepy Hollow?

We wanted to create a Halloween-themed game that relied more on classical Gothic American horror than your modern asylum psychos and zombie viruses, so we turned to the very well-known Legend of Sleepy Hollow by Washington Irving for inspiration. We’re all familiar with the story of Ichabod Crane and the Headless Horseman, but instead of retelling the story, we created a universe that the legend could have come from.

Did you use any real-life landscapes or pictures as your inspiration for the New England setting?

To build the Hollow universe, we browsed Tumblr for photography of Northeastern American vistas, mountains and deciduous forests for inspiration. We wanted the atmosphere to have that authentic sense of scale, sounds, and colors. We took some detours, but we believe we faithfully recreated that late October rural Maryland atmosphere.

oer-wout-autumn-mantra

colorado

hollow-concept-art

Image credits: Autumn Mantra by Oer-Wout; unknown photographer; concept art provided by friend Sean Villegas.

The lighting effects in Hollow are a big part of what makes it so compelling. Can you tell me about how you developed those?

Lighting was a big part of Hollow. Unreal Engine 4 gave our artists the ability to fine-tune lighting and to create the moods that felt necessary over the course of the experience. Very similar to the level detail an imagineer working on a Disney dark-ride would need. The lighting came as a result of many hours of playtesting and storyboarding.

hollow1

How does music and sound play a role in setting the atmosphere in Hollow?

Sound plays a very important role in Hollow, specifically enhancing the experience by controlling the audience’s sense of security. For example, the atmosphere is built up by comforting and inviting players as Amazing Grace cheerily plays and birds sing. The world then muffles to silence at the left fork in the road before heavy church bells toll from the graveyard and a high-pitched howl wails from the woods.

There really aren’t any birds nor monster cats in Hollow – we did not make them. But the sound would make you believe there are. All of our sound was possible through our very talented sound designer/foley artist. (Justin’s work can be heard on soundcloud.com/justin-gist.)

Navigating the world in VR can be tricky. What inspired you to develop hand controls using reins?

We designed Hollow to reach out to first-time Oculus VR and Leap Motion users. Making the controls feel as natural as possible was a high priority. So logically, our team created rein controls to steer and change the speed of your horse companion, which is the natural method to steering a real horse. By eliminating the need to use any other input than the Leap Motion, we created an easy way for new users to learn how to use the technology.

nfkE7M

What does the ability to see virtual hands add to the VR experience?

Adding hands does a lot more than most would think. Not only does it immerse the user into the world, but for first-time VR experiences it may actually reduce sickening effects many get from being in virtual reality. Our best tip to other developers would be to not rely on very specific hand gestures or positions, but to instead allow for a larger zone of interaction for the user. This gives the user fewer chances to break the game and a better experience at the same time.

What do you enjoy most about Unreal development?

Our favorite aspect of Unreal development is the number of tools available to us as a diverse team of developers. These tools help us in everything from scripting to animating and map design. The freedom to program in C++ is also a plus.

What will horror games look and feel like in five years?

At Cherry Pie Games, we’re thrilled to be involved on the frontier of emerging hardware, and future technology can only heighten the horror game genre. Could you imagine a remastered Hollow with complete body virtual immersion? Or 4D technology giving off the smell of pine needles or a cold chill in the air? The possibilities are infinite and always closer than we imagine.

d-5rcZ

What’s the story behind Cherry Pie Games?

Cherry Pie Games consists of six friends from the University of Central Florida who met during their various degrees and said “let’s do this!” Since then, we have been experimenting with new technology and learning every day. Next week, our team will be at GDC to unveil our new game, Emmerholt! It takes place in the Hollow universe, but with completely different gameplay and objectives.

That same week, we will launch our Kickstarter for Emmerholt, as well as releasing Hollow on the Android market for Google Cardboard. Hollow in mobile VR is very cool we might add!

Want to hear more about Emmerholt and Hollow? Cherry Pie livestreams their development process on their Twitch channel: twitch.tv/cherrypiegames. Drop in and chat with the team!

The post Take the Reins of a Ghostly Hayride: Cherry Pie Games’ <i>Hollow</i> appeared first on Leap Motion Blog.

Inside the Mysterious Beauty of Hammer Labs’ Otherworld

$
0
0

Over the next several weeks, we’re spotlighting the top 20 3D Jam experiences chosen by the jury and community votes. These spotlights will focus on game design, interaction design, and the big ideas driving our community forward.

Featuring ambient music and beautiful visuals, Hammer LabsOtherworld takes you to a strange place where distant spirits stride in mile-long steps and magical puzzles wait to be solved. Available free for the Oculus Rift, Otherworld placed fourth in the 3D Jam. We caught up with coder Oliver Eberlei to ask about the project’s inception.

otherworld

What’s the story behind Hammer Labs?

Officially, I am the owner and only person working for Hammer Labs. Unofficially, it’s whoever is working on a project with me at the time. I created our first game, Farm for your Life, with my sister. Since we released Farm for your Life on Steam, the name “Hammer Labs” gained a track record. I decided to keep the company and continue to work with other developers to create amazing experiences.

At the moment, we are working on a fast paced, arcade-action shooter similar to Starfox 64 called Sky Arena. The team working on Sky Arena is actually the same team that created Otherworld. We just wanted to try something completely different to recharge our batteries and the 3D Jam seemed like the perfect fit.

Otherworld is visually stunning. What was the inspiration for the dark, mysterious aesthetic?

The visuals were all created by our amazing artist, Simon Klein. We decided early on that we wanted to use the novelty of the Oculus to our advantage and just wow the player. Everyone should be able to dive in and lose themselves in a relaxing and enchanting experience. This is why the game itself is very slow and without any pressures. You can’t lose. Nothing you do will make it impossible to solve the puzzles and there is no time limit.

Looking around and taking in the world is a big part of the experience we wanted to create. We actually had many more interactive details planned which players could discover in the environment without them affecting the game at all. For example, the sky was supposed to show the real stars that we know from our sky and the constellations were supposed to light up when you look at them. But we were short on time so we couldn’t implement those ideas. Maybe we have time for them if we decide to make a complete game.

otherworld5 otherworld4

Sound is a monumental aspect of this experience. Can you tell me a bit about the sonic design process?

Robert Taubler and Michael Hasselmann, our talented sound designers and composers, were essential in this design process. Simon and I developed the core idea and when we pitched it to them, Robert immediately thought of the movie Contact. In the end there is a scene in which Jodie Foster is on a beach on a faraway planet. Whenever she reaches out to touch the environment, her touch creates a shock wave and a sound. The sounds don’t really have a melody, but they all sound beautiful together. This is what we wanted to achieve as well.

The player was supposed to create a relaxing melody by playing the game and even though all the sounds created are random, they sound mystical and beautiful thanks to something called the lydian scale. I’ve never heard of it before, but it sounded amazing when Robert just improvised something on the piano. That was exactly what we needed to round off our experience.

otherworld3

What was it like developing with Unity and Leap Motion in VR?

Simon and I have been using Unity for all of our projects over the last four or five years now, so the Leap Motion integration was the only area we hadn’t tried before. We knew it was essential to give ourselves time to experiment with the new hardware and see what we can do with it. Since VR and motion controls in VR are a very new concept to basically everybody on earth, we decided to provide a sort of introduction to all this new stuff and just use “full-hand grab” interaction.

It turns out that even this is a big challenge to get right. In our first iteration, the players didn’t just have to position the objects, they also had to rotate them correctly. Nobody was able to do it smoothly and it was really frustrating. By using an indirect control scheme, like the rubber band, you have much more time to position the object exactly in the spot you want it to be in. Even if the “let go” motion isn’t detected immediately, the objects are moving very slowly, so a small imprecision doesn’t screw you over as much.

My advice for other developers: Test your ideas very, very, very…. VERY early. Have an amazing idea to use Leap Motion for your input? Build a prototype and have other people try it the same day. And by other people I mean normal people. Not developers. Somebody who hasn’t even heard of Leap Motion before. Because they will use the device in a different way than you do, and your gesture-detection algorithms have to account for that.

Even though Otherworld was created in a short amount of time, we had around four or five input iterations after we had other people test the game, and I wish we had time for many more.

snapshot20150219094815

The post Inside the Mysterious Beauty of Hammer Labs’ <i>Otherworld</i> appeared first on Leap Motion Blog.

Viewing all 481 articles
Browse latest View live